Monday, May 31, 2010

braised pork chops pizzaiola


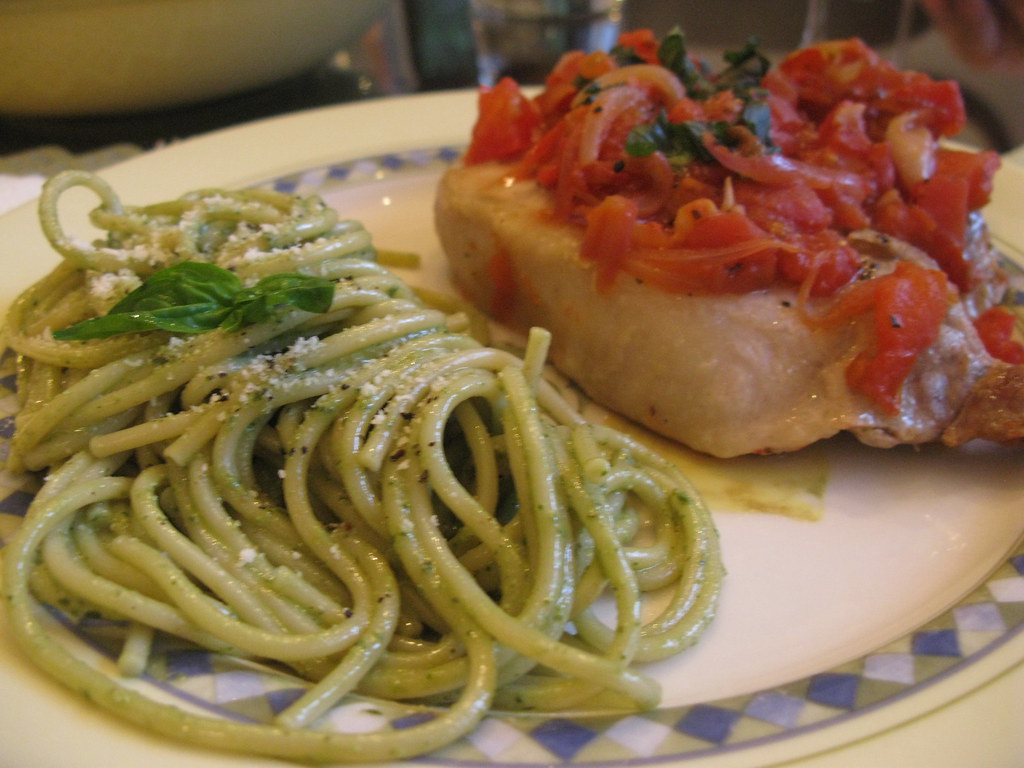
pesto and pork chop pizzaiola

My mom and I made this a couple weeks back. She handled the pesto, using the family recipe, and I took point on the pork chops. As you can see, my parent's ancient industrial strength blender creates a much silkier and smoother sauce than the rather chunky one I whipped up here in my apartment.

As for the pork chops, this was my first time making them this way, but pork chops pizziaola is sort of Aunt Cathy's specialty, and she's always talking about how easy they are. Additionally, Tenli had made a really tasty variation on the theme back in the fall based on a New York Times recipe.

The basic idea is simple: season and sear the chops quickly on each side, and remove them from the pan. Then saute up some red onions, garlic and fresh herbs. My mom really doesn't like rosemary, (a damn shame in my opinion), so we used basil and parsley instead. Then you toss a can of chopped tomatoes in the pan, and let that break down a bit. Add the chops back into the pan and pile the tomato mixture on top. Cover the pan and let braise in a 350° oven for 15 minutes.

They turned out almost perfect. Oddly, the first bite that Dad and I both had was really quite dry and tough. He accused me of overcooking them, and I was ready to concede the point. However, the second bite was tender and juicy, as was the rest of the chop. It was just strange that we both fell victim to the same anomaly to begin our meal.

I think I like breaded pork chops a little better, but a nice braised chop is definitely a pleasant change of pace. I suggest you try your pork chops pizziaola sometime soon!

Friday, May 28, 2010

Master Sneals Week MCMXXIV: Rick "Bayless" Moonen's Bluefish with Dijonaise Sauce


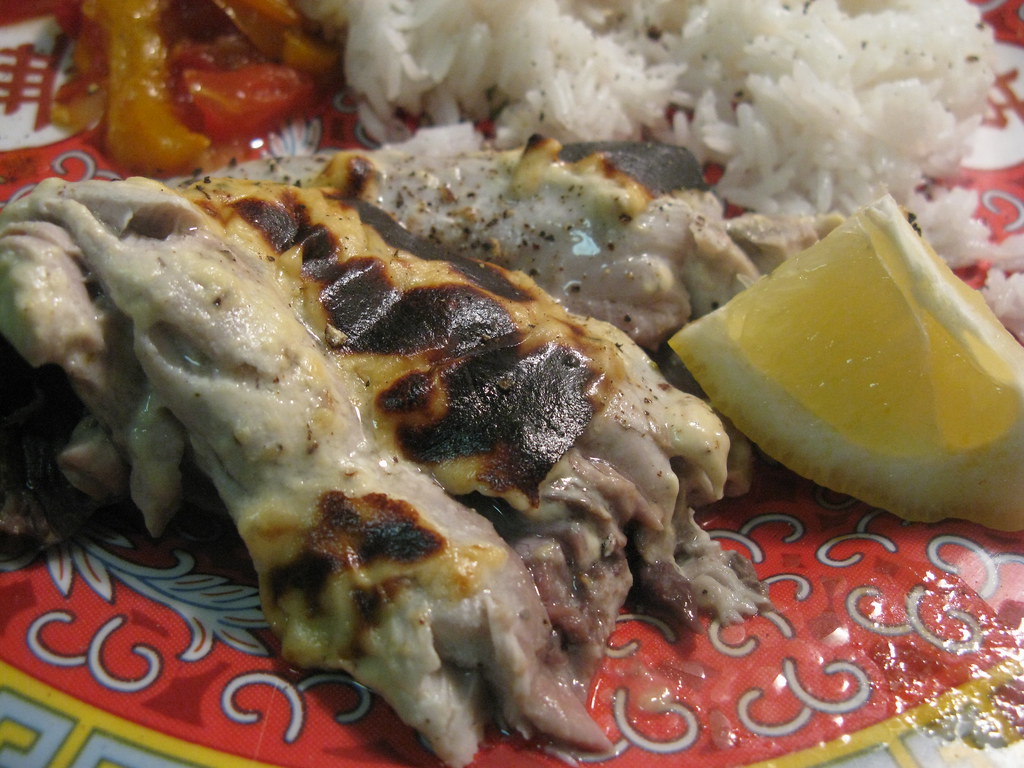
Broiled Blue Fish Dijonnaise

Don't be fooled by the unappetizing picture, what appears to be a mound of gray and yellow goop is actually a delicious piece of fish! We got this recipe from this guy Rick Moonen. He is one of the contestants on Top Chief: Masters of the Universe and he looks a lot like last season's winner, Rick Bayless. He has an elaborate, yet surprisingly successful, combover. It's probably the best combover I've ever seen. The guy must shellac his hair with about 2 pounds of crude oil each morning to get it to work. He's also into sustainable fish and stuff. I actually found this recipe on some sort of eco-fish website, which has a bunch of other good meal ideas too.

You will need:
- Some small, portion-sized fillets of fish, or just one big fillet that you can cut up later. The original recipe said mackerel in the title, but then the actual text said bluefish, so who knows. We used one big bluefish.
- 1/4 cup mayo
- 2 tbsp. dijon
- some thyme and oregano, probably any herbs would do, whatever you like
- salt and pepper

This was incredibly easy. The only remotely difficult part was getting the pin bones out of the fish. Why don't fishmongers do that for you? I bet they have some tool that could do it really quickly with no effort. I thought this was America.

Start by putting a griddle under the broiler. I got a big griddle at Good Will a few years ago for like a dollar. It's probably worth more than that in scrap, and it is such a great cooking tool. I also got a little toy hippo at the same time. I've still got the hippo, too; it was really a bang-up day at the Good Will.

While the griddle is heating up, mix together the mayo and mustard and herbs. Season the fish with salt and pepper, then slather the top of the fish with the sauce mixture. Once the griddle is hot, put the fish on there, skin side down, for about 3 or 4 minutes. When the sauce on top has started to brown and bubble, you're done. That's all there is to it.


fish on the griddle

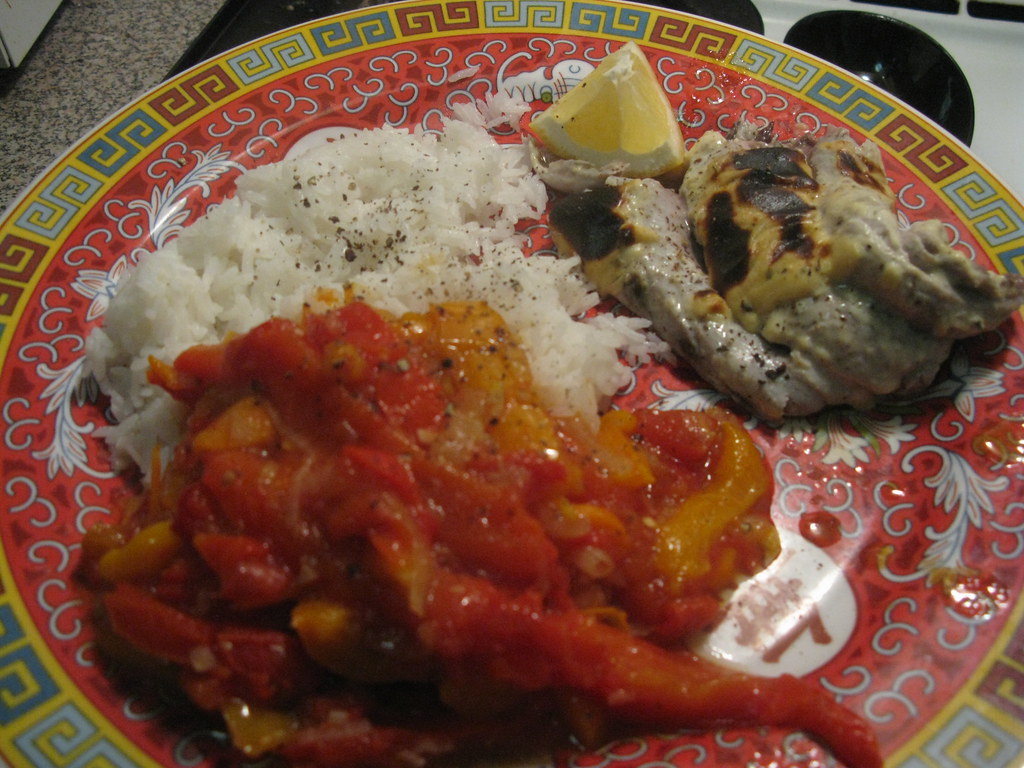
We served it with rice and peperonata. We tried Rick Moonen's peperonata recipe, which, while still good, is a step down from the one we used last time. It's pretty much the same as a standard peperonata, except it adds anchovies (wasted, no impact on the flavor at all, save them for something where they can make a difference) and tomato (no flavor impact, just made the dish more watery). He also did not call for red wine vinegar in the recipe, but I made a game-time decision and threw some in.

Overall, this meal was awesome and required very little time or effort. It even made good leftovers. It seems like fish is usually really easy to cook, all you do is kind of throw some sauces on a fillet and then cook it on high for a little bit. Or maybe that's just amateur hour stuff? Who knows. I like it.


blue fish and peperonata

Tuesday, May 18, 2010

mushroom risotto/fava bean toasts


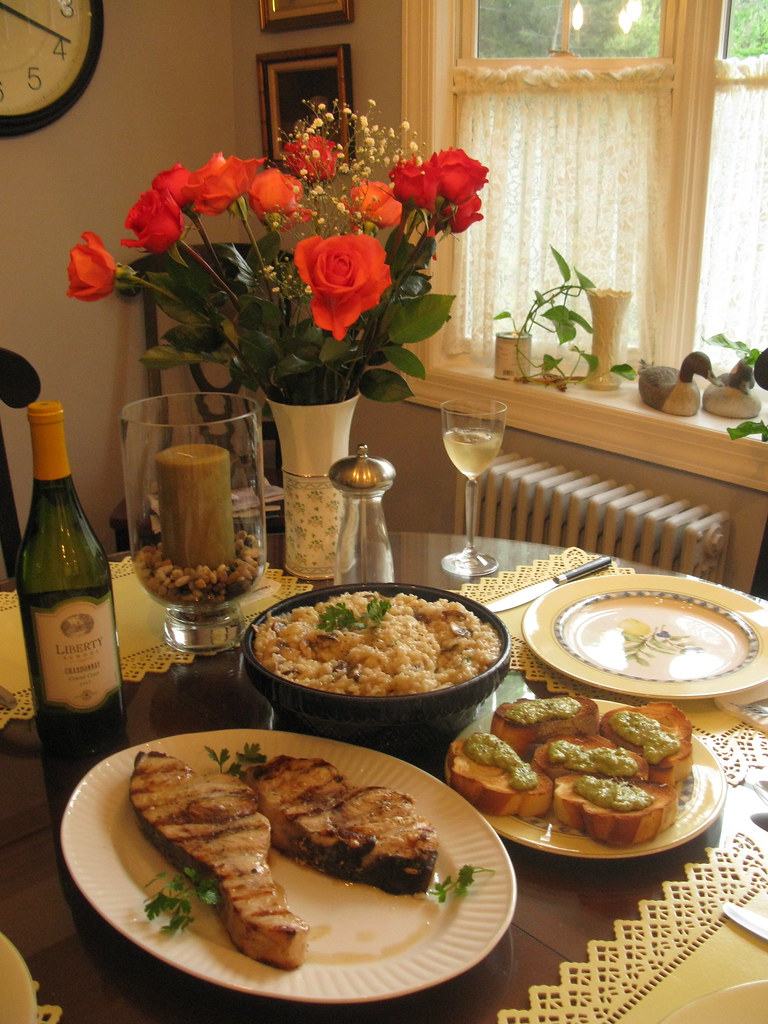
a Mother's Day feast

This was the dinner table for Mother's Day this year, and I think Dad and I have reason to be proud of the spread we put out. Matt would have helped had he not been working, but he did buy the lovely flowers. I picked up a nice bottle of chardonnay at Lenox Wines, and then whipped up some mushroom risotto and a fava bean spread on Arthur Avenue bread. Dad chipped in with some luscious dijon mustard sword fish. It was a heavenly meal.

Since graduating college, I've become a big fan of risotto and have made it a number of times, including a particularly memorable batch prepared in honor of Nathan's twenty second birthday with pumpkin, porcini mushrooms and red wine. To die for. However, there was a time that I found this simple dish absolutely intimidating. If it were not for my friend Anthony, who is an amazing cook, I doubt I would have ever even attempted the dish. I remember Tony making it for Natalie's birthday senior year and being amazed that he had prepared such an ambitious menu. Pork loin and risotto for 20 people is certainly an impressive feat, but the risotto itself is not nearly as complicated or tricky as I had one believed. With good ingredients and a little patience, anyone can make a delicious, creamy risotto in under an hour.
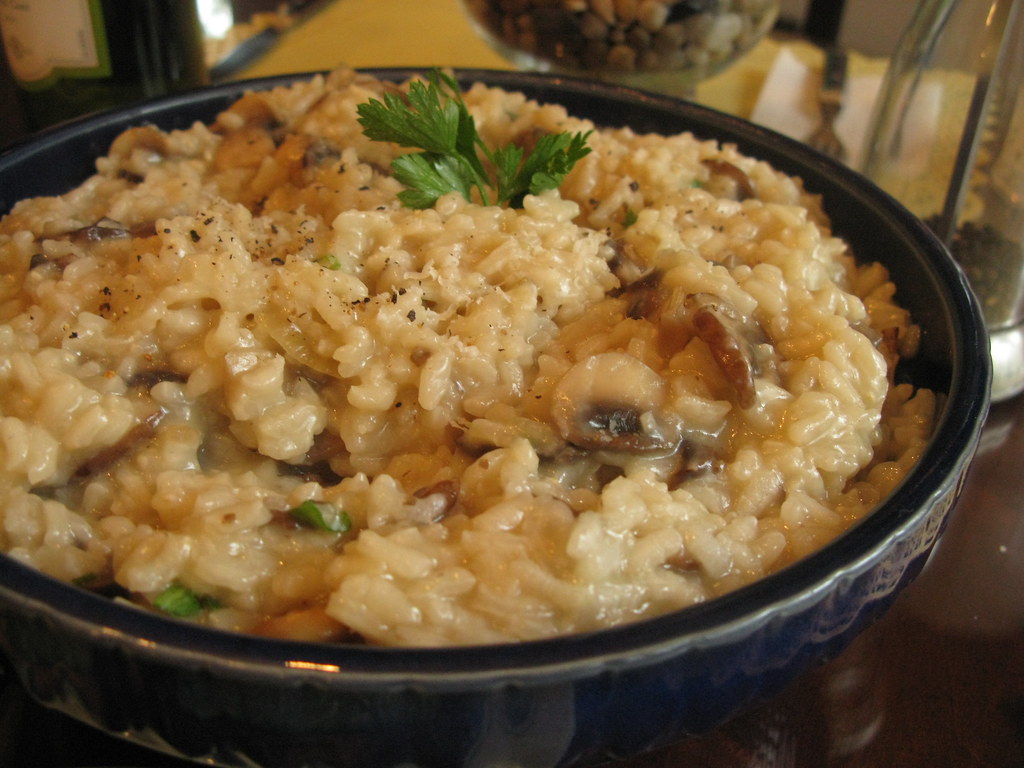

mushroom risotto

The trick to risotto is knowing that unlike regular rice, which typically uses a 2:1 ratio of water to rice, risotto can absorb more than four times its volume in liquid. In order for the rice to cook properly, the broth must be added gradually so as to not overcook it. The broth should also be warm, or the rice won't cook properly.

To start your risotto, heat some olive and then cook onions and garlic until they begin to soften. This is called the sofrito. Then you can add your extra ingredients, like the cremini mushrooms we used. There are plenty of great potential additions: anything from sausage, meatballs, shrimp, lobster, chard, asparagus or squash will be great. Once they're just about cooked, removed them from the pot with a slotted spoon to leave behind the olive oil, which will be nicely infused with the flavor of your added ingredients.

Toast the rice in the drippings for a few minutes, making sure it gets well coated. Pour in some wine, and stir until it evaporates. Then you can start to add the broth, one ladle at a time. Recipes vary on the exact amount to use, but you can probably get away with less if you cook over lower heat and let most of the broth absorb between additions. Cook at too high a temperature, and your broth will boil away before the rice can absorb it properly. Add more stock when the risotto starts to look dry, but be carefully not submerge the rice in liquid. Stir frequently to make sure the rice gets cooked evenly and doesn't stick to the pot.

Your risotto is done when the rice can't absorb any more liquid, and the two elements have become one cohesive mass. The individual grains should be soft but slightly chewy, and the risotto should be liquidy enough that you can pour it slowly, but solid enough that the broth won't separate from the rice. Add your mushrooms or whatever you're using, and stir to incorporate. Mix in some pats of butter, a good amount of grated cheese and freshly ground black pepper, and serve immediately.

As for the rest of the meal, dad handled the fish so I can't say much about it, but I can tell you about my fava bean toasts. They're something I learned to make when my food co-op threw a number of the then unfamiliar legumes at me last summer. I first tried making a stir-fry-esque dish with fennel and bacon that didn't quite come together. For my second attempt, I put the beans front and center with this bright green spread. It was an unqualified success. Basically, it's just a mash of olive oil roasted garlic, boiled fava beans, a little cream, Parmesan cheese, salt and pepper. It's so simple and tasty!

The only catch with fava beans is that getting them out of the shell is a little labor intensive. First, you have to peel the pods, and then you have to boil the beans for a couple of minutes. After that, you cool them off in ice water and shell them. It's a bit of a pain in the ass, actually, but it's not that hard. It's probably not worth the trouble on a regular basis, but they are a nice change of pace every so often.
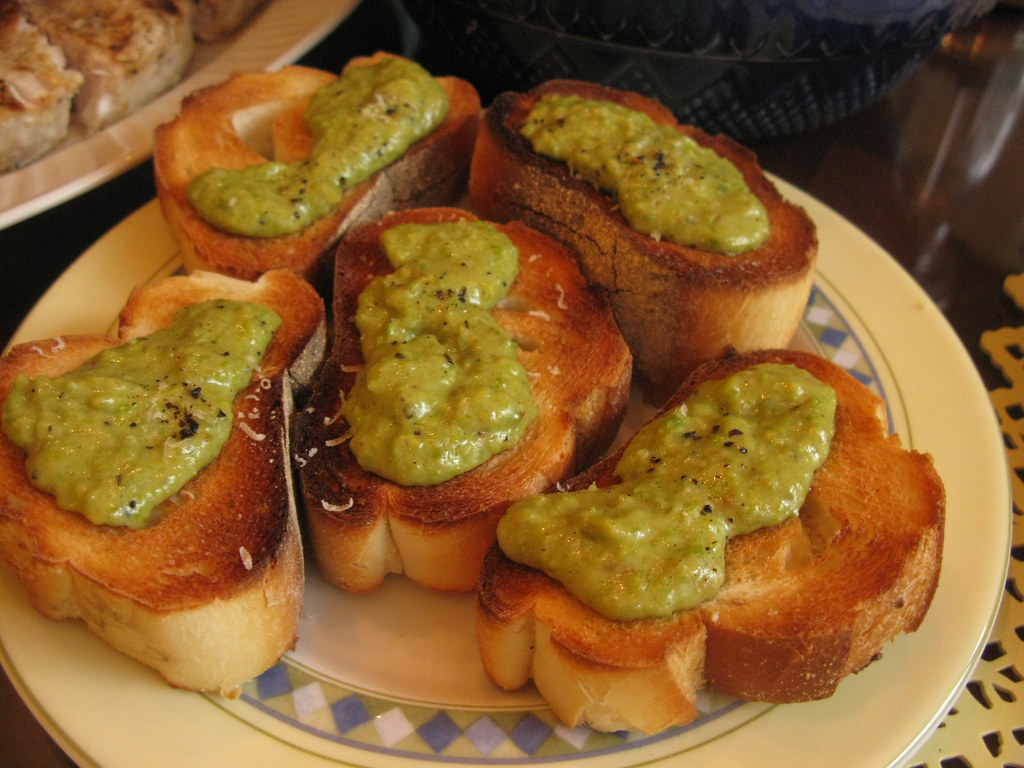

fava bean toasts

Sunday, May 16, 2010

pesto

So if I had to pick my absolute favorite food, I'd be hard pressed to find one thing that I love more than pesto. It's something that I've eaten my entire life— one of my earliest memories, food related or otherwise, is sitting at dinner and struggling to twirl spaghetti in emulation of my parents. They had cut up my pasta into bite-sized strands, and I couldn't understand why it kept falling off my tiny fork. When I told my parents that I wanted to neatly twist up the long strands like they did, they stopped cutting my pesto and I became the expert spaghetti twirler you all know today.

I suppose part of the reason I like pesto so much is probably because learning to twirl made me feel like a grown up. That being said, my family's recipe for pesto is reason enough to fall in love. It's fresh and creamy, a little bit nutty, with a kick of garlic and black pepper, and plenty of basil flavor. It's actually pretty standard as pesto goes, but somehow no other iteration ever seems to come close. Some things, mom, (and dad! and nona!), does best. The method is easy, and the recipe is easily doubled for a full pound of pasta or to freeze for later.

Simply bring a pot of water to boil, and add salt and one half pound pasta. Spaghetti, linguini, penne and fusilli are all good choices. Meanwhile, wash one cup of somewhat packed basil and set aside. Combine ¼-⅓ cup olive oil, ¼-⅓ cup water, 3 tablespoons walnuts (or pine nuts if you prefer to splurge), and 1 clove of coarsely chopped garlic in a blender. Blend until smooth. When the pasta is almost ready, add your basil and blend again, until just combined. Finally, add 4 tablespoons grated cheese, (I use romano but parmesan works too) and blend one final time. Before you drain the pasta, reserve some of the pasta water to use in case the pesto is too thick. Serve with plenty of fresh black pepper and extra grated cheese.


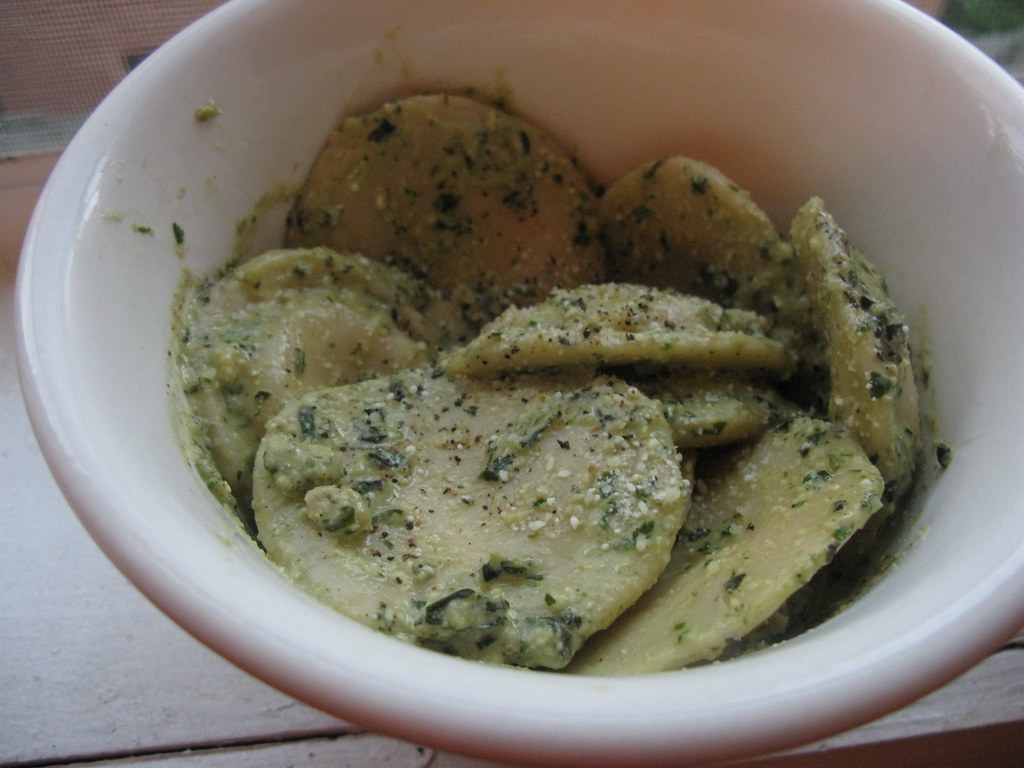
pesto ravioli

It was my first time using our new blender for pesto, and it didn't get the sauce as smooth as I am used to. You can see some chunks of walnut and distinct pieces of basil, which isn't how it normally looks. Luckily, this effected the taste very little.

Generally, I don't favor pesto with ravioli. The pesto is such a robust sauce, and the ravioli is such a heavy pasta that I don't feel they make the best match. That being said, when you take delicious cheesy ravioli and amazingly wonderful pesto sauce, things are probably going turn out ok, which they largely did in this case. My basil was a week old and couldn't last another day, and I didn't have much else in the house besides frozen ravioli, so my hand was a bit forced. Even without a meat or protein, some ravioli and a salad made a filling and comforting dinner that I'd be happy to have any day. It is, after all, my favorite food!

Saturday, May 15, 2010

st. louis style pizza

The first time I had St. Louis pizza was the summer after freshman year, when I visited Laura at her home there. We went to Imo's Pizza, where the region's distinctive thin crust, square cut pizza originated. This "square beyond compare," is characterized with its cracker crisp crust, a sweet tomato sauce, and their regional Provel cheese, which is kind of a processed cross between mozzarella and provolone.

A couple of months ago I got a trial issue of Cook's Country sent to me. It's a magazine put out by the same folks who do America's Test Kitchen and Cook's Illustrated. Their whole thing is to test the recipes with about a million permutations of all the ingredients and cooking methods and times, and then to detail the testing process before revealing the final recipe. Cook's Country specializes in weird regional American dishes. I wasn't too crazy about the selections in the issue they sent me, so I decided not to subscribe, but I did get pretty excited when I saw the recipe for St. Louis style pizza.

I showed it to Laura right away, and we of course decided to have our other St. Louis friend Matt over for a little pizza party.


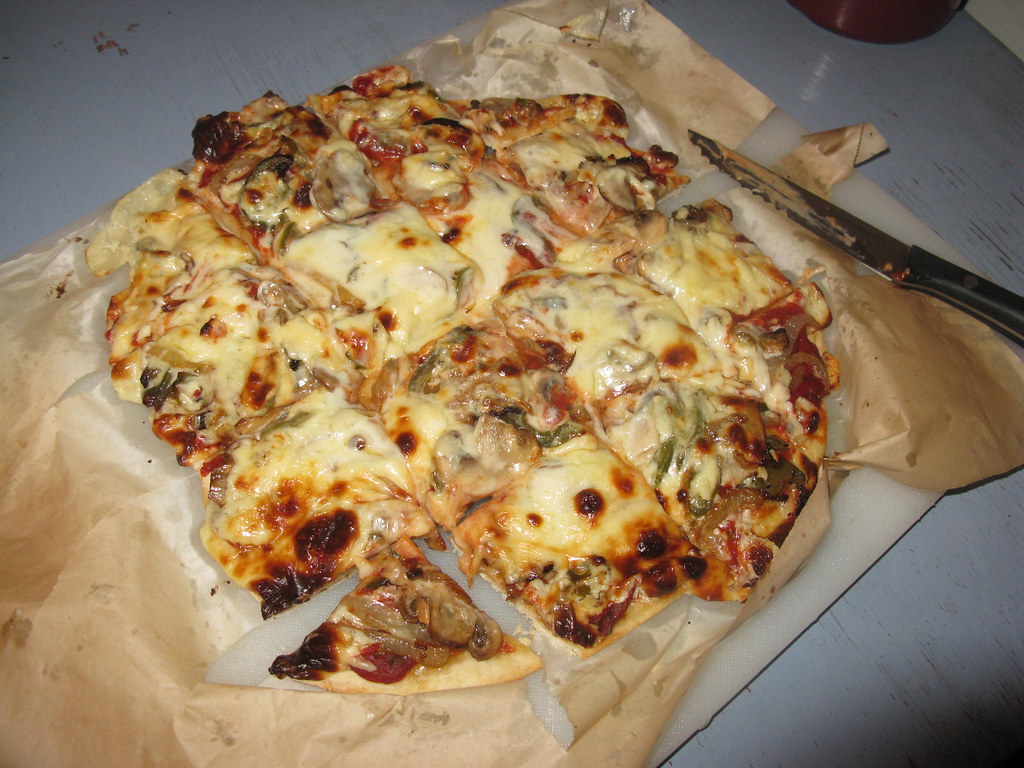
St. Louis pizza

All in all, it was a fairly easy meal, since the pizza dough doesn't have yeast so we didn't have to wait for it to rise. I just mixed 2 cups of flour, 2 tablespoons of cornstarch, 2 teaspoons of sugar, 1 teaspoon of baking soda, 1 teaspoon of salt together, and then added a cup and 2 tablespoons of water and two tablespoons of olive oil. I kneaded it just until it came together and then divided it in half. This was supposed to make two 12 inch rounds, but I had a lot of trouble rolling it out, and then I had to cook it on a piece of wax paper, which was very difficult to peel off after it had baked. It was a little bit of a mess, but it turned out well enough. However, the crust wasn't as thin or as crispy as it was supposed to be. I think maybe I should have floured my surface more.

The sauce was simple enough. The recipe simply called for mixing 8 ounces of canned sauce with 2 tablespoons tomato paste, sugar, fresh basil and dried oregano. Not cooking it at all seemed too weird, so I let it simmer for a half hour or so. I also hate sweet tomato sauce, so I only used a very scant tablespoon sugar, rather than a full one. Even this was a major concession, as I am very skeptical of the merits of sugar in sauce. It didn't turn out bad, but I'd just as soon not use it.

The cheese was 2 cups of white American and half a cup of Monterey shredded and mixed with 3 drops of liquid smoke. This was way too much cheese, but that's probably because the I couldn't roll the dough thin enough. The American/Monteray hybrid was supposed to mimic the taste of Provel, which isn't sold outside of St. Louis. I also hate American cheese, so I would change the ratio in favor of the Monteray if I made this again. The liquid smoke was a very cool product. I have no idea how they do it, but it smells just like a barbecue. So strange.

We baked the pizza for about ten minutes at 475 degrees. Cooking pizza at such a pathetically low temperature actually made me miss my horrid apartment in the Bronx. That oven was an inferno! However, all things considered I did pretty well in the trade off.

We decked out our pizza like they would at Imo's, a vegetarian deluxe with sauteed mushrooms, onions and green pepper. If we had really gone all out we would have had bacon and sausage too, but these pizzas were completely overloaded as it was. I definitely should have made larger pizzas for the large amount of toppings we were using!

I don't remember the pizza at Imo's all that well, but Matt and Laura seemed to find it a reasonable facsimile. It was definitely a fun experiment, and I might use the dough again, but I'd just as soon use my own sauce and cheese on it, you know?

Thursday, May 13, 2010

maiale in agrodolce e peperonata

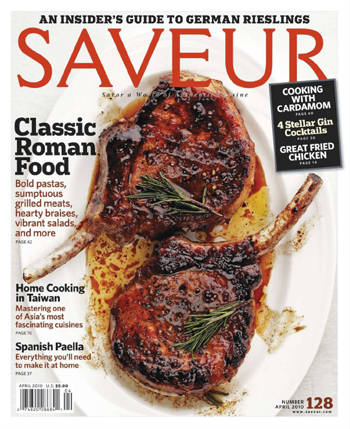
This gorgeous recipe comes from Saveur's April issue, which featured an absolutely inspiring spread on Roman food. Nathan's co-worker turned him on to it, and he insisted we make the cover recipe, and even though it was fantastic we've put off blogging it for quite awhile now.


the classic Roman porkchop

Impressive, no? Well, ours didn't look nearly as picture perfect, but it was still a damn tasty meal. The ones in the photo have been frenched, which looks fancy, but really just means you're cutting off all that tender meat along the bone, which is one of the two best tasting parts of the chop. Therefore, we didn't have any regrets about sacrificing Saveur's dramatic presentation for the sake of MORE MEAT.

To start, we seasoned our chops and drizzled them with olive oil. The recipe called for letting them sit like this for half an hour, but I can't recall if we listened or not. Basically, I'm sure resting the chops with the salt makes then more tender (that's almost like brining, right?), but the agrodolce glaze you're about to make is so good that it probably doesn't matter. Also unnecessary? A grill. We cooked our chops on Nathan's griddle, which has grill ridges on one side, but a regular skillet or pan would be fine.

For the sauce, we reduced ⅓ cup balsamic vinegar and 2 tablespoons of honey in a small pot. You want the sauce to get nice and syrupy, but don't let it get too thick. If it's getting to the point where it's so viscous that you're scraping, not stirring, you've reduced too much. This happened to us, but we just added more balsamic and it loosened back up. To finish the sauce, melt in a half a stick of butter and the leaves from one sprig of rosemary.

We then cooked the chops on medium high heat, basting with the sauce and turning them over every so often. They should be done after 12 to 14 minutes. The recipe instructs letting them rest for five minutes before serving, but these smell so good that it'd be understandable if you cracked before that.

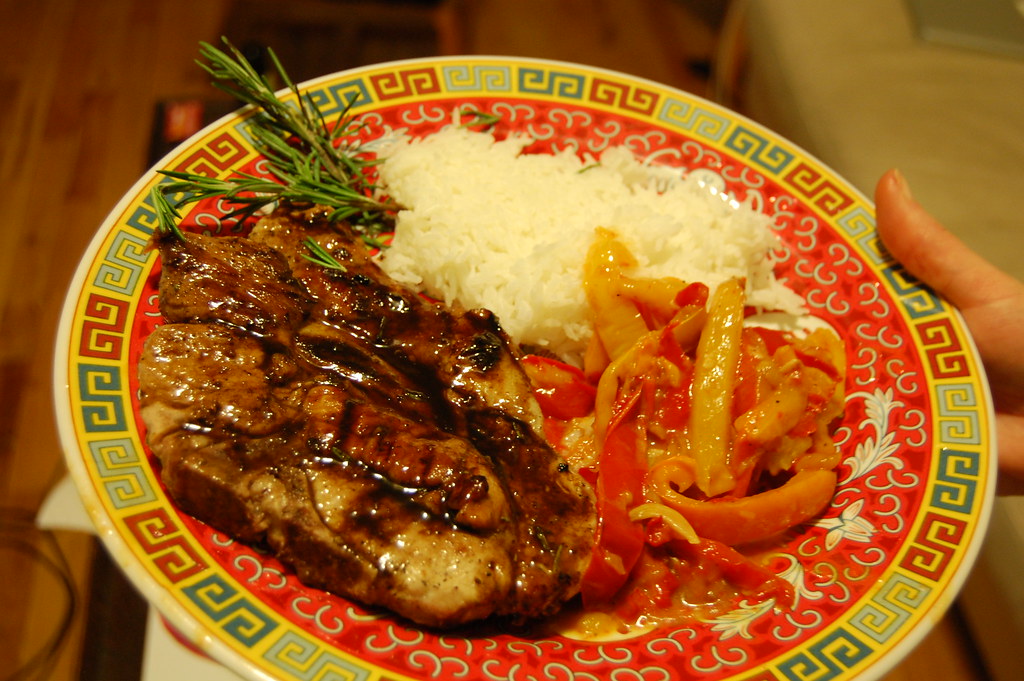
As you might have expected, these are awesome. The balsamic honey glaze is more sweet than sour, but the rosemary really gives it a depth of flavor. It was my first agrodolce, and it won me over instantaneously. Cooking down the balsamic really mellows it out, and the sauce tastes wonderful with the pork; (I love pork so much and I love finding new ways to cook it).

Saveur's suggested serving these beauties with peperonata, which turned out so good that it rivaled the main dish. The onions and peppers become sweet and delicious, and the red wine vinegar finishes it off with a nice tang. So good, and so simple.

Simply chop up 4 assorted red, yellow and orange bell pepper, 4 cloves of garlic, half and onion, and cook them in a pot with a little hot olive oil. Add a quarter cup water and some salt and pepper, and just let them cook for about an hour, stirring every so often. Stir in 3 tablespoons of red wine vinegar at the end, and you're done. Perfection!


hearty Roman fare

Wednesday, May 12, 2010

Master Treals Week 5: Rick Bayless' Picadillo


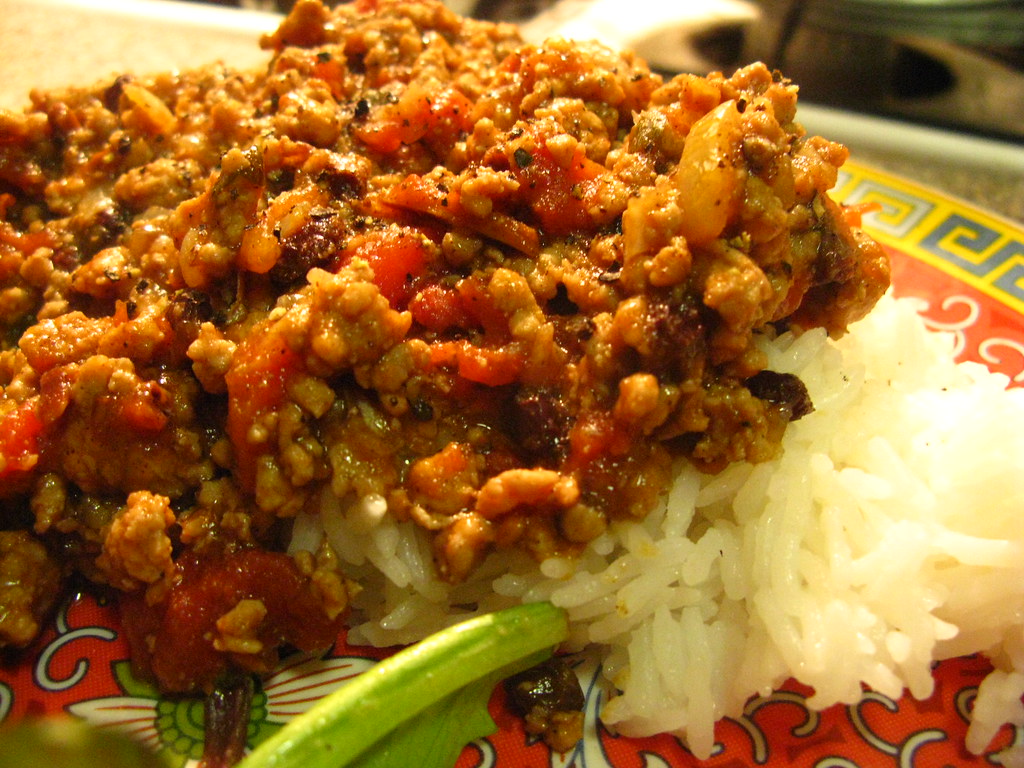
the master's picadillo

I've been wanting to make a picadillo for a while. So we made one with this recipe that we took from Rick Bayless, as it was Cinco de Mayo and Sarah felt it would be allowable to make a recipe from the guy who won Top Chief Masters last year. As I understand it, for a picadillo you can just kind of throw a bunch of shit in a pot, let it cook down, and then eventually serve it. Here's the shit we threw in our pot:

1 28oz can of diced tomatoes
1.5 lbs ground pork
1 diced onion
1 minced clove of garlic
1 tsp. cinnamon
1/8 tsp. ground cloves
1/4 cup raisins
1/4 slivered almonds (we toasted them first)
2 or 3 tablespoons of red wine vinegar
Cumin
Salt
Pepper

The recipe we worked from recommended adding a canned chipotle chili, but who knows where to buy one of those, so we used a delicious chipotle sauce that we found at Whole Foods.

Cooking this thing is really easy. Cook the diced onions in oil until they are soft and browned, then add the garlic and cook for a couple more minutes. Then add all of the pork, and cook that until all of the little pieces of ground meat are cooked and brown. Make sure to stir during this part so that everything cooks evenly.

Once the pork is cooked, just dump everything else in - the tomatoes, the vinegar, the cinnamon, etc. We actually added the chipotle sauce later, when it was almost finished, but I don't think it matters too much. At this point, just let the pot simmer, stirring occasionally, until the liquid from the tomatoes etc. is cooked down and the whole thing is "a thick, homogeneous mass," to quote the recipe we used. Doesn't that sound appetizing? This took about 4o or 45 minutes for us but your mileage may vary.

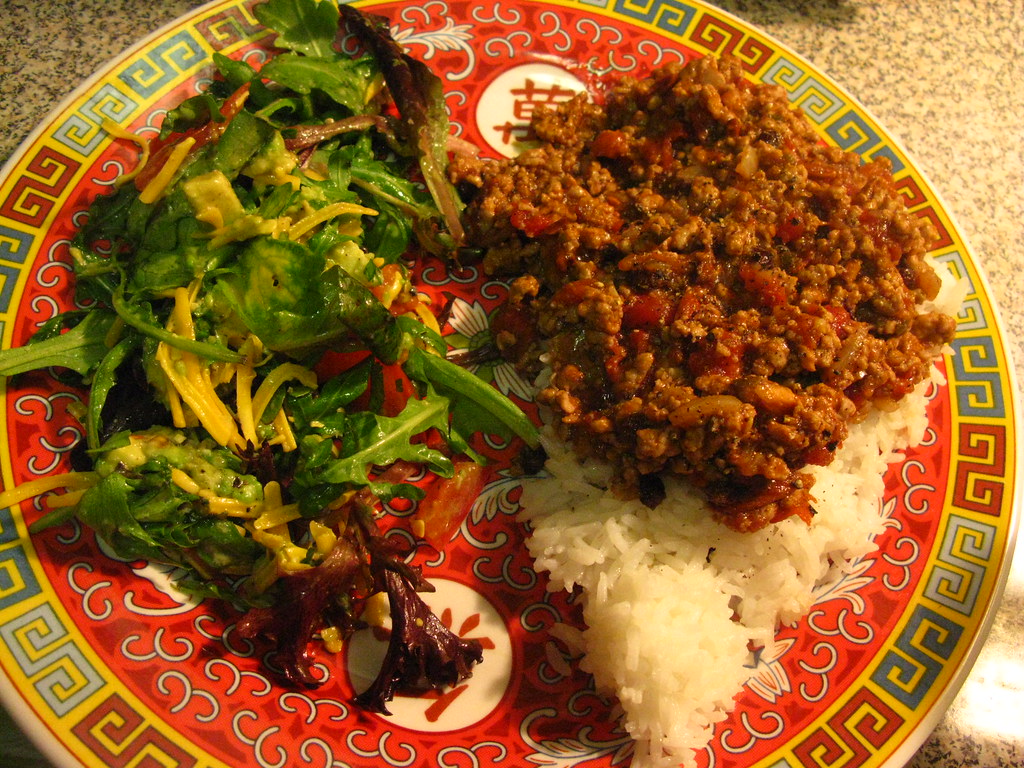
Overall, the whole process took maybe an hour, with only about half of that involving actual work - the rest was just simmering time. Serve over rice, with salad, (ours had shredded cheddar, tomato, avocado, cilantro and lime). This is a pretty large amount of food - even after a hearty dinner, there were 3-4 lunch portions left over (accounting for a roughly 1:1 ratio of picadillo to rice), so I was eating well for the rest of the week.

You could really mix this recipe up if you wanted to. Substitute beef for pork, add olives, use different spices, more onions, etc. Go buck wild and never let anyone tell you what to put in your picadillo, this is America.


a meal in honor of cinco de mayo

Saturday, May 8, 2010

Fried Chickpeas with Chorizo and Spinach

This is another recipe from Mark Bittman, the dean of people who mean well but don't want to spend a million years in the kitchen getting all messy and irritable as they slave over some complex hogwarsh. I made it one night after seeing it on the Times' website.

Ingredients:
- 2 cups canned chickpeas (no need to get fancy, I just got one of those big Goya cans)
- 4 oz. diced chorizo (Goya to the rescue again. Just get a whole one and cut it up.)
- half pound spinach
- bread crumbs

The original recipe also called for sherry, but I'm not the sort of moneybags who keeps a well-stocked bar filled with all sorts of exotic liqueurs. I have a minibar area in my bedroom but it currently consists of a bottle of red, a bottle of rum, a chocolate bunny, and some cookies. In the freezer there be gin and vodka, but no sherry. Sorry haters. Anyway, I just used red wine vinegar instead and so should you.

First, put like 3 tablespoons of oil in the bottom of a pan, and heat it up. Put all of the chickpeas in there (after draining their fluid from the can) and salt/pepper them. Bring the heat down to medium-low and let the chickpeas cook for ten minutes or so until they start to turn brown. Then add the chorizo, and let it cook for another 5 minutes, maybe a bit more, until the chickpeas start to crisp up on the outsides and they start to get some nice chorizo flavor on them.

Remove all of that stuff from the pan and then cook the spinach in the oils that remain. At this point you can add a quarter cup of sherry, or if you're awesome like me, red wine vinegar. Add some salt and pepper too, naturally. When the spinach is nice and soft, pretty much cooked, put the chickpeas and chorizo back in and toss everything together for a bit.

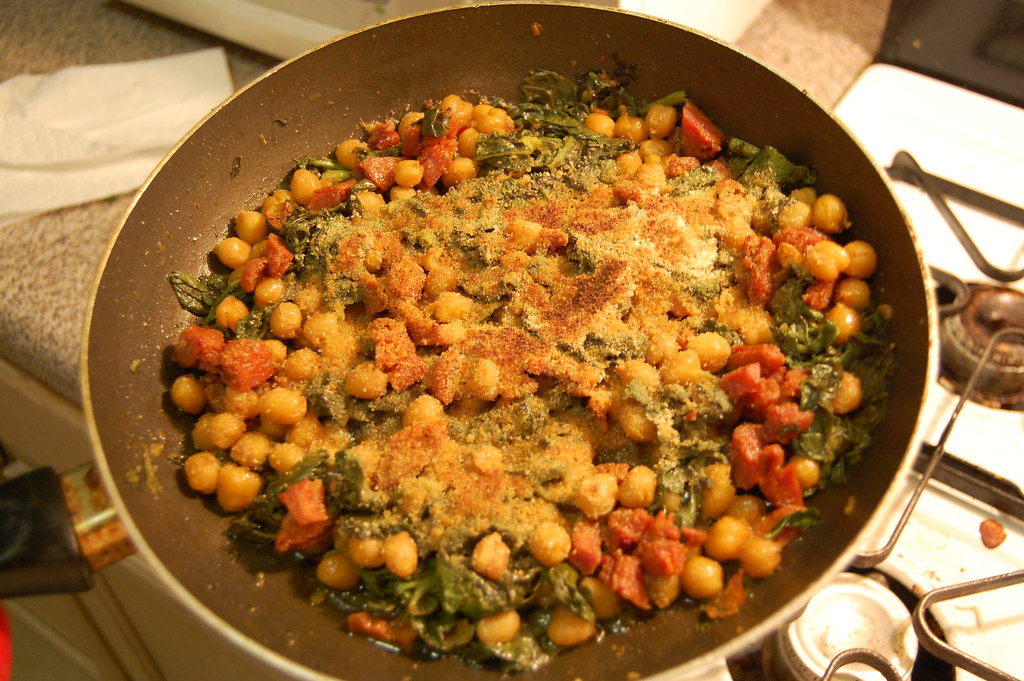
To finish it off, put breadcrumbs on top of the whole thing and put it all in the broiler for a little bit, just to brown the breadcrumbs and give the dish a nice crust. Then eat.


chickpeas, chorizo and spinach with a nice crispy top

I really enjoyed this dish - it was great and it easily cost less than ten bucks. The chickpeas had a great texture, nice and soft but just crispy enough on the outside. The chorizo was luscious. The spinach provided a nice clean backdrop, keeping the dish from getting bogged down in starch and meat. Best of all, it only took like 20 minutes to make.

Thursday, May 6, 2010

Tuna Steaks with Country Toast and Aioli

This is a long-overdue post that Sarah has been haranguing me about for some time now. I got this recipe out of a great cookbook that my mom got me, Alice Waters' The Art of Simple Food. It has a lot of delicious yet relatively easy recipes, which is great for me since I tend to do my cooking after work. Some people enjoy eating at 9:30 at night - I don't.


rare tuna steaks, homemade garlic aioli and grilled pullman bread

Most of this recipe is really easy, so I'll keep it short. To make the tuna steaks, just season them with whatever you want to. I think I used salt and pepper. Cook them on a griddle (I got mine at Good Will for $1.50. It's probably worth more than that just in scrap value and it's one of the best purchases I have ever made). A couple minutes on each wide will do - you just want to get a good sear on the outside while keeping the inside rare. For the toast, just brush some slices of a nice loaf with olive oil and then put them on the griddle, too.

What I found most satisfying about this dish was the aioli. I tried to make aioli once before, in an effort to ape the food at Five Napkin Burger, and it was a complete failure. This time, it was an unqualified success. First I mashed up some garlic, then put an egg yolk on top of that. After that, I slowly added one cup of olive oil, whisking vigorously the whole time. slooowwwllly. Seriously, it took like like ten minutes to whisk it because I was adding it so slowly. Eventually you can start adding more olive oil at a time, but initially it was the feeblest of dribbles. This effort paid off, because the aioli came together beautifully and was delicious. A surprising amount of aioli was produced.

To serve, just give everyone a piece of the tuna, some toast, some aioli and a lemon wedge. You can put the aioli on the toast and on the tuna, or put the tuna on the toast, etc. I guess there are 6 ways you could eat this dish, so go hog wild!

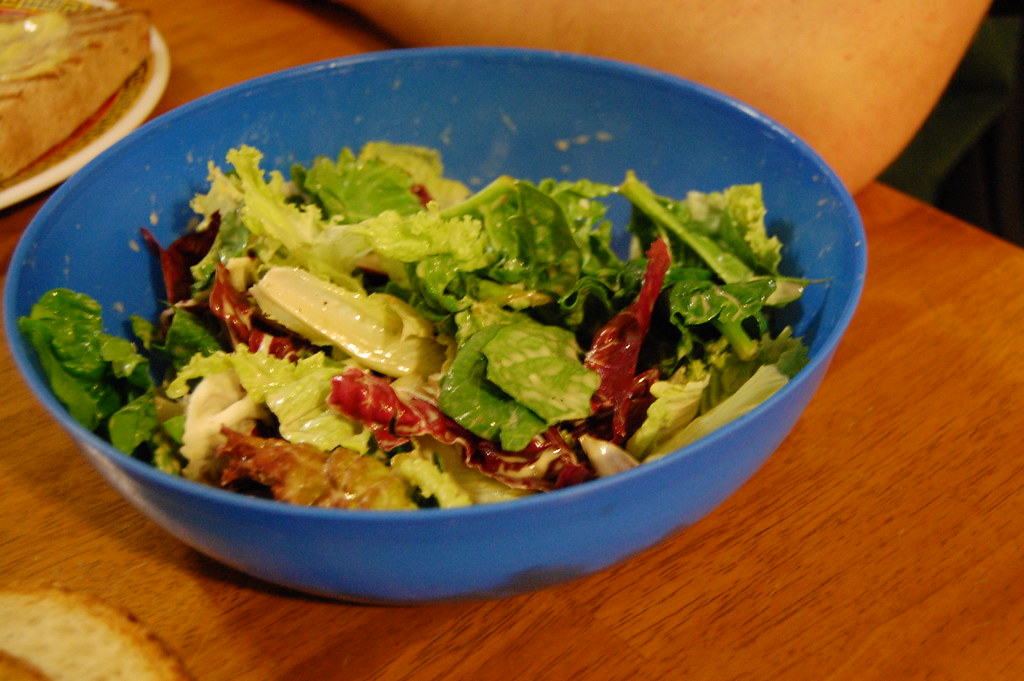
Note from Sarah: We also had a nice salad with our fish. I made a dressing from the aioli, thinning it with lemon juice and adding a healthy amount of salt and pepper. We had a nice mix of regular lettuce and radicchio. Simple, but refreshingly tasty.


lettuce and radicchio in a lemon aioli dressing

Tuesday, May 4, 2010

master meals, week 4: jody adams' gnocchi with mushroom fricassee

I have not been looking forward to writing this entry. Jody Adams may have broken our losing streak by becoming the first featured Master Meals chef to make it to the Champions round, but Nathan and I were less successful back in his kitchen. This was easily the worst thing we've cooked all year, including our blue cheese sauce disaster.

The recipe was for homemade gnocchi with mushroom fricassee, and it looked straightforward enough. Sure, I'd heard that making gnocchi can be pretty tricky, but I had done my research and I thought I had a pretty solid grasp of the process.


our gnocchi

Unfortunately, a theoretical understanding of making gnocchi will only take you so far, and we fell more than a little short in the execution. Instead of light, fluffy potato-y pillows, our gnocchi were dense, doughy bricks. It was quite a disappointment. I think that making good gnocchi is probably one of those things that you have to just develop over time, because I couldn't tell you what went wrong. My only thoughts are that I may have over kneaded the dough, and that it would have been lighter had I added more flour. The Jody Adams recipe used about twice as much potato as compared to flour than the other two recipes I was using as a reference.

Anyway, I won't pretend to give you any gnocchi tips, as I could use some good ones myself. I will, however, tell you a bit more about the mushroom fricassee, which was quite delicious and was the only reason I was able to stomach as much of the gnocchi as I did. We sliced and browned a whole pound of button and portabello mushrooms in some butter. We had to do this in two batches so as to not crowd the mushrooms, (a Julia Child tip). Then we removed them from the pan and sauteed up a shallot and a clove of garlic with more butter until soft. Then we tossed the mushrooms back in with a half a cup of marsala wine and let that reduce to a nice glaze. The recipe also called for fresh thyme, but we did without.

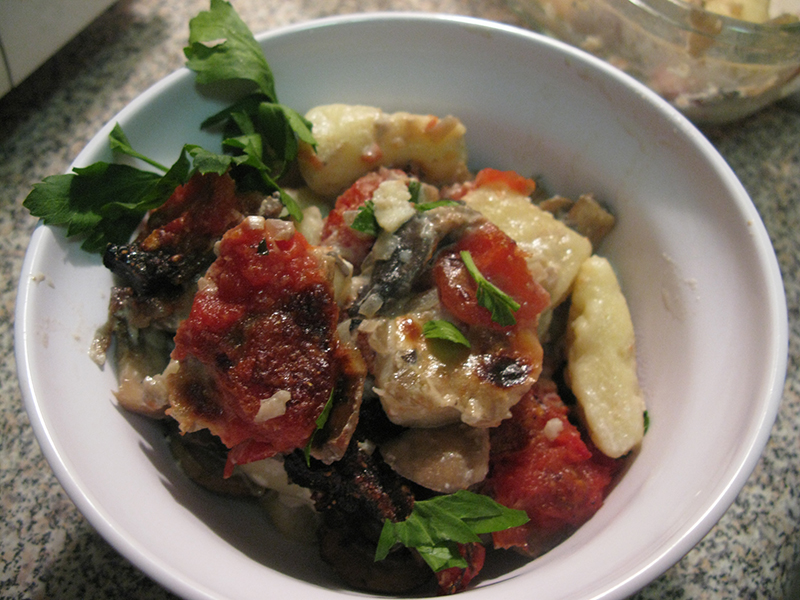
On its own, this mushroom fricassee would have been great. Adams poured reduced heavy cream over her gnocchi and spread the mushrooms, chopped tomatoes and parmesan cheese on top to bake. We used canned chopped tomatoes, which actually worked fine-- it was the gnocchi that were the real problem. They were just a leaden mess, and soaking in all the cream probably didn't help any either. Sprinkled with parsley, though, they actually looked pretty good. As we sadly learned, however, appearances can be deceiving.


not bad looking gnocchi