Tuesday, September 28, 2010

ricotta stuffed tomatoes

Believe it or not, my jaw was actually wired shut two months ago today! I am pleased to report that the injury is no longer dictating my diet. Last night, Nathan and I went out for some Righteous Urban BBQ and I tore into some St. Louis style ribs with a vengeance. It felt awesome! It had been far too long since I'd done any serious meat eating.

I'd like to say that today's entry is written in that same spirit, but I'm afraid I don't have a bloody, carnivorous feast to present to you today. Instead, I have more of my soft food backlog and ripe and juicy local tomatoes. Yay food co-op!


tomatoes bursting with ricotta cheese

I mad these for Nathan and I a few weeks ago and served them with EVEN MORE tomatoes. Surprisingly, Boyfriend was singing the praises of our vegetarian meal, a true testament to the deliciousity of a farm fresh tomato cooked with some well chosen accompaniments. These were sliced in half, seeded, and drained on paper towels before I seasoned them and stuffed them with a mixture of fresh basil, dried oregano, grated romano and ricotta cheese. Topped with breadcrumbs and a drizzle of olive oil, they baked at 400˚ for about a half an hour.

They were delicious, but I wish I had used a better brand of ricotta instead of cheaping out on whatever crap they had on sale at Fine Fare. Also, I think I forgot to add minced garlic to the filling! Absolutely shocking, I know. Someone should slap me upside the head for neglecting my favorite ingredient of all time. I so was busy trying to get a nice dinner ready by the time Nathan arrived at my apartment, (just wait til I write about the awesome dessert), I must have just skipped it in a rush. I promise to do my best to live up to the Garlicus Maximus name in the future!

I found this recipe here. Amusingly, the author there had found the recipe on a different blog, which had also taken it from a third blog, which attributed the recipe to someone called Pastor John. Oh the interwebs. Basically, it's your turn to make a blog entry about this dish, adding one further degree of separation. Won't that be fun?

Friday, September 24, 2010

roasted tomatoes and cipollini onions with cannellini beans


a bright and juicy tomato dish

It just so happens that three of my favorite things are tomatoes, cannellini beans and basil. Mmmmm. Leave it, of course, to smitten kitchen to feature a recipe that features all three of these things, and then watch as I run to the nearest supermarket for fresh basil and canned beans.

This is hearty and filling for a meatless meal, and is a great way to showcase the late season tomatoes still gracing us with their presence here on the East Coast. After last year's debilitating tomato blight, we've really been spoiled with all the beautiful tomatoes in 2010.

Simply roast the tomatoes and peeled onions with olive oil, salt and pepper for 45 minutes at 375˚. Serve with shredded basil, cannellini beans, grated romano cheese and toasted Italian bread– unless your broken jaw can't deal with crispy bread in which case you'll just have to lick your plate or let all those lovely tomato juices go to waste.

Damn. I want to make this again with lovely bread from Madonia now that I can actually chew. So delicious!

Thursday, September 23, 2010

pastina risotto


This was another meal prepared out of necessity, thanks to my broken jaw. Pastina is the smallest type of pasta around. It comes in different shapes, but I've only ever seen it in tiny little stars, which are just adorable. My mom used to make it for me all the time when I was a baby, because it is so soft and small. Obviously, it is a logical dinner choice for one who cannot chew.

Unlike regular pasta, you don't need to salt a big pot of boiling water to make pastina. It is so delicate and small that it would probably pass straight through the strainer and down into the sink if you tried to drain it in a colander. Instead, you can make pastina like risotto, adding the water little by little and stirring it consistently. It can be just as delicious as the real deal, but it takes a fraction of the time to cook, since pastina cooks to her perfection in such a short amount of time.

I made three different versions of this pastina dish, mainly because the first time it was so incredibly delicious. My parents had their own grown up dinners, but they kept sneaking bites of mine because it was just that good. Unfortunately, I was unable to quite replicate my success on the second and third go arounds. The trick to this dish is making sure to add enough liquid to keep it creamy and delicious, rather than gummy and dry.

I started by making a quick sauce with a little garlic and oil and these golden tomatoes from the food co-op. Then I added the pastina, letting it "toast" in the oil like you would risotto, and then adding some water and letting it cook in the liquid. As the pasta began to absorb the sauce, I poured in a little half and half to make sure it wouldn't dry out. After it was mostly cooked through, I put the pastina in a bowl. I stirred in some grated romano cheese, some shredded basil leaves and finally cracked an egg in and mixed it all about. The egg cooked and it became a deliciously rich and creamy dish.

This was only a few days after I had had the rubber bands put it, so solid food was still a wonder and this pastina was the best food I had eaten in weeks. Lest you think it was only good in comparison, my mom kept exclaiming how good it was and asking for more. She was really impressed with my little improvised dinner.


The next night I did much the same thing, only with red tomatoes and a big dollop of ricotta cheese. Unfortunately, I think I cooked it too long, and didn't keep it moist enough, because this turned into a bit of a gluey paste. Not at all tasty, and it was all the more unfortunate because I knew just how good it could have been.


I also made one more slight variation, trying to mix in some extra veggies. I tossed in some zucchini and corn, but the flavors all got a bit muddled and again a bit dry and overcooked. It was better than the incredibly sticky and bland red tomato sauce edition, but it just couldn't compare to the golden tomato pastina.

You can see in the photos just how much creamier the first go around looked. It really came out perfectly.


The pastina risotto method is a bit temperamental, I guess, but it's definitely worth messing around with because the results can be spectacular. Pastina may be a popular baby food, but soft food diet or not, I certainly did enjoy it. And if delicious isn't enough for you, this has also got to be the quickest pasta dish you'll ever make. Quick and easy, but totally homemade and tasty. I'd say that's pretty awesome.

Tuesday, September 21, 2010

thoughts on top chef

Believe it or not, one of our readers, (and my good friend), has elicited my opinions on the conclusion of the most recent season of Top Chef. Hi Kristen!

While I was impressed with how much the judges seemed to like everything the contestants prepared the last three episodes of the season, I can't help but be disappointed in the end results.

First of all, I was rooting for my girl Kelly all the way through the season, so I was super bummed she got booted before the last episode. Also, I had a free dinner courtesy of Nathan and Pete riding on her performance, so it would have been nice to see her take home the big prize.

As for the actual winner, Kevin, I'm not really too pleased that he won. I think Michael Voltaggio may have given him a little extra creative edge. You're telling me that a man who made STEAK for a NASA challenge suddenly came up with the idea for and some crazy method for cuttlefish pasta? I smell a Volt. Sadly, the Kevin win came a season too late. I would have much preferred the red-headed Kevin to defeat Voltaggio the younger, and for this season to have gone to Kelly, or at least Ed.

I don't dislike Kevin, and I think he's a talented dude, but he was just too inconsistent for me to believe him to be worthy of the title of Top Chef. He's no Hosea, but he's definitely one of the lesser winners IMHO.

If it were up to me, he would have gone home instead of Tiffani in the NASA challenge, and again instead of Kelly in the first part of the finale. Last season, I was really upset when Jenn failed to make it to the last supper, leaving an all male finale, so it was sad to see the women come up just short once again.

Once we lost the women, I would have had Ed as the winner. He's got lots of chefly skills, but he isn't a total creeper like Angelo with his mail order bride. That being said, Kevin is a nice guy and I'm sure he has a beautiful family, so congratulations to the newest Top Chef winner!

Monday, September 20, 2010

chocolate coffee oatmeal


chocolate coffee oatmeal

This isn't much of a post, except to say that I recently experimented with making coffee chocolate oatmeal as part of my soft food diet. I cooked the oatmeal on the stove top with hot coffee and milk, stirring in some Hershey's cocoa powder. It was surprisingly disappointing. It got gluey and sticky, and the cocoa powder clumped up a bit. I also think it could have used some added sugar to counteract the bitterness of the coffee.

I still think this could be good, but in this iteration, it simply wasn't. Bleaugh.

Sunday, September 19, 2010

brown sugar and sour cream raspberry gratin

I went home for the weekend when they opened my jaw and replaced the wires sealing me shut with rubber bands. When I came back, there was a giant crate of raspberries in the fridge, which Laura encouraged me to help her finish. Twist my arm a bit, why don't you?


raspberry gratin with sour cream and brown sugar

So, one morning I made us breakfast by popping these super easy brown sugar and sour cream raspberry gratins under the broiler for a few minutes and then topping them with homemade vanilla ice cream. Part of a well balanced breakfast, obviously, and perfectly soft and swallowable for a broken jaw.


raspberries topped with sour cream, brown sugar, and broiled until crisp and melty

All you have to do in top a layer of raspberries with a layer of sour cream, a sprinkling of brown sugar, and then broil it until the brown sugar caramelizes and everything get warmed through. It takes like five minutes from start to finish, and its predictably delicious. Ooey gooey fresh fruit, creamy and with a touch of brown sugar, you'll absolutely inhale this dish.

I made mine in individual ramekins, which would be a great dinner party dessert, especially topped with ice cream or fresh whipped cream. I assembled mine the night before, which made a quick breakfast even more achievable, and such a technique would work beautifully if you were serving this to a large group.

I went a little light on the brown sugar, because I didn't want it to be too sweet, but if you want a more substantial crust, feel free to add more. Enjoy!

Saturday, September 18, 2010

tomato corn pie

This one was a bit of a cheat as far as the soft food diet went. I had an overwhelming corn surplus, beautiful csa tomatoes, and my ongoing inability to resist the allure of anything featured on the smitten kitchen. Thus, tomato corn pie.


tomato corn pie with fresh basil and lemon mayo

Even with my rubber bands and wire armature still in place, I was actually able to eat all this. The trick is to let the fork stand in for your teeth, which frees you up from any painful chewing. Those tines can accomplish a lot of smashing and mashing. I swallowed lots and lots of more less fully intact corn kernels while I was on my soft food diet and suffered no ill effects. Even if I had, it might have been worth it just to enjoy this bright, summery pie.

The corn from our CSA has been spectacularly sweet all summer, and the tomatoes have been just brilliant. This stands in sharp contrast to the share we received last year, which had many things going for it, but fairly awful corn and a pitiful amount of tomatoes. I could never have made a dish like this last year, but this summer, my tomato corn pie was a decadently sweet and savory seasonal treat.

The only trick to the dish is the pie crust. The ratios on the original seemed to be off, because I had to add more flour. I could have just measured wrong, but I definitely had to add extra so I could roll the dough out. Once I did that, the crust came out beautifully. I was shocked by how legit it looked once I baked it.


pie doesn't always mean dessert

Not only did it look like a real pie, it also tasted pretty damn good. Layers of corn, tomato, cheddar, chives and basil stacked up prettily, and the flavors went together beautifully. I especially enjoyed the thin layer of lemony mayo spread underneath the top layer of crust. It was a nice, citrusy touch. Nathan thought it could have used even more cheddar cheese, and I have to agree. I love summer veggies, but cheese makes everything better.


corn tomato pie cross section

If you still have late summer corn and tomatoes, I definitely recommend you make this. I didn't get anymore corn this week, but I am still swimming in tomatoes. I'll miss them when they go, but right now I am up to my elbows and I don't can, so it's a little overwhelming! Still, there are certainly worse things, and I just can't say no to a ripe summer tomato. There's nothing better.

Friday, September 17, 2010

baba ganoush

So first there was delicious ice cream, and then there was mozzarella in carrozza with tomato jam. The third thing I made for myself when I was able to open my mouth and eat soft foods was baba ganoush. I had a lovely eggplant from the food co-op, and had just seen this recipe from David Lebovtiz. I figured it would be soft and delicious, and nothing like a fruit smoothie, which was really all I was looking for at the time.


roasted eggplant baba ganoush

This baba ganoush is incredibly easy to make. First, you char your eggplant over a gas flame, like you would roast a red pepper. Once the skin is all black and smokey, you roast it in the oven at 375˚for 20 to 30 minutes. The charred skin peels off easily, leaving you with plenty of eggplant pulp to puree with garlic, tahini paste, lemon juice, olive oil, a little chili powder, salt and parsley or cilantro. I used parsley because that was what I had, and I subbed in Smucker's natural peanut butter for tahini paste.

Since I was home on Long Island when I made this, I was able to use my mom's food processor, which I really appreciated. After roasting the eggplant, this came together in a snap! I know I really don't have a real need for one, and I definitely am running out of kitchen space, but boy would I like a food processor. So freaking useful!

I liked the baba ganoush. It had a nice, rich flavor that seemed almost meaty after a month on soups and smoothies. I was able to swallow small bites without chewing, which made it an ideal part of a post broken jaw diet. It was, however, thicker than I expected. Generally you eat baba ganoush with pita chips, and my baba ganoush definitely would have been too heavy to serve as a dip. However, it worked just fine for my purposes.

Even so, next time I make this, I will definitely try to achieve a more spreadable, creamy consistency. I am not sure how I would go about that– maybe more olive oil, or lemon juice? Actually, come to think of it, I'm not sure what the consistency of tahini paste generally is, but perhaps it is looser than the natural peanut butter I used. There wasn't much left, and as a rule the peanut butter at the bottom of the jar is very very thick, since the oil always floats to the top. So yeah, I guess the paste-like peanut butter could have something to do with the heavy texture of my baba ganoush. You live you learn.

Tuesday, September 14, 2010

beach plums are so hot right now

a quick note:

last week, I posted about cooking with coastal beach plums. just a few days later an organization no less important than NPR followed my lead with this article on the elusive summer fruit. check it out if you're looking to make the renowned beach plum jelly! damn I am so au currant.

Monday, September 13, 2010

mozzarella en carrozza with sundried tomato jam

No pictures today, I'm afraid, but I'd like to tell you about the first real meal Nathan and I made after they snipped my wires and replaced them with rubber bands. It took me about twice as long as usual to smash up everything and carefully swallow it, but for what was essentially a grilled cheese sandwich, this mozzarella in carrozza was pretty soft and easy on my wounded jaw.

It was also a really nice night in general. Nathan's roommate, Pete, moved out in September, but we all ate this meal together before he moved downtown. It was also a special night because Pete recently started dating our very good friend Jess. This was a long overdue development. It's too bad that Jess and I can't hang out while visiting our respective boyfriends, but I'm of course very happy for them regardless of where Pete is living.

I've had mozzarella in carrozza before, but it wasn't quite like this. Here, the fresh mozzarella was sandwiched between two slices of bread and dipped in a mix of egg and milk, and then fried in butter. Basically, it was a hybrid grilled cheese french toast. When I had this on Arthur Ave at Marios, the bread must have been much much thinner, because I really thought it was just breaded and fried. This was also delicious, but much more sandwichy. I think the key was that the bread soaked up so much of the egg and milk that it kind of melded together with the cheese. If our bread had been thinner, it would have been an even more cohesive dish, and more like what I remembered.

The accompanying jam was what really excited me about this dish. Sundried tomatoes, roasted red peppers with strawberry jam, a little sugar, red wine vinegar and salt, it seemed easy enough. I liked it well enough, but we probably could have drained less of the olive oil off the peppers and tomatoes. It was definitely too dry, and not nearly jammy enough. Maybe my solid food cooking skills were still rusty? I'd consider making this again, but I wouldn't exactly jump at the chance. It was definitely tasty and hit the spot after a month of slurping purees through my teeth, but it didn't quite come together.

Sunday, September 12, 2010

ice cream!

So I got the most awesome get well soon present after I broke my jaw. It was an ice cream machine, thoughtfully sent to me by Nathan's family. They knew that I was incredibly impressed by Tenli's homemade blackberry swirl ice cream, and they knew my post injury diet consisted of almost entirely milk shakes. Basically, this gift was the perfect fit— a big thank you to Tenli, Marie, Raisa and Weston!


my ice cream maker churning away on its first batch

They also thoughtfully included a copy of David Lebovitz's exhaustive ice cream cookbook, One Perfect Scoop. It has tons of amazing recipes for ice cream, gelato, frozen yogurt, sorbets and granitas, as well as delightful things to mix in or sprinkle on top of your cold confections. I of course read the whole book cover to cover and was able to learn quite a bit about frozen, churned desserts.

One thing that you may not already know is that many types of ice cream are made from a custard base. This is generally made by carefully cooking egg yolks with cream and sugar until the mixture thickens. I say carefully because egg yolks cooked over direct heat have a very strong tendency to scramble and harden, which doesn't make a very good ice cream base at all. If this sounds intimidating, you are not alone, which is why I chose an ice cream that did NOT have a custard base for my very first batch.


easy ice cream

To be specific, I made a Philadelphia style vanilla, and to be fair, I have always preferred that to French vanilla ice cream. Some thing about the crisp visual contrast between the white ice cream and the dark speckles of vanilla bean is way more appealing to me than the rich, eggy yellowness of French vanilla. I like both, but Philadelphia vanilla has long been my favorite of all ice cream flavors. It certainly didn't hurt that it was the easiest of all David's recipes, but there's a good chance that I would have gone with a classic vanilla as my first flavor regardless. I love it that much.

How easy is the recipe? Here, I'll give it to you.

Vanilla Ice Cream, Philadelphia Style
(from David Lebovitz's One Perfect Scoop, published 2007)
2 cups heavy cream
1 cup whole milk
¾ cup sugar
pinch of salt
1 vanilla bean, split in half lengthwise
¾ tsp vanilla extract

Pour one cup of the cream into a medium saucepan and add the sugar and salt. Scrape the seeds from the vanilla bean into the saucepan and add the pod to the pot. Warm over medium heat, stirring, until the sugar is dissolved.

Remove from the heat and add the remaining cup of cream, the cup of milk and the vanilla extract.

Chill the mixture thoroughly in the refrigerator. When ready to churn, remove the vanilla bean, rinsing and reserving it for another use, and then freeze the mixture in your ice cream maker according to the manufacturer's instructions.


Philly vanilla with fresh whipped cream

Beautiful, easy and delicious. Wow. Tasted exactly like every other Philadelphia style vanilla I've ever had, which is to say AWESOME. I had some extra heavy cream, so I quickly made some whipped cream with my electric mixer. A classy, classic, all white combo.

This was actually the second thing I was able to eat after my wires were snipped and I went on the soft food diet. (Nathan made me some Gordon Ramsay scrambled eggs for lunch, but then I went home and made this.) Let me tell you, it quite hit the spot.

I know that an ice cream machine is a bit of an investment, both monetarily, and in terms of much coveted kitchen space, but I'm really enjoying mine. Being able to churn my own ice cream has opened a whole new world of culinary possibilities, I'd encourage you to get one yourself if this is something you'd like to do at home. Big thanks again to Tenli and Marie for the super amazing gift!

Monday, September 6, 2010

foraged beach plum and strawberry crisp


So this weekend was my first one without wires in over 5 weeks. I celebrated by heading out to Long Island with Nathan. There, we spent time with our respective families and enjoyed ourselves out on the water. In addition to sailing in Northport Harbor with my dad, we also got to take a motor boat out to Fire Island, which was surprisingly beautiful. It really felt like it was miles and miles from anything. Gorgeous.


Here we are out on the beach. The surf was incredibly rough courtesy of the otherwise utterly unimpressive Hurricane Earl, so we couldn't go swimming, but it was still awesome.


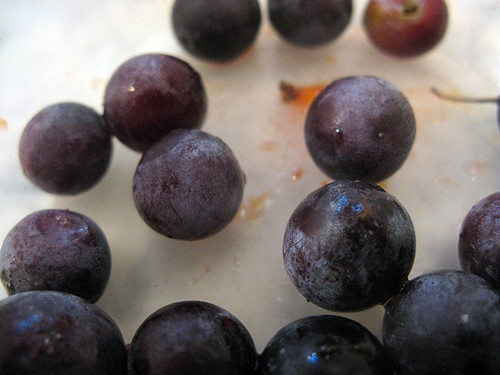
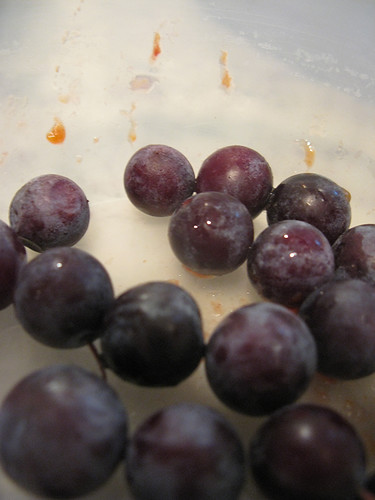
That first photo is just a small sample of the mind blowingly beautiful view. What you can't see is that the small, scrubby looking little bushes on either side of the walkway are actually laden with these tiny and tart beach plums. They look a little bit like overgrown blueberries, and are sweet with a tangy bitter aftertaste. Nathan and I had never seen them before, but we foraged a few handfuls, which we transported in my camera case, and took home to bake with.


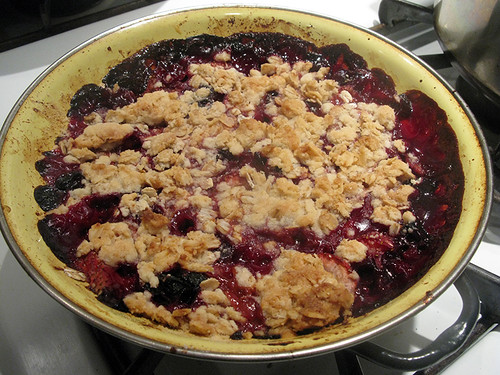
Like the friendly Fire Island natives who assured us that these strange fruits were edible, my mom knew exactly what the beach plums were, and that they are most commonly made into jam. I like jam, but I don't use it all that often. Instead, I decided to make a nice beach plum crisp for dessert.


Here is the recipe, which either my mom or I clipped from Newsday years ago, although it says it was distributed by 
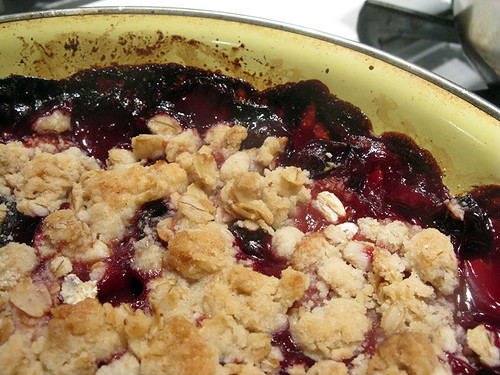
Los Angeles Times Syndicate. Anyway, I was only able to forage a small amount of beach plums, so I had to scale everything way down. We had only enough for four very small servings, so it must have been less than half the amount. I did not adjust the ratios in the written recipe, because I don't think I could accurately represent them. The great thing about crisps is that it's not a real topping, but just a crumbly topping that basically toasts on top of the fruit. It's very hard to mess up.


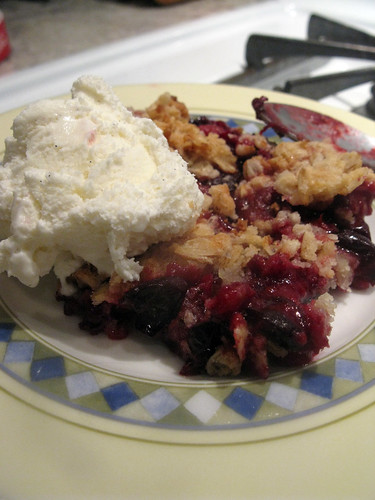
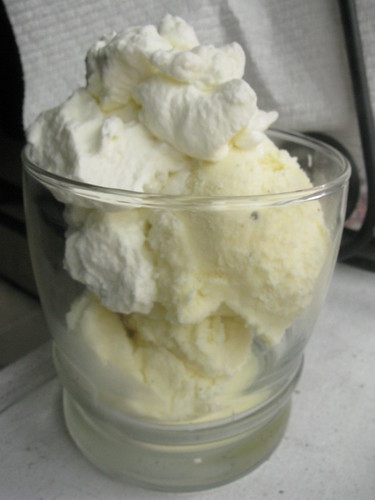
I also made a few substitutions with the ingredients, so I made those adjustments. The topping called for half butter and half oil, but my mom insisted on all butter, which worked perfectly. I also swapped out a couple of tablespoons of apple juice in the crust for maple syrup. The fruit filling was the most significant change. Originally, it included plums, blueberries and peaches or nectarines. I obviously used beach plums instead, and also strawberries, or else it would have been a little bitty baby crisp. Obviously, you can interchange whatever kind of fruits you have around. Also, I accidentally used regular sugar instead of the prescribed brown, with no ill effects. Finally, the serving suggestion was with vanilla frozen yogurt, but we went with Philadelphia style vanilla. Yum.


Without further ado:

Beach Plum-Berry Crisp
Topping:
¾ cup brown sugar, packed
¾ cup rolled oats
¾ cup flour
4 tbsp butter
2 tbsp maple syrup

Fruit Filling
2 pounds ripe beach plums, pitted and sliced
2 cups sliced strawberries
¼ cup maple syrup
3 tablespoons sugar
2 tbsp cornstarch
2 tbsp fresh lemon juice
¼ tsp ground nutmeg
dash ground ginger

1 qt vanilla ice cream, optional

1. Preheat oven to 400°. For topping, combine sugar, oats and flour in large bowl. Blend in butter until crumbly. Stir in maple syrup with fork until mixture is evenly moistened. Set aside.
2. For filling, combine beach plums, strawberries, maple syrup, sugar, cornstarch, lemon juice, nutmeg and ginger and toss gently to combine in a shallow 2-quart baking dish.
3. Sprinkle topping evenly over the fruit mixture. Bake for about 40 minutes, or until top is golden and filling is bubbling. Let cool about 10 minutes. Serve hot or warm, with vanilla ice cream. Makes 8 servings.


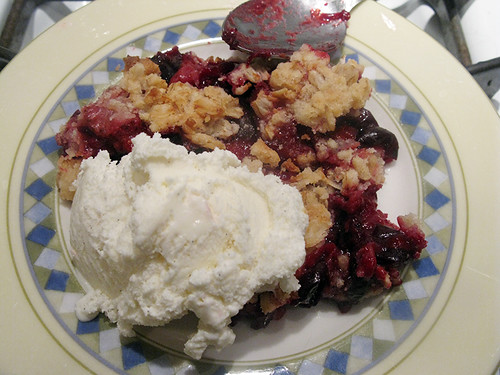
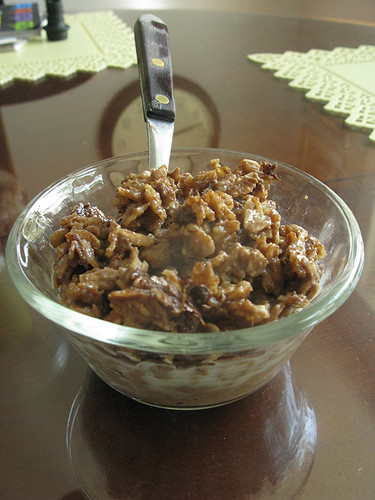
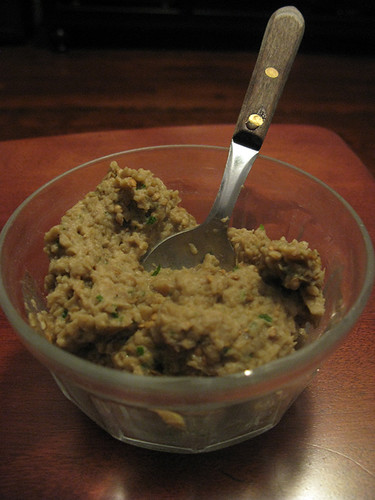
It was slightly tart because of the beach plums, but super delicious and easy. And I got to forage! So cool!

Wednesday, September 1, 2010

really good flatbread, IIRC


So I will be upfront with you and admit that I haven't actually tried these flatbreads since nearly a year ago. However, they were pretty damn good then, when I made them for snacking during a dream weekend out in the Hamptons at my friend Jess's uncle's house. So good in fact, that Jess insisted that I make them again for the Lupus benefit that she and my friend Becky were hosting a couple of weeks ago. Of course, with a jaw wired completely shut, there really wasn't any way for me to taste test, but I think they went over ok.

It was a lovely event, hosted in Becky's empty Sty Town apartment. There was art, and wine, and cheese, and my roommate Laura's brother Paul's improv troop gave a performance. Basically, it was just the sort of classy event that you want to serve a delicious rosemary flatbread at. I found this recipe on only the biggest food blog on the web, and its provenance is none other than the dearly departed Gourmet Magazine, so you should expect great things from this little bugger.


These flatbreads look perfectly rustic and elegant, taste deliciously crispy and wonderful, and they also happen to be incredibly easy to straightforward to make. So basically, there is no excuse not take make these for your Labor Day weekend gatherings. You could serve them with cheese or sundried tomatoes, but they are great just by themselves. Just mix up the dough, roll out, bake and break into messy little shards. You'll be done before you know it.

The only reason this doesn't take ten minutes start to finish is that you split the dough in thirds and bake each flatbread one after the other, which draws things out a bit. Otherwise, you just stir together flour, baking powder, salt, water, olive oil and the rosemary. The recipe calls for fresh, but dried works just fine. Then you roll it out, sprinkle with salt and more rosemary, and bake. Nothing to it.

I've also tried making these with alternate spices, mainly because my mom doesn't like rosemary. I love the woman to death, but this I will never understand. As an alternative, I grated in some cheddar cheese, which was pretty sweet. This time around I added some romano, oregano and red pepper. My friend Grace actually made these with cinnamon sugar in lieu of the spices, which I bet would be pretty great if you swapped olive oil out for vegetable oil. Basically, this is a good base for a crispy cracker flavored with whatever strikes your fancy.

Flatbreads seem so sophisticated and upscale, but they really are a snap. For a snack that's sure to impress and please, give these a shot!