Tuesday, July 20, 2010

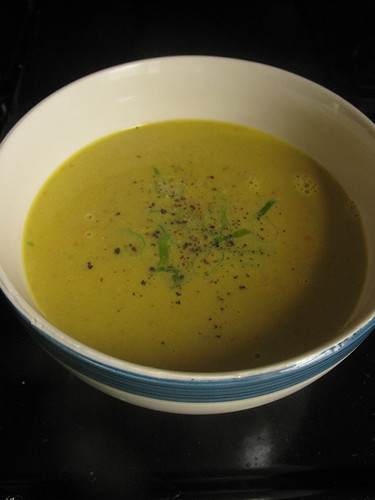
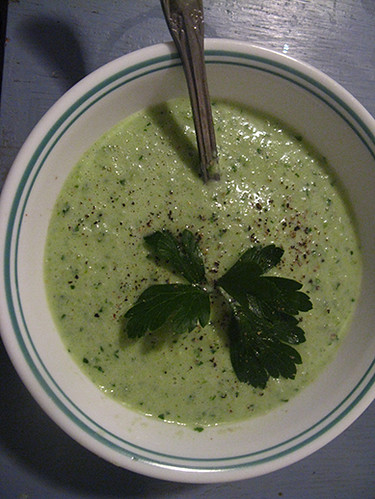
chilled cucumber soup


chilled cucumber soup

After my huge pot of borscht, I am a big fan of the cold soup. It is cool and refreshing and filling; the perfect thing for the oppressive heat wave that has kept wrapped New York in its hot little hands for all of this month.

This cucumber soup came about after one of our recent CSA shares included three cucumbers of tremendous proportions. I'm generally not crazy about cucumbers, but I liked the idea of turning them into a light, chilled, creamy soup.

I very loosely adapted my soup from this Emeril Lagasse recipe. I had my three gigandor cukes, a large fresh food co-op onion, a scallion, and a sizable handful each of parsley and cilantro. I chopped that stuff coarsely, and then threw it in the blender. I was worried about pureeing all that food, but I needn't have been. This was really easy to make because Laura's parents bought her an incredibly kick ass blender for Christmas. It pureed everything to perfection. I barely had to chop anything at all; it was great.


cucumber soup with a sprig of parsley

Then I scooped in about half a container of sour cream and probably an equal amount of plain yogurt. For spice I added a fair amount of salt and pepper, some of my cucumber dill mix, dried chili powder, cumin, garlic powder and I think oregano. For acidity, I put in the juice of half a lemon, although I'm sure lime would be awesome too. I blended again to combine, and then ate it right away. All the ingredients save the spices were straight from the fridge, so it was reasonably cold to start with. It was more chilled after a night in the fridge, and the flavors stronger and brighter, but it was good immediately after its tumultuous journey through the blender, served with a juicy steak and white rice.
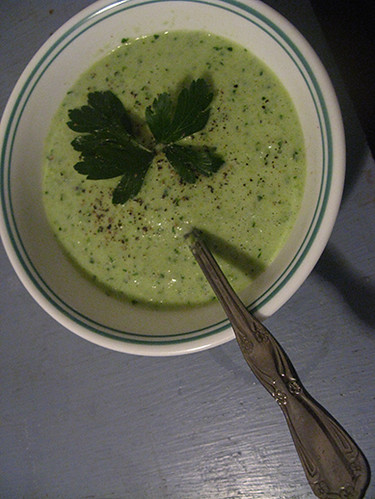

a cool and refreshing summer meal

Speaking of cucumbers, I'm finding they have a fairly short shelf life. In general, I haven't had to toss much of my food co-op veggies out. I mean, sure, when I'm eating salad or greens in the later part of the week, some of them will be a little bruised or wilted, but only the worst of them get tossed in the trash. So far, I've wasted very little of my produce, but cucumbers have been the exception. I've had a couple of them turn to absolute mush in a plastic bag in the fridge. Any storage tips? Or exciting recipes that I will want to make immediately, thus avoiding the problem altogether?

Monday, July 19, 2010

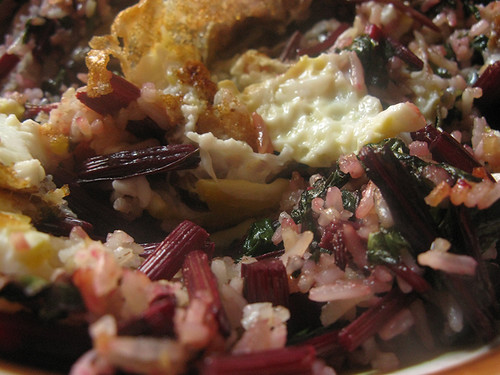
beet top fried rice


ginger fried rice with beet tops and a fried egg

This is definitely one of those meals you make just to get rid of excess produce, so unless you've got an excessive amount of beet tops in your fridge, I doubt you'll want to replicate this at home. However, it was still damn tasty and fried rice is always easy and delicious.

I've covered fried rice a couple of times before, and aside from the addition of the beet tops, this dish was very similar to its previous incarnations.

I start with minced garlic and ginger, and crisp that up in some hot vegetable oil. Then I sautee whatever mix ins I am using— beet tops in this case, but that could very easily be mushrooms or pork or scrambled egg or even just frizzled scallions, (or leeks, as the Marc Bittman original called for).

In this instance, I kept the garlic and ginger in the pan and added my chopped beet tops, which were dripping wet from just having been washed. I let them get nice and wilty, and then I emptied the pan. I added more vegetable oil, and cooked the leftover rice until it got sticky. A dash of soy sauce, a splash of sesame oil, mixed to combine, and then add back in the greens, garlic and ginger. Topped with a fried egg, it was a typically yummy fried rice. The stems of the beets did start to turn things pink, which was funny and cool, but other than that it was fairly standard.


fried rice with beet tops

Sunday, July 18, 2010

sugar snap pea and carrot soup


sugar snap pea and carrot soup

So, with this post, I'll have reached the end of sugar snap pea season. It was definitely a good experience, and opened my eyes to the joy of farm fresh peas. My last week of peas sat in the fridge longer than they should have, so I figured making them into a nice soup would be good, since they were no longer as sweet.

On a tip from Tenli, Nathan's mom, I shelled my peas and then sauteed the pods in butter. Then I added some water and let that boil away to make a nice broth. I strained out the pods, and was going to discard them, but they were actually surprisingly tasty, so I decided to incorporate them into my soup after all. This turned out to be a good decision since it imparted further pea flavor and it helped keep the soup from being too watery.

Meanwhile, I had sliced up some onion and carrots, and got those cooking in a little more butter. Once I had my pea broth, I added that and some frozen chicken stock, and let that all cook together. Then came the peas. Once everything was nice and soft, I added the pods back in and went to town with the immersion blender.

This only made two or three cups of soup, (it was only a pint of peas), but once properly seasoned, it was delicious. Sweet but hearty, it was a simple and successful meal. Topped with sliced scallions and paired with bread and butter, it was SO GOOD. Pea soup is always the best, isn't it? Will have to make split pea soup in the winter.


a summery soup of peas and carrots

Saturday, July 17, 2010

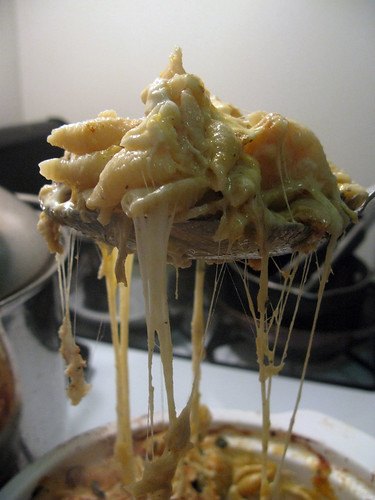
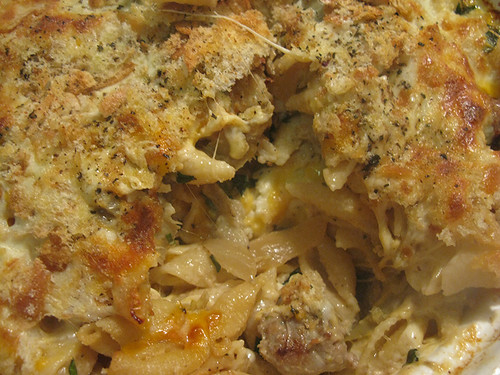
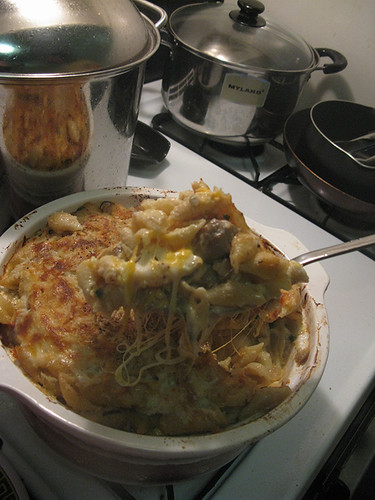
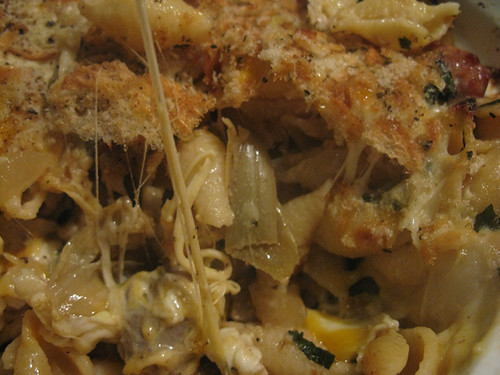
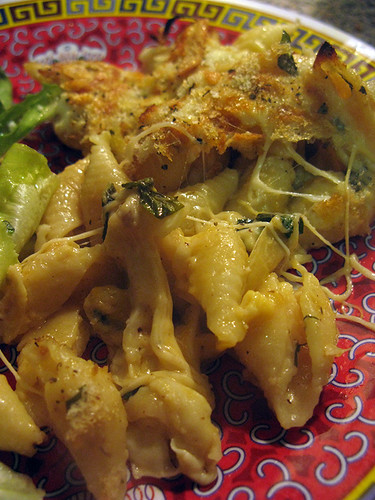
mac and cheese take three


As promised, I welcomed Nathan home from Italy with that all-American classic, macaroni and cheese. I know I've covered this before, not just once but twice, but you know what they say. Third time's a charm. Also, while the repetition may bore the three readers we have, it's good for me just to keep a record. Plus, it doesn't hurt that this may have been the most intensely delicious mac and cheese I've made yet.


A rich, creamy bechamel sauce loaded with butter, flour, half and half and parmesan cheese. Having tried milk last time around, I have to say that it comes out so much creamier if you splurge on half and half. It really improves the dish.


Sweet Italian sausage sauteed with half and onion and a garlic clove left over from the chicken parm's tomato sauce. Then add a tiny jar of olive oil marinated artichoke hearts. Sautee and toss with pasta, bechamel sauce, and plenty of sliced basil for extra Italian flair and flavor.


A whole pound of mozarella cheese and a quarter pound of cheddar shredded and melted between layers of bechamel laden pasta shells. Dare I say this was almost too cheesy? Don't worry, I said almost.


A crispy topping of breadcrumbs grated from an old loaf of Arthur Avenue bread in the freezer. Extra romano cheese on top.


A triumph of artery clogging proportions. What my boy wants, my boy gets.

Friday, July 16, 2010

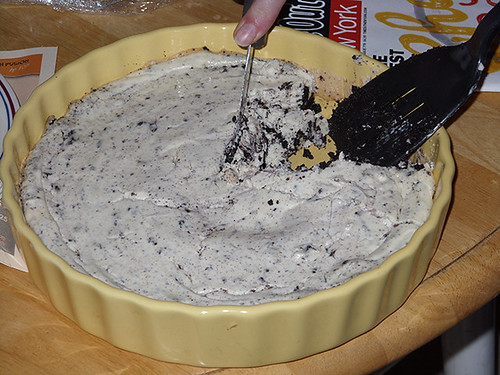
oreo cheesecake


roman style broccoli

This post is pretty much dinner for Paul Part III, (Part I being chicken parm and Part II being broccoli strascinati). For dessert that night, I made an Oreo cheesecake.

I love Oreos, so awhile back I bought one of those jumbo jumbo packs from BJ's that is designed to feed 30 third graders or whatever. Needless to say, it was more Oreos than I knew what to do with. Therefore, I was thrilled when I came across this recipe for cookies and cream cheesecake bars.

I ended up scaling down a little because I had some cream cheese, and bought some more, and then came home to discover that the stuff I had in my fridge had gone bad. Whoops. I wasn't about to go back out, so I simply regrouped and made do with 2 things of creamcheese instead of three, reducing the amount of other ingredients accordingly.

I ground up one roll of Oreos in the blender, and then mixed them with three tablespoons of melted butter. I pressed this mixture into the bottom of my tart pan. The recipe called for baking this crust, but I've made similar crumb and butter crusts in the past, and none of them required any baking. Therefore, I decided it was totally unnecessary and I skipped it.

Then I beat two bricks of room temperature cream cheese and half a cup sugar with my electric mixer. Once that was nice and blended, I added half a cup sour cream, ¾ teaspoon vanilla and mixed that all up. Then I added two large eggs, one at a time, and then made sure that everything was neatly combined. Then I took half of a roll of oreos and blended them really quickly, so they were still nice and chunky, and stirred that into the filling. Pour into the pan on top of your oreo crust, bake for 40 minutes at 325 degrees, refrigerate overnight and voila! You're done!

It was pretty tasty, but I think it needed more sugar, actually. It tasted more like cream cheese and less like cookies and cream or cheesecake. I wouldn't rule out that I ultimately used less than a half cup sugar, because I tend to cut back on sugar when baking. However, it definitely could have been sweeter. It was tasty enough, (I mean Oreos and cheesecake! come on!), but I think that there are probably better variations on this theme out there.

Thanks to Paul for the pictures! Have a good weekend everybody!

Thursday, July 15, 2010

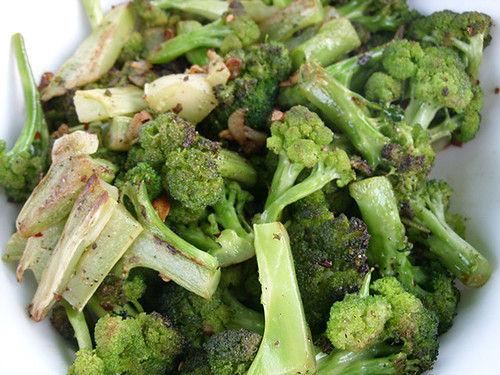
broccoli strascinati


roman style broccoli

Remember when I talked about making pork chops agrodolce and peperonata from Saveur's Roman Food issue? Well, another dish in the magazine that caught my eye was broccoli strascinati. The concept is simple: broccoli cooked in a frying pan at medium high heat with olive oil, garlic and red pepper flakes. I really like broccoli, and I think it's especially good when the edges start to brown even as the rest of the floret stays bright green, so I was excited to try cooking it this way.

Nathan, however, hates broccoli, which means that in the two years we've been dating, I've cooked it only a handful of times. This is sad. Growing up, broccoli had a prime spot in our veggie rotation, usually steamed and sprinkled with lemon juice and grated cheese. If it wasn't for Nathan, I know it would remain among my go-to vegetables. As it is, I miss broccoli, so when Boyfriend went off to Italy without me, what else could I do but cook a Roman broccoli dish?

When I made dinner for Paul, I had just gotten three small heads of broccoli from the food co-op. When I started thinking about side dishes for chicken parmigiana, this recipe immediately popped into my head. I got hungry just thinking about it: crispy, crunchy, slightly charred broccoli with fragrant garlic and olive oil and a hint of spice from the red pepper flakes. I'm used to hearing from Nathan about how awful broccoli is, so I was worried that Paul and company wouldn't like it. Then I remembered that Paul's second favorite dish after chicken parm is chicken with broccoli, and that he has long dreamed of combining the two into one super dish. We were golden.

I cut the broccoli up into little florets. I also peeled the stem and chopped that up, so as to not waste anything, but I think I could have peeled a little more liberally, as I got some very chewy stringy stems at points. Then I smashed and sliced a few garlic cloves. From there, the recipe is sinfully simple.

Heat olive oil in a skillet over medium-high heat. When the oil is hot, add the broccoli and let that start to brown, turning it periodically, for 6 to 8 minutes. Then you add just a little bit of water, the garlic and the red pepper flakes and cook for a few minutes more, until the garlic starts to brown. Season with salt and pepper, and you've got an easy and super delicious vegetable side dish. It's so good I suspect even Nathan would like it.

As for Paul, this was probably the closest he's ever going to get to his hybrid chicken parm/chicken with broccoli dinner. While I'm happy to cater to a friend's personal tastes, I don't think I'm ever going to mess with parmigiana soy sauce fusion. Sorry Pablo.

Stay tuned for our dessert!

Wednesday, July 14, 2010

chicken parmigiana


my chicken parm with broccoli, pesto and sourdough bread

So one of my best friends, Paul, moved into the city last month, and I promised to bring over dinner as a housewarming present. Paul's favorite food is chicken parm, so the menu was a total no brainer. I figured I'd also bring a salad, because I'm always struggling not to waste my food co-op lettuce. Then, while making borchst, I accidentally defrosted a container of pesto I assumed was chicken stock, so we had that too. It was pretty discolored after its time in the freezer. Not pretty. I also made an oreo cheesecake and broccoli strascinati, but I am aiming to make an entry every day for the month of July, so I am going to stretch this meal across three posts.

First, I made Marcella Hazan's famous tomato sauce, which I previously blogged about here. The recipe calls for only canned tomatoes, butter, and an onion. But I of course could not help embellishing, tossing in a garlic clove and finishing it off with plenty of fresh basil and parsley from my food co-op stores. I cooked this in too small a pot, because I didn't want to use the giant one, which meant tomato splattering everywhere and the onion and garlic didn't get as delicious soft and saturated with tomatoey goodness as the last time, so I had to remove them from the sauce rather than smashing them into it. Luckily, it still tasted good, and I saved the onion and garlic to use again on a later date.

Since there were going to be three ravenous young men at dinner, I bought six chicken breasts and boned them myself. This means that I've now got six bones in the fridge waiting for me to cook up some stock, but that is a story for later. I sliced my cutlets thinly and then dipped them in egg and seasoned breadcrumbs and pan fried them in hot vegetable oil. I did all this the night before so that I could serve a reasonably early dinner to Paul, his girlfriend Lauren and his roommates, Rob and Andrew. I also cut up the broccoli, and made the cheesecake. Lots and lots of prep work.

The next day I came home after work and packed up everything and hopped on the subway down to Paul's house. He picked up some bread to go with dinner, his roommate Andrew had some red wine, and Lauren bought some shredded mozzarella. I had already put the cutlets and sauce in a baking dish, so when I arrived I simply topped them with the cheese and popped them in the oven and got to work on the broccoli and salad.

After twenty minutes, I switched on the broiler and let the cheese get a little brown and bubbly. The chicken was a delicious saucy, cheesy mess.


chicken parmigiana with plenty of cheese and sauce

Andrew recently bought a gigantically awesome patio table for their roof, so we took the food upstairs and ate under the stars. It was awesome. I am so envious of their sweet roof set up, although I suppose I could technically set up something of the sort on mine, which is unlocked. Maybe someday.

Tuesday, July 13, 2010

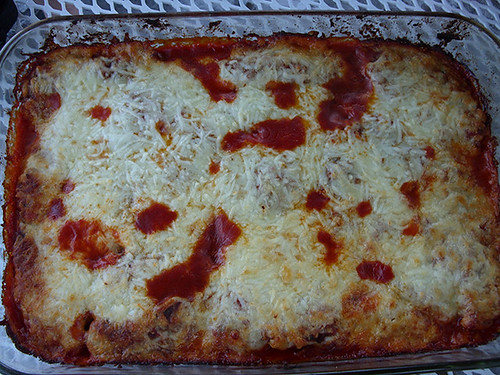
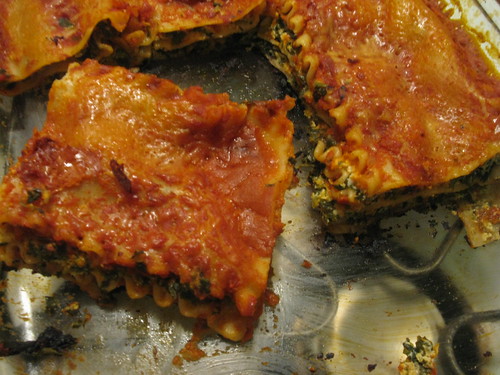
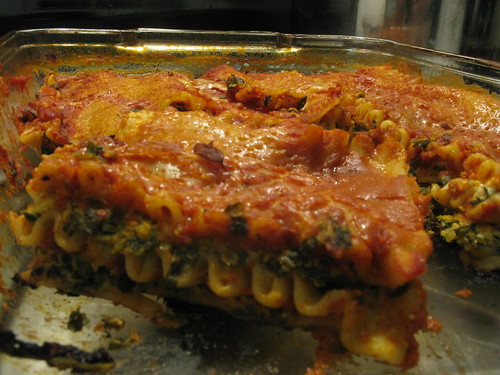
Spinach Lasagna

Sarah is churlish and always whines about how she doesn't like lasagna, but I think it is great. Lasagna is one of the few foods that I don't think really benefits from meat, it's that good. Normally I would say that you could add meat to pretty much anything and it would make it better, even possibly ice cream. Even though they look good on paper, meat lasagnas never really seem to stack up to this recipe. Even Sarah admits that it is pretty good.


This recipe uses the following ingredients:

1 lb ricotta
1 1/2 c shredded mozzarella, divided into 1 c and 1/2 c
1 egg
1 10 oz package frozen chopped spinach, thawed and drained
3/4 tsp oregano
1/8 tsp black pepper
1 jar tomato sauce
8 oz lasagne noodles

Yeah that's right, a jar of tomato sauce and some frozen chopped spinach, you organic pansies. The haters may hate but using these ingredients saves plenty of time/effort and I challenge you to taste the difference, especially in a situation like this where the spinach isn't exactly center stage. You guys have fun wilting and chopping your spinach and I'll be already done cooking, sitting back, just lounging and watching COPS or some shit.

Anyway, preheat the oven to 350, and mix the ricotta, 1 cup of the mozzarella, the egg, the spinach, the oregano, and the pepper in a bowl. This tastes great on its own and would make a good dip if it weren't for the raw egg. Get one of those glass 9 by 13 baking pans and grease it with some cooking spray (ooohhhh shiiiit he's using cooking spray, waah waaah whatever whiners). Then begin layering. First put half a cup of sauce, then a third of the noodles, then half the cheese mixture. Then do that again. Then put the last of the noodles, whatever is left of the sauce, and the remaining half cup of mozzarella.

Now comes the most important part. Notice that I didn't boil the noodles. This is because boiling them is unnecessary - they will cook fine in the oven as long as you add water at this stage. Using the empty sauce jar as your vessel (this way the water becomes sort of saucy), pour water around the edges of the lasagna assembly, about a cup or two. Then cover the pan tightly with foil (you might want to spray the underside to prevent it from sticking). Bake for 75 minutes and let stand for as long as you can hold yourself back - in my case maybe 5 minutes but ideally like 10 or more.

There you have it, some delicious lasagna. I've had some minor issues with the bottom noodle getting a little overcooked and chewy, but nothing major. The most recent time I made this I added a lot more water and the problem was lessened. Maybe I need more sauce on the bottom? Who knows.

As I was writing this an idea struck me - what if instead of making a pure meat lasagna, I took this already successful recipe and added meat to it? I could put some pancetta in this thing or bacon, or perhaps replace the noodles with thick-cut bacon?!?! Maybe I will try this and report back.


Monday, July 12, 2010

the over-stocked fridge

Yesterday, Laura and I both cooked our own veggie-centric dinners in an attempt to get through our surplus of food co-op goodies. Between the two of us, we definitely made a dent in our produce supply, but there is still a considerable amount of food we need to use, and most of it doesn't have a very long shelf life.

It's especially tricky because almost all of it is stored in opaque plastic bags, which makes it hard to keep track of what we've got at any given time. Each week, there's a new supply, and I'm afraid we generally don't finish everything up before the next delivery. In order to better keep track of everything and how old it all is, I've decided to put an inventory on the fridge door, and date things.

As of tonight, we have two bunches of small beets, half of the beet tops, 2 giant beets left over from the winter share, half a red cabbage, two green cabbages, 3½ zucchinis, 4 yellow summer squash, 2 onions, a bag of scallions, a bunch of chard, a bunch of kale, half a bag mixed lettuce, two bunches of turnips, 2 garlic scapes, a little basil, and that's just the food co-op stuff. There's also carrots, celery, and half a bunch of parsley.

The fridge is fit to burst, with the crisper drawers filled to the brim and the bottom shelf is also piled with vegetables.


our full full fridge

As you can probably imagine, it's pretty daunting. If any of those ingredients particularly speak to you, please feel free to share recipe ideas with us. On Wednesday I think I'm going to make a maple turnip carrot recipe that my friend Megan gave me last year, but I'm definitely looking for other ideas.

Sunday, July 11, 2010

I scream, you scream, from California to the New York Islands

Note from Sarah: Today's entry is a guest blog by Nathan's mom, Tenli. She posted some absolutely mouthwatering photos of homemade ice cream on facebook earlier, and I was so impressed. Even though lots of food blogs frequently feature ice cream making, it still seems like an impossibly daunting proposition to me. I was so impressed with her blackberry ice cream that I insisted Tenli post a guest blog entry explaining the process. I hope you all enjoy it as much as I did!


Nathan's brother Weston, age 15, is an avid and creative cook, particularly skilled in the dessert area. He and I had been searching for a cooking class to take together since his birthday in October. Last weekend, we finally had our chance: Ice Cream 101 at Sur La Table in San Francisco. In the hands on class, we were introduced to the concept of "French style" ice creams, which are custard based. Weston and I participated enthusiastically in class, making four different kinds of ice cream, as well as chocolate and strawberry sauces, and of course eating them all. We came home to Oakland with the recipes from our class, a gorgeous red Cuisinart ice cream machine, and "The Perfect Scoop" by David Lebovitz. The next morning, as I stumbled around the house still logey from my ice cream hangover, it came to me: "Hair of the dog!" Off I went to get the ingredients for my first solo batch of Lemon Curd - Blackberry Swirl Ice Cream with Blackberry Sauce.

Our teacher, Sara Lodick, reminded us at the start that the best ice cream is made from the best and freshest ingredients, and, with that in mind, I splurged on Strauss Family Creamery organic dairy products from Marshall, California. The lemons and blackberries came from the local Sunday farmer's market. Pretty much everything else was already in my pantry, and I was good to go.


For the blackberry swirl part of the ice cream, I began by boiling the berries, sugar, lemon juice, and a small amount of light corn syrup in a small saucepan until they generated a fairly thick, deep purple sauce. I strained the liquid and set it to chill while I prepared the lemon ice cream. In a larger saucepan, I combined cream, milk, and sugar with some extra special vanilla extract from Mexico, and just barely scalded the mixture, turning off the heat when the merest hint of a skin formed on the surface of the liquid. In a metal bowl, I whisked together eight egg yolks with 3/4 cup of sugar, then added lemon juice and grated lemon peel. Finally, I combined the two mixtures together, slowly adding the liquid to the egg mixture with a ladle so as not to curdle the ggs. (I really missed Weston at this point -- ideally, this would be a two person operation.) Next, I put the metal bowl over a double boiler and stirred it over boiling water until it began to thicken. I fed the custard base through a strainer, and put the strained custard over a bowl of ice to chill quickly, then put it in the fridge to cool down further. The recipe said to cover and refrigerate overnight -- but in class, we did it in a couple of hours, so I knew it would be fine if I rushed things a bit!

While the custard was cooling its heels, I combined blackberries, more sugar, and more lemon juice in a bowl and let them stand for an hour or two, stirring every now and then. Over time, the lemon juice and sugar broke down the berries into a distillation of pure blackberry sweetness that would later be the sauce for our dessert.

Later that day, while eating a delicious grilled dinner out in the garden, the ice cream maker did all the work of turning my custard into fabulous lemony ice cream, which I then layered in a loaf pan with the blackberry swirl mixture, and returned to the freezer for another hour or so. Scooping into the layers produced a mouthwatering swirl of pale lemon and purple blackberry which was then drizzled with indigo sauce and a couple of ultra sweet blackberries. When we finally got to eat dessert, there were moans of pleasure all around.

- Guest entry by Tenli, Nathan's Mom. Thanks to Sarah for inviting me to share this experience.