So I finally did it: I made my own mayonnaise! This is one of those things that only professional chefs and food bloggers do anymore, and now that I count myself among the latter, I suppose it was only a matter of time before I joined the ranks of the mayo makers.
freshly made mayo
Look how gorgeous! Watching the unlikely combo of egg yolk and olive oil come together to form a delicate and creamy mass was oddly satisfying, but I have to say that I probably wouldn't try to pull this off on my own.
I started off whisking the yolk vigorously with my right hand, and trying to slowly drip in the oil with my left. My parents have a nice olive oil bottle with a small spout, but if left unchecked it still was more of a small but steady stream rather than a series of oil droplets. I soon tired, and called in my dad from the sidelines. We teamed up, taking turns with the more exhausting whisking and easier dripping. It came together beautifully, and was lightly seasoned afterward. I suspect it could have held even more olive oil, but we were both getting tired and I decided it was good enough.
As cool as I felt making mayonnaise from scratch, the primary reason I decided to try my hand at it was that I was making potato salad, and I didn't have nearly enough Hellman's. This potato salad was part of the ribs and zucchini meal I posted about yesterday, and immediately followed my gigantic coleslaw. As such, I had already used most of my parents' stock of the condiment in question. Enter the handmade variety!
macaroni and cheese
My parents weren't too crazy about this potato salad. I guess it was tasty enough. Boiled potatoes cut up and mixed with mayo, diced celery, minced parsley and basil. I added salt and pepper, and possibly a little dijon. This was just a quick and dirty potato salad, (labor intensive mayo aside), as the real star of the meal was the ribs. I'd like to try making a more interesting potato salad later on this summer.
Wednesday, June 30, 2010
Tuesday, June 29, 2010
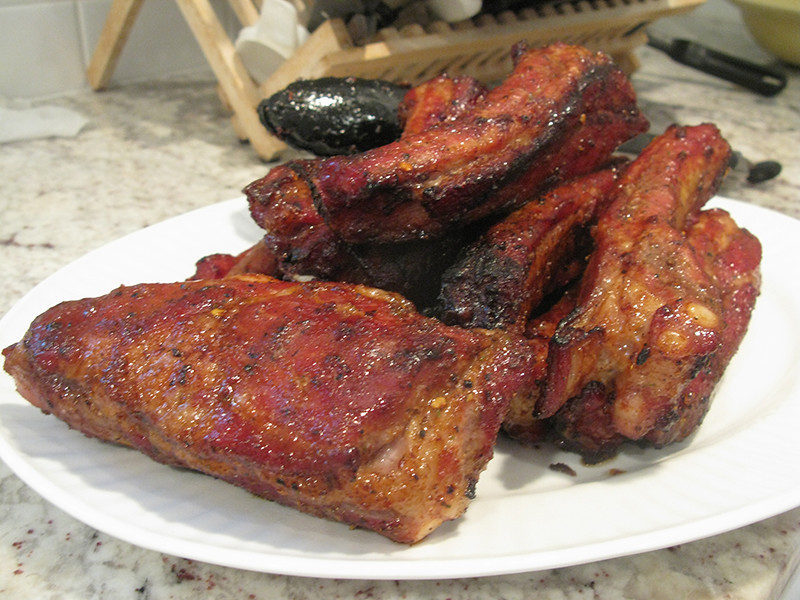
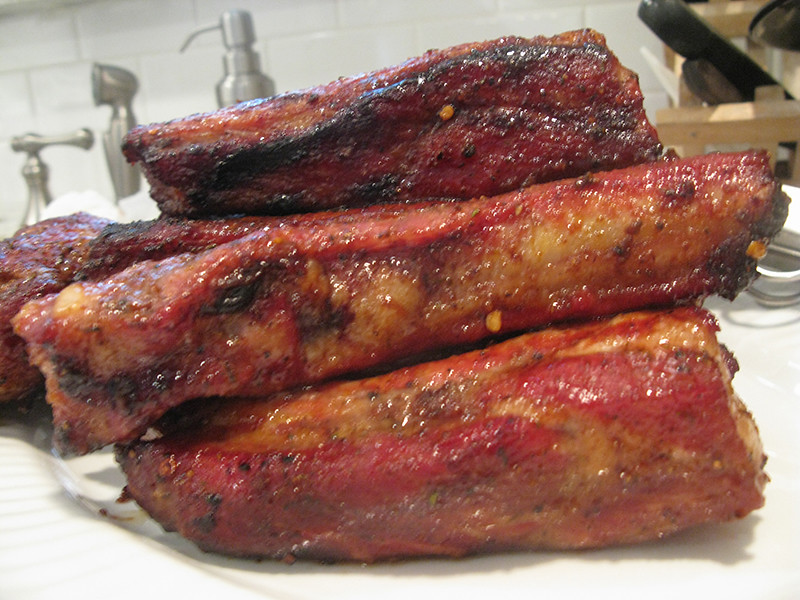
dry rubbed ribs/zucchini and yellow squash with tomato sauce
dry rub barbecue
So couple of weeks ago I went home and my dad and I made dinner. My parents had ribs in the fridge, but we decided to try something new and try a dry rub recipe.
This turned out to be really easy. We used a lot of brown sugar mixed with cracked black pepper, kosher salt, cayenne pepper, paprika, cumin, red pepper flakes, garlic powder, nutmeg, mace and savory mix. Dad massaged the spice rub into the meat, let it sit in the fridge for an hour or two and then slowly grilled it to perfection.
that's the rub
Sweet, savory, spicy and delicious. No barbecue sauce required. I'm a girl who often hates ribs slathered in gloppy sticky sweet sauce, so these really were right up my alley.
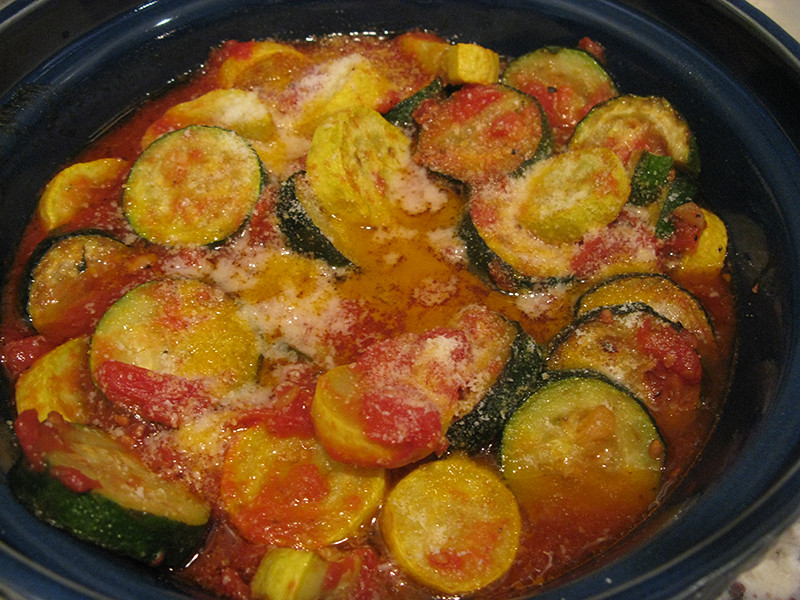
zucchini in tomato sauce is a Cascone family favorite
We also made zucchini and summer sauce in tomato sauce. This is something my family has been making for years, and it's easy and delicious. Simply slice the zucchini and squash into centimeter thick rounds and simmer in your favorite tomato sauce. Serve with extra black pepper and grated romano cheese.
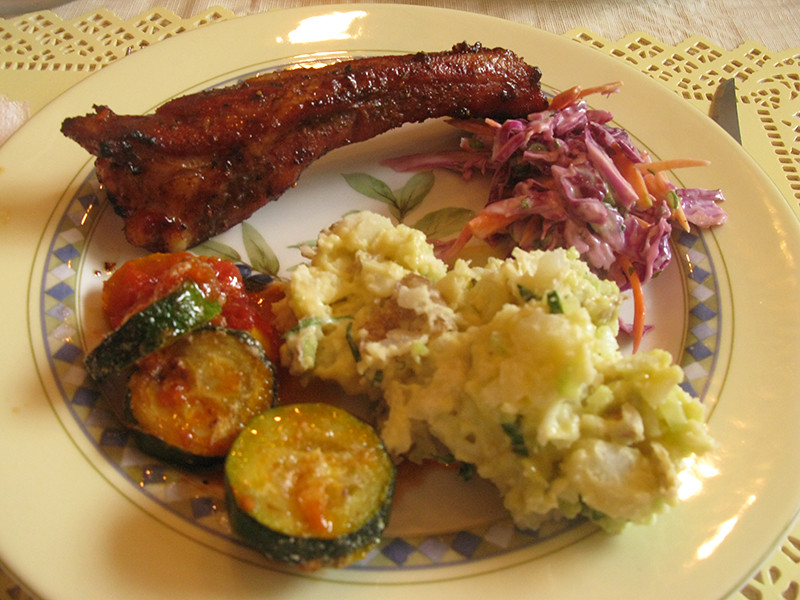
ribs, coleslaw, potato salad and slightly out of place zucchini in tomato sauce
Here's the whole dinner plate. As you can see we also had leftover coleslaw. You can also catch a glimpse of the potato salad with homemade mayo that I'll be talking about in my next post. I know that Nathan hasn't posted anything this month, but you'll all be stuck with me for at least two weeks longer. Boyfriend is off exploring Italy for the next two weeks, and I'm holding down the fort up in Harlem. Hopefully, this oppressive heat won't prevent me from keeping busy in the kitchen while he's gone!
Labels:
barbecue,
family recipe,
food co-op,
gluten free,
ribs,
spice rub,
tomato sauce,
zucchini
Monday, June 28, 2010
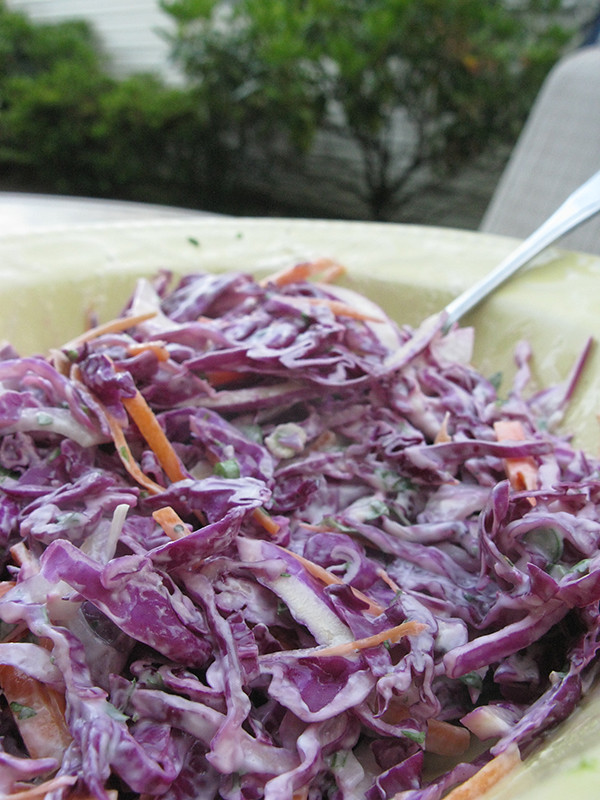
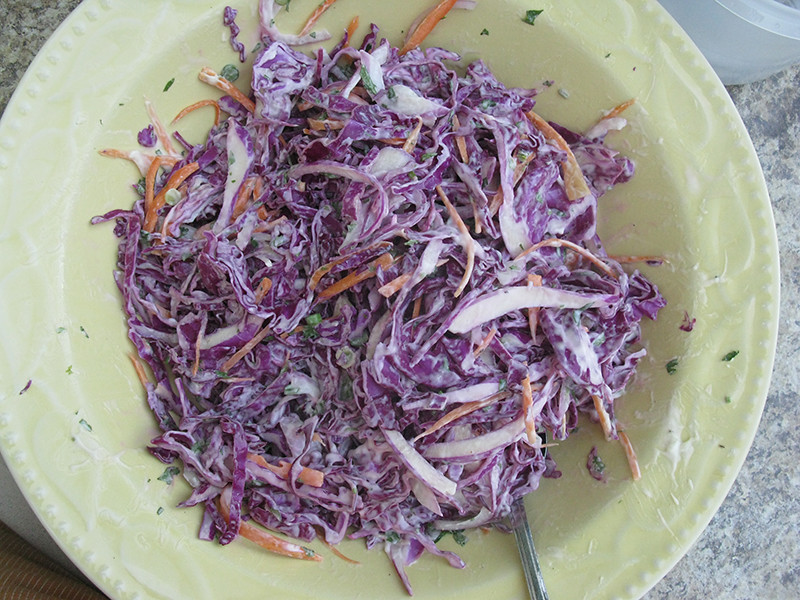
cilantro lime coleslaw
coleslaw with a kick
This was my first foray into the world of slaws, and I had no idea what I was getting myself into. This mammoth bowl of coleslaw is only half of what I made. A head of cabbage goes a long, long way!
a brightly colored slaw
I decided to make this coleslaw because there was a big old head of red cabbage languishing away in the back of the fridge. Back when Nathan and I made our second bagna cauda pasta dish, I had been in charge of the grocery shopping. I was tired after a long day of work, so when I went to my local Key Food I half hoped/half believed that the red cabbage they had on display in the produce section was actually radicchio. When Nathan arrived he quickly set me straight, and was so kind as to head back out to try his luck at Fine Fare. We both feared the mission would prove fruitless, but he inexplicably found two lonely radicchio heads, sitting in the produce case as if they were waiting specially for us. Indeed, the cashier had no idea what they were, nor how to ring them up, and the manager was equally flummoxed. After much discussion, it was determined that they must be runty red cabbages, so they ended up costing about fifty cents collectively.
That worked out great for the bagna cauda dish, but it also meant that I wound up with a totally superfluous head of red cabbage. Fast forward to my first food co-op pick up a few weeks later, and I've got a fridge full of veggies and a barbecue to attend at my dear friend Christine Jones nee Flood's house. I know I want to bring something to eat, and when I remember I have the cabbage, coleslaw is the obvious choice. I also still have winter food co-op carrots that aren't getting any younger, so I'm thinking this is perfect.
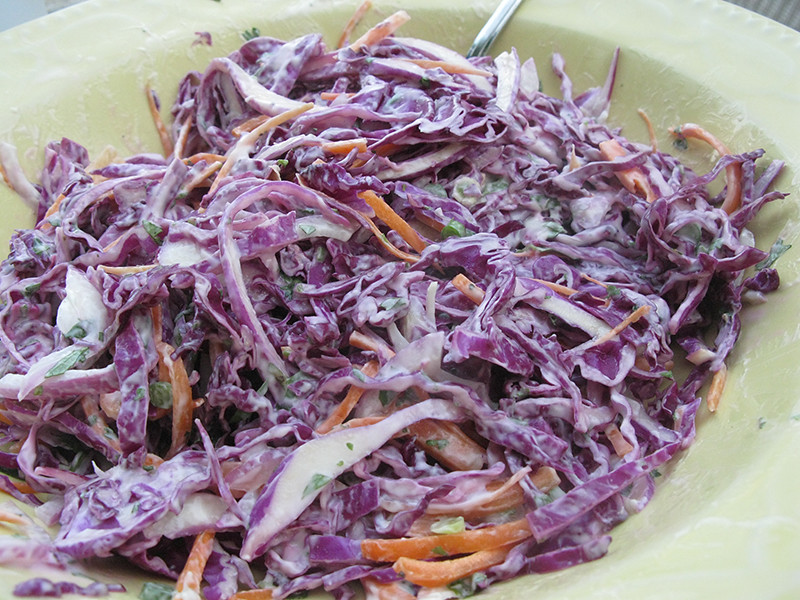
coleslaw close-up
When it comes to finding a recipe, I turn immediately to the smitten kitchen, where Deb has a well established love for slaws. This basic Ina Garten recipe seemed like it would work well enough, but then I dug a little further and discovered this cilantro-laden variant. Since I had gotten a bunch of cilantro from the co-op, I decided to go in that direction.
I chopped up a full head of red cabbage, about half of a small red onion, and then I peeled and thinly sliced 7 or 8 little carrots. This took forever and a day, but I like to think my newly acquired knife skills would now speed up this process considerably. I also decided to add some garlic scapes, which I sliced into little rounds. Then I chopped up some of the cilantro. After all the slicing and dicing was completed, I packed all my chopped veggies into the biggest tupperware I had, which was fit to burst.
I brought this home to Long Island and dressed it the next day, about a half an hour before the party. I was in a bit of a rush, so I ignored the recipe's measurement and just mixed together some mayo, salt, pepper, sugar, lime juice, cayenne pepper and dijon mustard. This only lightly coated my slaw, which was actually what I was aiming for. At this point I realized that I had enough coleslaw to feed a small army, and that only about half of it was going to fit into the largest salad bowl my parents had. Needless to say, I had a lot of leftovers. This slaw is great, but it gets soggier and more liquidy as the days go by, so unless you're having a party of 20 people, stick to half a head of cabbage. That being said, cilantro and lime are a kick ass way to jazz up a typical slaw. It was a great take on a traditional summer dish, and I would certainly make this again.
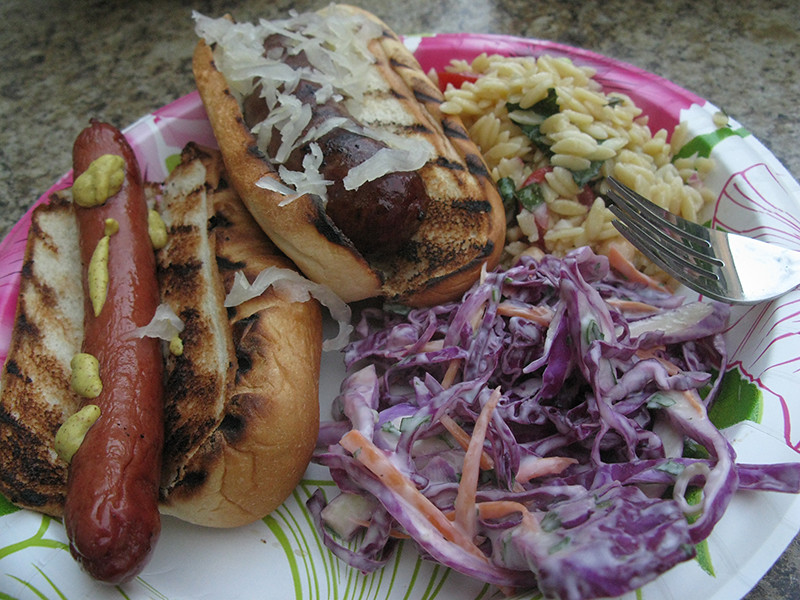
The whole barbecue was awesome, although I'm sure any Southerner worth his salt would have had a few choice words with us for calling it that. Mrs. Flood served up a typically impressive spread, including amazing brats. Meaghan made some delicious orzo salad with chickpeas, grape tomatoes and basil which would have totally housed Jimmy Bradley's lentil version. It was a delicious dinner, and not bad to look at either— and neither were the lovely guests! It's always a blast to get back together with my high school friends, and I only wish it could happen more often.
it may not be real barbecue, but it still looks like summer to me!
Labels:
barbecue,
cabbage,
carrots,
cilantro,
coleslaw,
food co-op,
gluten free,
lime
Saturday, June 26, 2010
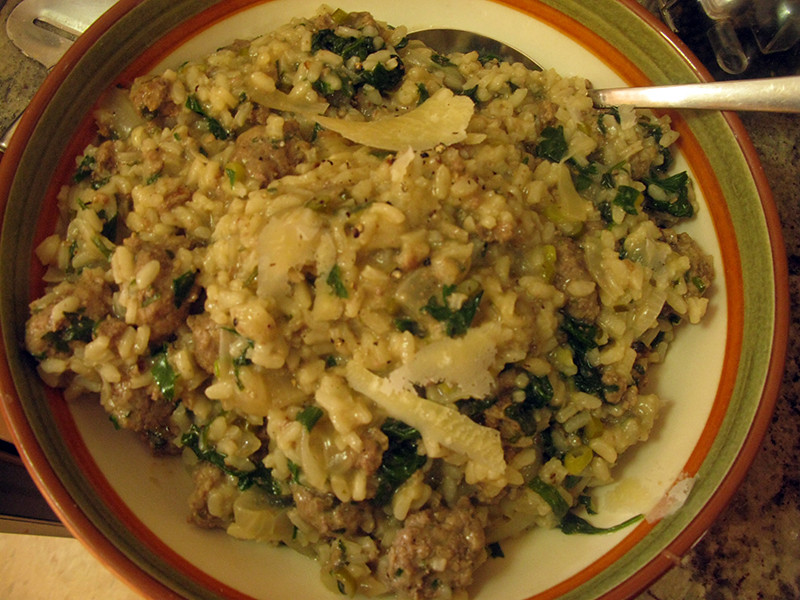
meatball and spinach risotto
So something I like to make is a meatball risotto. I am not sure if people usually put meatballs in risotto. I have a feeling they don't, but I don't care. I love meatballs, and I love risotto, so I see no reason not to combine the two into one meal.
risotto meatball and spinach, topped with shaved parmesan
I've made this meatball risotto twice now, once last summer for my dear friend Mary Kate, and now again this summer for Nathan, his mom and his grandma. I make little meatballs and cook them in the pot I'll be using for the risotto. Once they are cooked through, I take them out of the pot and add the onions, and then the rice. In this instance I also added some thinly sliced garlic scapes. Otherwise, the preparation of this risotto was pretty much the same as it always is. White wine, followed by lots and lots of chicken stock. At the end I added the chopped spinach some nice food co-op parsley, a hunk of butter and some shaved parmesan.
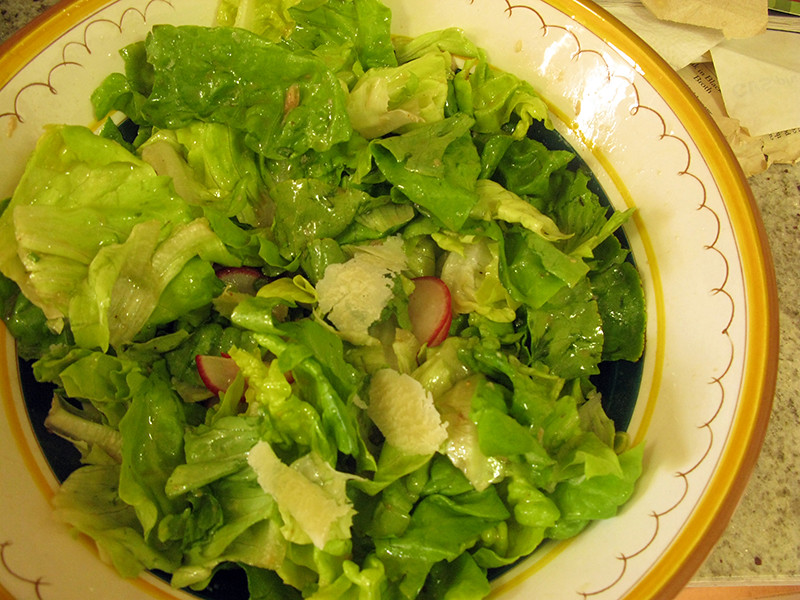
salad with radishes and garlic scapes
I also made up this beautiful fresh salad of Boston lettuce from the food co-op, more garlic scapes and those green market radishes. I've been working on finished up that $1 bunch since the tenth of June now! That is just crazy. Yesterday I tried roasting them, I'm so desperate to get rid of them!
I'll probably do a more in depth write up of my meatballs at a future date, but I usually just mix in seasoned breadcrumbs, eggs, milk, minced garlic and parsley and form it into little balls. I try not to over mix the meat so it won't get tough. This particular time, I was using meat I had gotten over the winter from the old good co-op, and I think it was a little too lean because they weren't the most tender. Or maybe I just needed to add more milk and eggs. In any event, these meatballs didn't have to stand on their own, so they were quite good enough for my purposes. We all enjoyed the meal, and each others' company, which is really all you can ask for.
In one of my earliest posts I had talked about another dinner I made and Nathan's grandma's house. It was a very time consuming affair, so this time I did a lot of the prep work before heading down to Chelsea. Having the meatballs mixed and the garlic scapes and radishes chopped meant I didn't have to waste much time slicing and dicing, and that I could dive right into the cooking. This meant I was able to have dinner on the table only 30 to 40 minutes later than initially planned. I'm getting faster you guys, slowly but surely!
Labels:
food co-op,
gluten free,
italian,
meatballs,
risotto
Friday, June 25, 2010
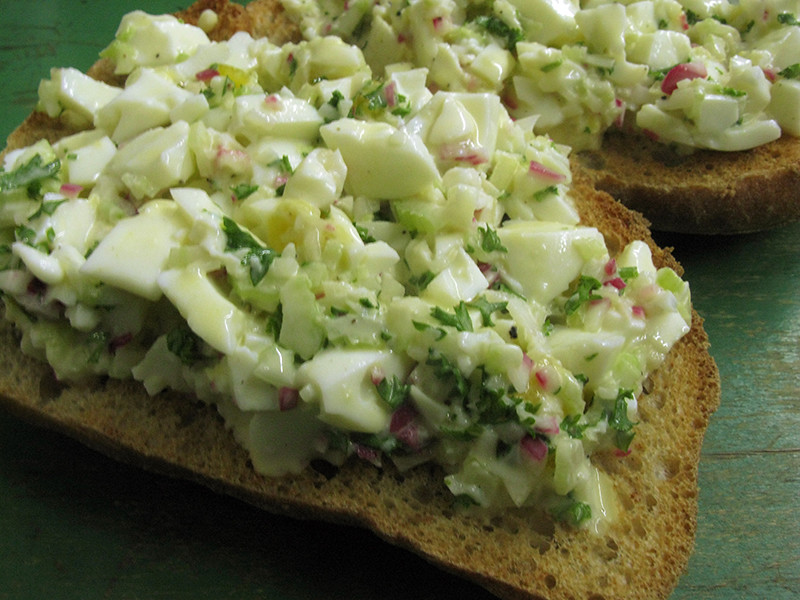
egg salad is not boring
I feel kind of silly blogging this, but honestly, if I'm feeling lazy and am out of leftovers and all I have in the fridge is a carton of eggs, egg salad sandwiches are my lunchtime savior. Boil two eggs until just shy of hard, (I like the yolks to be solid, but softer and more orange than the traditional hard boiled egg), chop them up and toss with mayo and whatever mix ins you please. It's easy, fast, and bound to please.
Generally, I like to saute a little minced garlic in oil to add to my egg salad. This shouldn't surprise you. I also like to put in finely chopped onions and celery, because a good egg salad has to have a little crunch. (When we made that carbonara and overcooked our eggs, Nathan made an egg salad without a more toothsome component, and it was like eating baby food.) I also like to have some chopped parsley in there, for color. I once had a giant bunch of fresh dill that I was struggling to use up, and that was an awesome add in, bringing a huge burst of flavor. I season generously with salt and pepper, and add just enough mayo to make it all stick together.
egg salad sandwich with celery and radish
This egg salad in particular could have used a bit more punch– I didn't add the onions or garlic, partially out of laziness and partially because my previous attempt at this dish had given me a particularly bad case of dragon breath. What I did add was tiny, crunchy little bits of radish, in addition to the requisite celery. I mainly did this because I thought a pop of red would look really nice, but having the pepperyness of the radish did help make it less bland without the garlic and onions.
You could also add mustard to your egg salad for added flavor and to cut back on the mayo. You could make it spicy with paprika or chili powder, or toss in some pickles to add some acid. You can switch out the onion for scallions or sub in red onion or garlic scapes or shallot. Bacon and egg salad is also a great combo, but I wouldn't do that if I wasn't planning to eat my sandwich right away. No one likes soggy bacon. Anyway, my point is that there's a lot of room to be creative here. Just keep in mind these three rules:
1. season, season, season! and don't forget the onion!
2. don't forget the crunch, or it's just mush in your mouth
3. you need some sort of binder, like mayo, to make it come together
Otherwise, enjoy!
Thursday, June 24, 2010
what I did with my CSA share
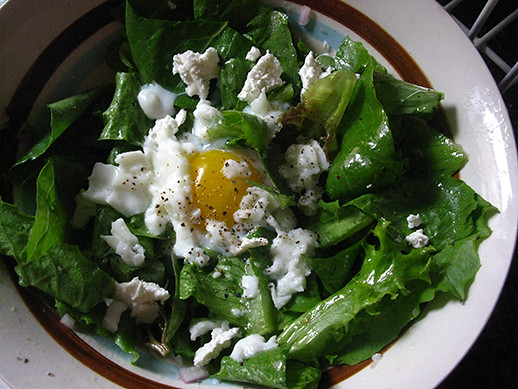
As you all recall, it was two weeks ago that I picked up the first CSA share of the season, which meant a fridge full of veggies to consume. And what did I do will all that jolly green goodness? Well, I had dinner downtown after I picked up the food on Thursday night, but I kicked off Friday morning with a nice green salad accompanied with a poached egg and goat cheese, both of which I had gotten the previous weekend at the market. I also sliced up some garlic scapes very thinly, as though they were scallions, and added that to the mix. With something so green and cheerful for breakfast, you can't help but feel like it is going to be a good day.
salad for breakfast
I had off from work that day, and was thus able to spend the afternoon cooking and planning recipes to use up my vegetable stockpile. I sliced up all the ingredients for a red cabbage and carrot coleslaw with cilantro, garlic scapes and a lime mayonnaise. This I brought to my friend Flood's barbecue the next day. I pickled a jar of sugar snap peas and stored them in the fridge. Then I turned my attentions to that night's dinner, which I made for Nathan and his mom and grandma. A meatball risotto featured garlic scapes, parsley and fresh spinach from the csa, and was served alongside a leafy green salad of boston lettuce, scapes, and Union Square radishes. On Sunday, my parents and I made a delicious dinner that included co-op zucchini and summer squash with tomato sauce and grated cheese, as well as dry rubbed ribs and potato salad with homemade mayo. Later in the week I had more salad, this time with fried goat cheese, which I served alongside bacon and onion loaded five cheese macaroni and cheese. The next night my pasta leftovers got paired with a gingery tatsoi stir-fry tossed with the extra zucchini and squash we didn't cook over the weekend. By the following Thursday, all I had left in the fridge was my arch nemesis kale, a bag of turnips, and some cilantro and parsley.
This week, I've been less successful. Thursday I went straight from picking up the food in Harlem to a bar down by West 4th St, and ended up eating leftovers once I got home. I cooked some delicious pasta with peas and broccoli rabe on Friday night, but Saturday afternoon I went to brunch with Nathan and in the evening Laura, Lauren, Paul and I scored tickets at Shakespeare in the Park to see A Winter's Tale. Sunday I used food co-op basil to make pesto, which accompanied a food co-op salad and coffee pork chops. But Monday I went straight from work to a barbecue hosted by Grace and Marianne, Tuesday I saw Toy Story, and Wednesday I went to a talk about Clementine Paddleford at the New School followed by a bar trivia night, so there was not been much opportunity to use up all this food. I don't even want to think about how much produce awaits me when I go home to cook tonight. Dauntingly, there is another pick up tonight, so it's not going to get any easier!
Even though I fell a bit short in week number 2, I've still built up a substantial back-log of recipes, all of which you can expect to see here in full detail soon.
Wednesday, June 23, 2010
farmers' market sandwich creation
sandwich with both parts of the radish
I don't know if you've noticed, but I tend to improvise a lot in the kitchen. That's why you won't find a lot of recipes in my posts, but rather more free form explanations of what I've been up to in the kitchen. This might be frustrating if you're not super comfortable in the kitchen and you are looking for more exact instructions on how to replicate our meals at home, but I do always link to the recipes that were my jumping off point, so hopefully this isn't too much of a problem.
Anyway, my point is that even though I don't worry too much about following a recipe exactly, I almost have one (or two), that I am using as a guide. Therefore, when I come up with a dish entirely on my own, it is kind of thrilling, even if it is only a simple sandwich, like the one I am going to talk about today.
Going on three weeks ago now, back when Nathan and I were still doing our Master Meals series, he suggested I swing by the Union Square Market on Saturday afternoon so we could make Jonathan Waxman's famous chicken on Wednesday. I thought this was a good idea, but by the time I got down there, the chicken vendors were gone, and we never did get around to making more Master Meals.
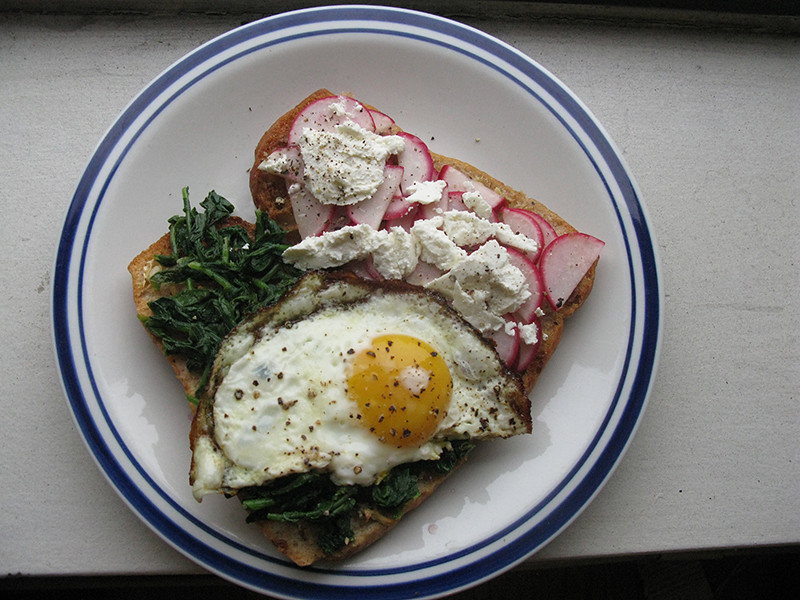
What I did make was this delicious sandwich, inspired by the bounty of the late spring farmers' market:
fried eggs and goat cheese atop radishes
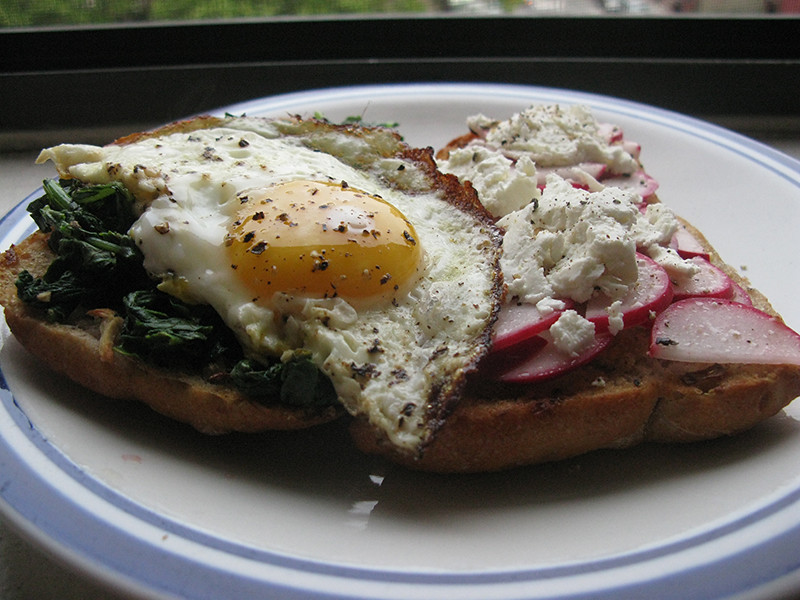
Thin-as-I-could-slice-'em radishes, creamy salted goat cheese, a runny fried egg and sauteed radish tops atop a crusty roll. All freshly bought down in Union Square and prepared with a minimum of heat and thus ideal for a hot summer day. What was especially great about this light little meal was that it all kind of came together in my head organically, (no pun intended), as I wandered the market.
"A huge bunch of radishes for a dollar? Those would be great marinated with oil and vinegar, salt and pepper and served on some buttered bread, and I can cook the greens up with some lemon juice. But how can I make this more of a full meal? Eggs for $2.25 a dozen? Oh, a HALF dozen? Expensive, but now I want to make egg sandwiches, so let's just go for it... Oh look! They are closing up for the night so a bag of four rolls is only two bucks! Anything else? There's goat cheese. I love goat cheese. Four ounces for $5. Great!"
This all came together brilliantly. The radish slices gave it crunch, and the buttery bread and runny eggs richness. Nathan made the astute observation that the lemon in the greens mixed with the egg yolk made it taste a bit like hollandaise sauce, and the goat cheese was the perfect creamy, last minute addition. These sandwiches were so good, I'm even going to write up my approximations of a formal recipe so those of you playing along at home can make this yourselves. So, without further ado:
"The Garlicus Maximus" – Whole Radish Sandwiches on Garlic Bread with Goat Cheese and a Fried Egg
makes 2 sandwiches
the green tops from a large bunch of radishes
2-3 medium to large sized radishes
2 tbsp olive oil
1 tbsp red wine vinegar
kosher salt
freshly ground pepper
½ a lemon, juiced
½ a stick butter at room temperature, plus extra for frying eggs
2 cloves garlic
1½ tbsp goat cheese
2 rolls
1. Wash the radishes, removing the greens and setting them aside. Slice the radishes as thin as you can. (I don't have a mandolin, but I imagine it would be helpful in this situation.)
2. Mix the olive oil and vinegar in a small bowl and add the sliced radishes and a generous amount of salt and pepper. Let marinate while you make the rest of the sandwich.
3. Smash the garlic cloves into a paste. You can use a mortar and pestle to do this, or you can scrape the clove with the side of your paring knife. Mix the garlic into the softened butter.
4. Slice your rolls in half and spread the garlic butter on both sides. Toast in the oven or toaster oven until golden brown.
5. Saute the radish greens until wilted over medium low heat in a frying pan. They should still be wet from when you washed them, which will prevent them from burning in the hot pan, but you can heat up a little oil or butter before you add the greens. Add lemon juice and season with salt and pepper.
6. Fry two eggs and season with salt and pepper.
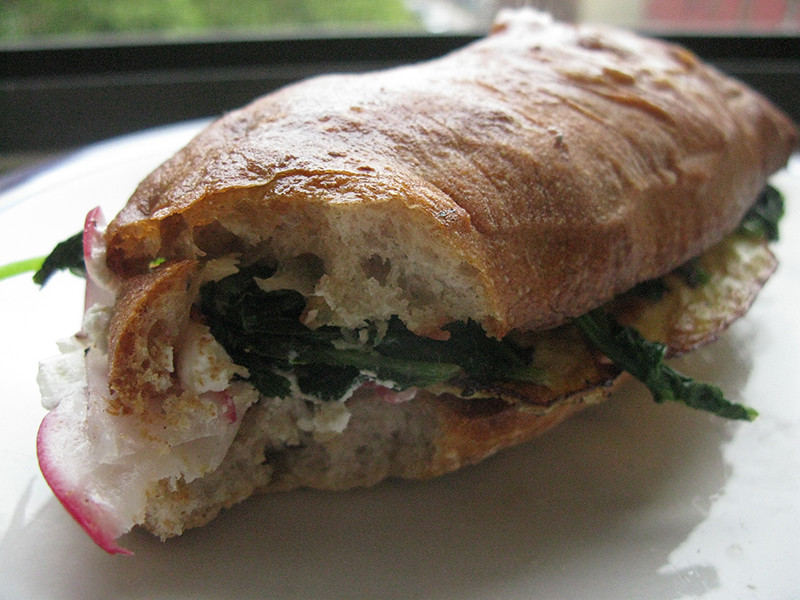
7. Assemble the sandwiches. Layer the thinly slice radishes on one half of the sandwich, and the lemony greens on the other. Pour a little of the left over vinegar and oil mixture over the sliced radishes. Spread a goat cheese over the radish slices, and top the greens with the eggs. Crack a little black pepper onto the cheese. Fold to close, and enjoy.
soon to be devoured sandwich
PS: If you are, in fact, playing along at home, or even just reading along, drop us a line. I'd love to hear how our recipes turn out back in your kitchen, and it's great to get feedback. Kthxbye.
Labels:
butter,
cheese,
eggs,
garlic,
gluten free,
goat cheese,
greens,
radishes,
sandwich
Monday, June 21, 2010
cream cheese frosted carrot cake/rice crispie treats
So back in the fall Jess and I went out to her uncle's house in the Southhampton. He has an amazing glass mansion on the beach with this dream kitchen stocked with just about every gadget imaginable. The past couple of years, he's been so kind as to let Jess bring her friends out for a weekend pre-memorial day or post-labor day. Last year, we came out in September to a surprisingly well stocked fridge with instructions to help ourselves to anything. This meant delicious frozen ravioli and sword fish, high quality Rao's tomato sauce, a tin of old fashioned banana pudding mix, slivered almonds and a tupperware full of homemade cream cheese frosting. Naturally, we took advantage of the latter two items by making a carrot cake, which we slightly altered by adding some chopped walnuts, which are generally one the best parts of any carrot cake.
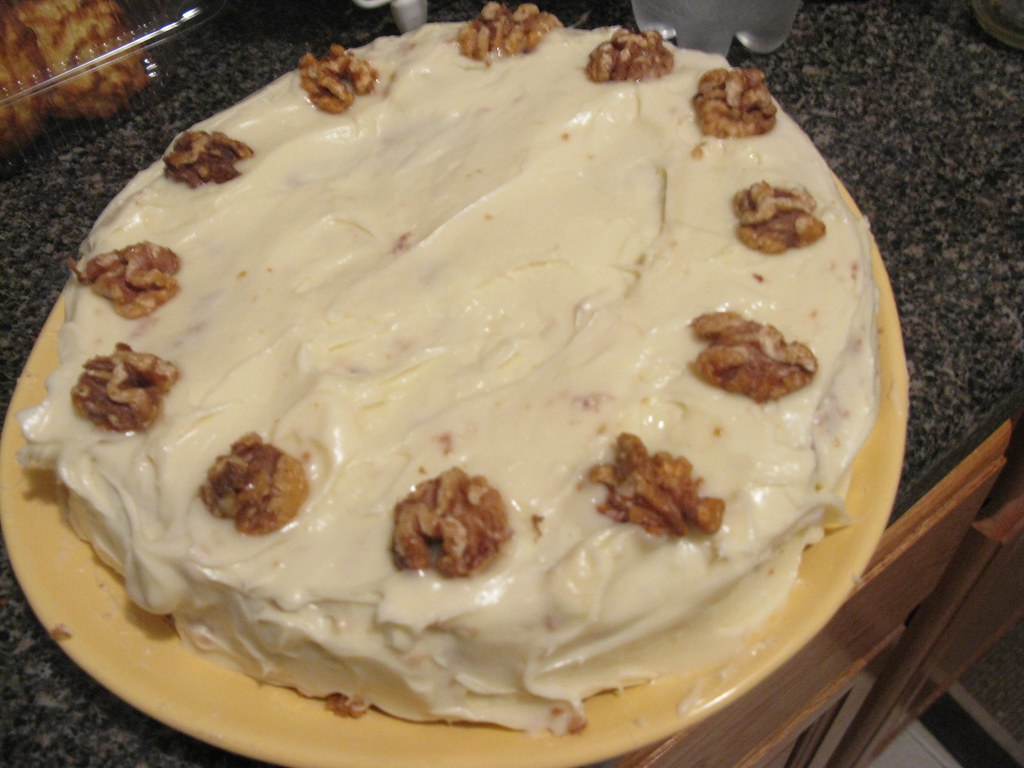
cream cheese frosting on an almond carrot cake
The recipe proved delicious, and I've had it stashed away to make again ever since. The perfect opportunity arose over Memorial Day Weekend, when Laura and I threw a little party for our friends at the apartment. I had cream cheese in the fridge, a big bag of walnuts from BJ's, some left over almonds from our lentil dish, a lemon or two, plus carrots and eggs from the food co-op, so this cake was calling out to me.
Somehow, things did not go as smoothly as I had planned. I suspect that Jess did most of the actually baking last time around I did mostly things like toasting the nuts and getting the eggs out of the fridge while I made salad and pasta and such. Also, the food processor and other high tech grinders and such in the Southhampton probably really sped up the process. In any event, I had no idea how labor-intensive this little bugger was. First you toast the nuts, then you chop the walnuts and grind up the almonds to make flour. Then you zest a lemon, shred the carrots, measure the dry ingredients and mix in the egg yolks. As if that weren't enough, you have to whip the egg whites, and then fold them into the batter in two batches. You might think that you could bake the cake and be done with at that point, but no, I had to make my own frosting too, creaming together a stick of butter and brick of cream cheese with vanilla and a reduced amount of powdered sugar! Luckily, that part was super easy and came out awesome.
The cake itself was pretty good, but it was a lot of trouble when I had a party starting in less than two hours. I was frosting the cake and picking out the fullest walnuts from the bag to candy and decorate the cake with while the guests were milling about. It was a little stressful. Good, but stressful!
This cake is probably best if you have a reasonable amount of counter space and a food processor, but for those of us less fortunate, there are other confectionery delights that can be made in a snap. Why yes, I am talking about rice cripsy treats, specifically this salted brown butter rice crispy recipe. As any child can tell you, rice crispy treats are the best. What savvy moms can probably tell you is that they are damn easy to make as well! Simply melt a stick of butter, let it get golden brown, then take it off the heat and stir in a package of marshmallows. Then you add a quarter teaspoon salt and six cups of rice crispies, stir it all together and then press it into a pan. That's all there is to it! So if a 20 step cake is a bit daunting, know that you can always fall back on a childhood favorite. Plus, I had almost half the cake left over and no rice crispy treats whatsoever!
Labels:
cake,
carrots,
cream cheese,
food co-op,
frosting,
lemon,
parties,
walnuts
Sunday, June 20, 2010
knife skills
So some time last year my Aunt Cathy suggested that I take a knife skills class. I've always been incredibly slow and awkward when it comes to cutting up vegetables, so I thought this was a great idea. Anything that will make me faster and more efficient in the kitchen is definitely worth looking into.
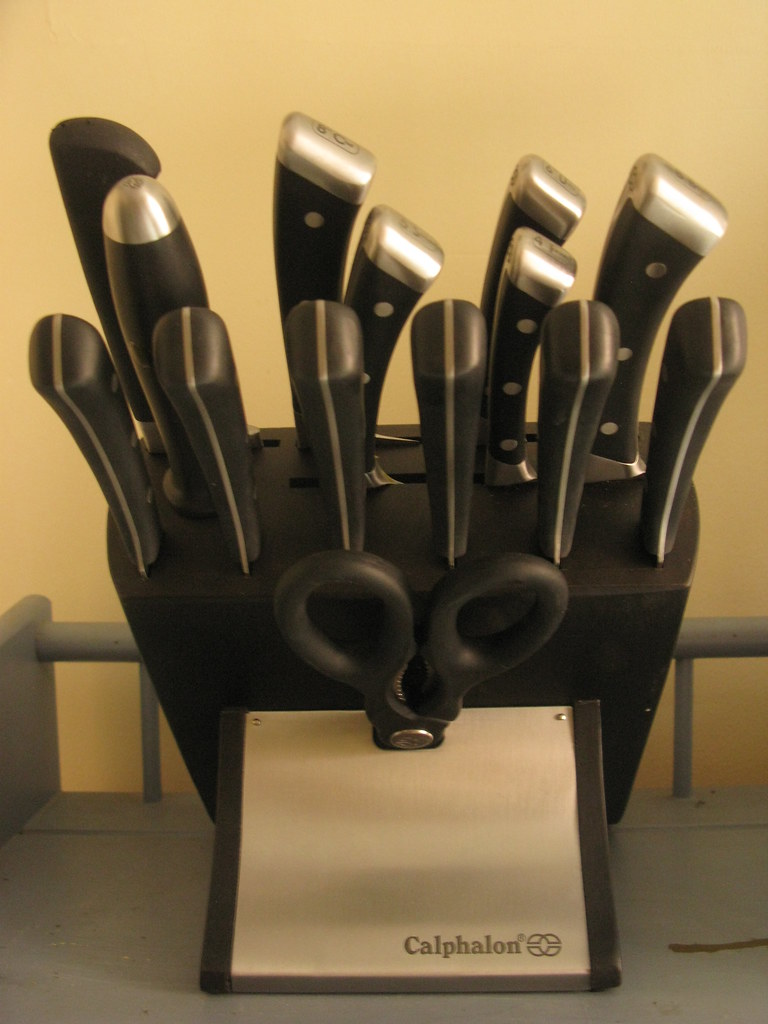
Come Christmas time, my parents presented me with a gift card good for $95 at The Institute of Culinary Education in the city, with instructions to take Knife Skills 1 with Norman Weinstein. In a case of great minds think alike, Nathan presented me with a hand drawn "I owe you one knife skills class," card. This later transformed into a handsome Calphalon knife block.
nate bought me these for christmas
I've been using the knives for a couple of months now, but I didn't get to take the knife skills class until last Monday. It was an interesting experience, since it immediately became apparent that I was doing pretty much everything imaginable wrong. The techniques we learned in the class make so much sense and are so much easier and less tiring than what I've done all my life. Assuming you are just as clueless with a blade as I was, I'm going to describe Weinstein's methods and include some key excerpts from the course packet.
First of all, you have to hone your knives every time you use them, and take them to a sharpener once or twice a year. To hone your knives, you want to use a steel that is at least two inches longer than your knife. Unfortunately, my steel is only 8 inches, same as my longest knife. Lame.
"Place a work towel on a flat, non-skid surface such as your kitchen counter or cutting board. Hold the steel at a 90 degree angle to the work surface, tip firmly held on the board. Heel and tip of the knife should from a 45 degree angle, with the heel and spine at the required angle (20 degrees) at the handle end of the steel. Using moderate pressure, draw the knife back and downwards to the bottom until you have pulled the tip off the steel near the bottom with a "follow through" motion. do not turn your wrist or the angle will change. Repeat the process on the other side of the steel. Proceed in this manner 3-4 times, using alternating strokes, keeping the required angle at all times."
The second thing we learned was that the bigger and heavier the knife we use, the less force we have to exert. The bigger knife will do the work for you, and will require less strokes to accomplish a given task. For someone who always uses a 3 inch paring knife, this was big news. Unfortunately, my knife block's biggest knife is 8 inches, and Weinstein swears by a 10 inch model. I will have to get one at some point, but for now I'll just make a point to use the chef's knife I have.
To hold the chef's knife, pinch the back of the blade between your thumb and forefinger, and curl the other three fingers under the handle. DO NOT grip the knife tightly, as this will cause tension in your arm and lead to pain in the shoulder and back, and will prevent you from cutting in a fluid motion. Use your other hand to hold whatever you're cutting with a light grip, lightly curving your fingers so that you present the flat segment of your fingers to the blade rather than your finger tips or knuckles.
When you're cutting, you should never be pressing down on food to cut it. Your knives should be sharp enough to slice your ingredients effortlessly. (In fact, the should be able to cut through a single sheet of paper effortlessly. Ha! I just spent 20 minutes sharpening all my knives and that is tall order!) Instead of pressing down, you want to move your knife forward and then bring it back in one constant swinging motion.
For items that are less than an inch high, Weinstein has devised a "low technique." You start with the tip of the knife on the board in front of whatever you're cutting, and glide the knife back towards you, lowering the blade as you go. You wind up with the whole back of the blade against the board, and you cut effortlessly. Then you kind of swing back and repeat. It's difficult to get the hang of at first, but it's an awesome feeling when you do.
For taller items, like a head of cabbage, you start with your knife on the item, with the tip an inch in front the far edge of it. You pull the knife back and it begins cutting the food, and then you lower the blade and let it glide down onto the board. You should use the full length of the knife to cut, and then swing it back forward to begin again. It's similar to the low technique, but a little trickier, I think. I kept raising my elbow up, which is wrong because it creates extra work.
"To get the best swing motion from the knife hand, stand back six to seven inches from the cutting board and have you waist parallel to the table, feet slightly spread (under shoulders). Stand too close to the edge and you feel cramped and a need to clamp your upper arm to your ribs, not a good thing to do when you are trying to achieve a relaxed, fluid, swinging motion." Most things are easier to cut when they are closer to the edge of the board, but I haven't quite figured out how to do that and not drop food on the floor.
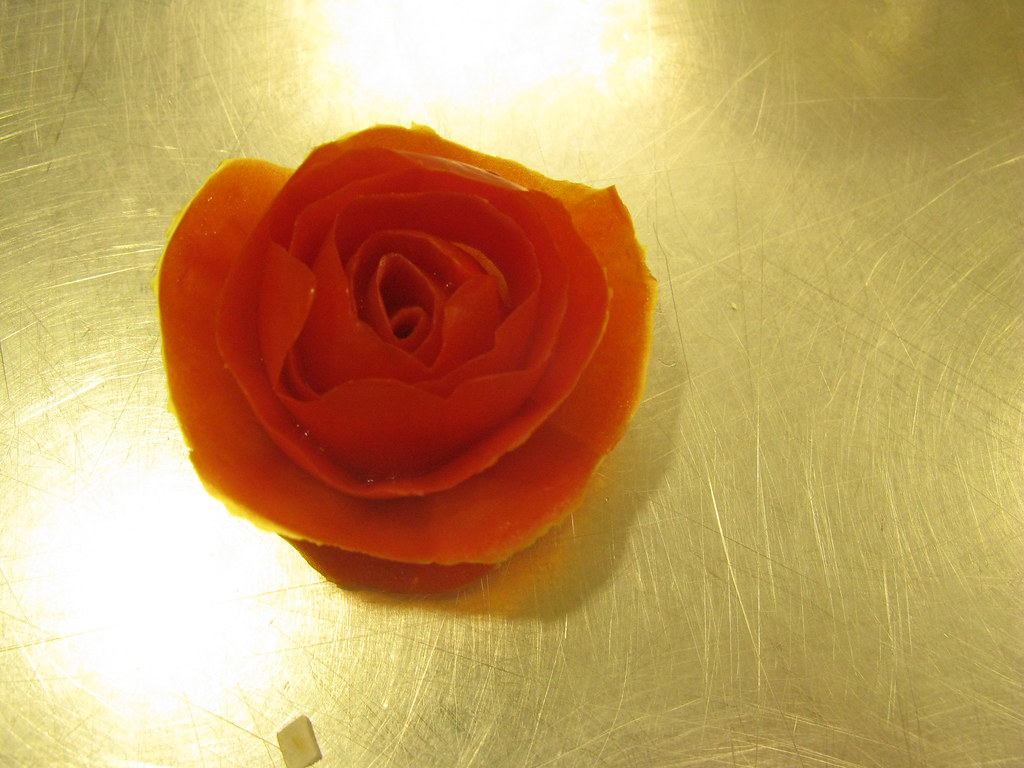
We also learned how to dice, to peel, to mince, and how to cut onions, bagels, garlic, herbs and peppers. All in all, I've learned a lot and I am excited to continue practicing these new techniques. And to make lovely tomato roses. I won't describe the method for those because it's just too easy and makes these pretty things much less impressive.
my tomato rosette secret
Thursday, June 17, 2010
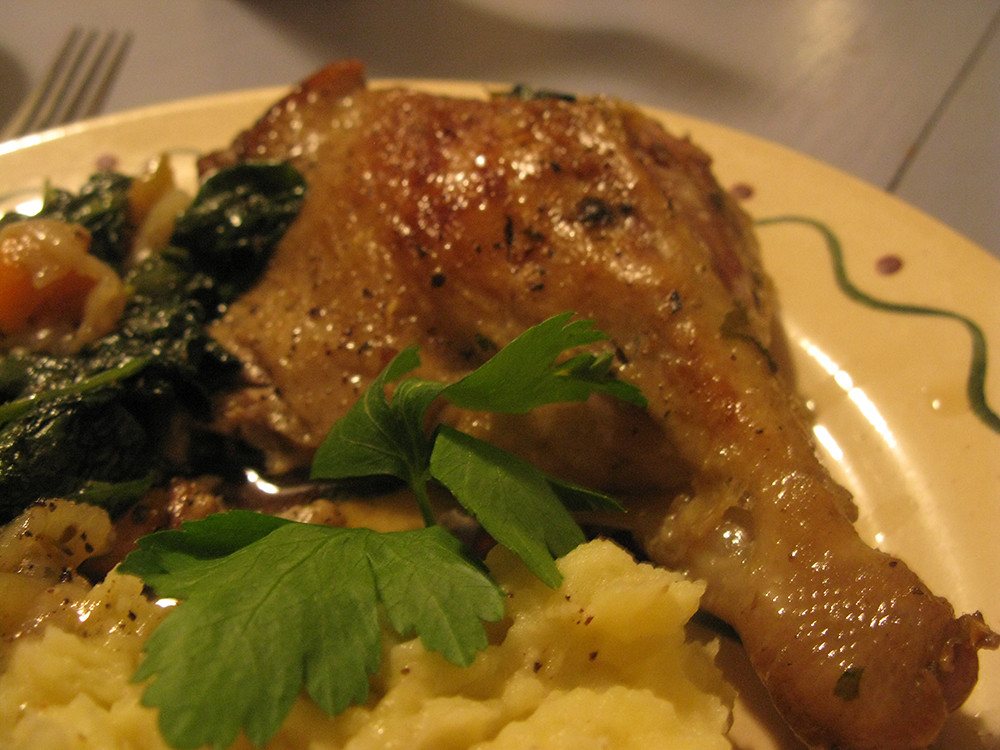
duck legs with spinach, carrots and mashed potatoes
So awhile ago Nathan and I went down to the Tompkin's Square Park Farmer's Market on a Sunday to "see what was fresh," as is so popular amongst the food blogging set. We picked up some beautiful duck legs, cute cipollini onions, some fresh spinach and little potatoes and made us some braised duck.
Now, duck is probably my favorite meat, and I know Nathan is pretty fond of it as well. We made an incredibly delicious roast duck for Christmas dinner at my parents' house this year, but this was our first attempt at an every day sort of duck dinner. Back in December, we made a typically complicated recipe from the epic Chez Panisse Menu Cookbook. This time around, we once again took a page out of Alice Waters' book, but we were less ambitious and looked to The Art of Simple Food and Chez Panisse Cookbook for our inspiration.
We trimmed the extra skin and fat off the legs, sliced it and fried that up first to render the fat. We tried eating the cracklings with salt and pepper, but they weren't as good as I thought they would be. Kind of burnt I guess. Meanwhile, we let the duck sit after we'd salted and peppered it. After an hour or so, we browned the legs in my big oven proof frying pan, pouring off the fat as it collected.
After the skin of the duck was a nice mahogany brown, we removed it from the pan and set the legs aside for a moment. We tossed a couple of diced food co-op carrots and some chopped celery into the pan and let that cook for awhile. Then we added the duck back in, skin side facing down, a bunch of the peeled cipollinis, and poured in some homemade chicken stock and a little white wine for the braising liquid. I am pretty sure we also added some lemon zest as per Alice's suggestion.
We put the pan in a 425° oven and covered it for a half hour. Then we flipped the duck and turned down the temperature to 325° for an hour to an hour and a half. At some point, and I don't remember when, we dumped off the braising liquid and let the fat rise to the top so we could skim it off. When the legs seemed thoroughly tender, I put the spinach and some parsley in the pan and let that wilt in the juices.
Unfortunately, I found that this dish, while flavorful and delicious, was just too greasy and oily. Even though we skimmed off as much duck fat as we could, it really clung to the whole dish. I was especially disappointed with how greasy the spinach got, even though we just added it the very end. Of course, it was duck with amazing onions and vegetables, so we didn't complain too much. I'm just not sure if braising is the best way to go with such a fatty animal.
not your typical meat and potatoes
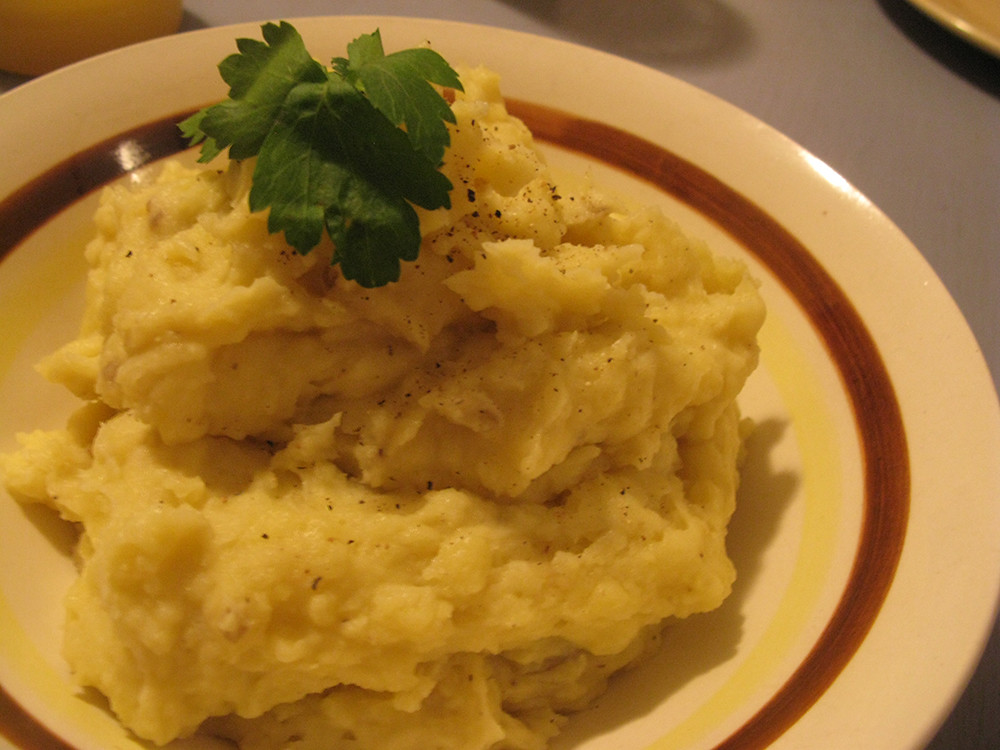
More successful were Alice's easy mashed potatoes. We chopped them up into medium sized pieces and boiled them about 15 minutes. After draining them, (reserving some of the water), I put them back in the pot and turned the heat back on to dry them out for a few minutes. That's a trick Aunt Cathy taught me. Then we took them out of the pot and poured in a little milk and potato water, which we also heated. Then we added back the potatoes and some butter and whipped it all together with the electric mixer. Delicious! I ask you: how are mashed potatoes so good?
easy mashed potatoes
Labels:
carrots,
duck,
food co-op,
gluten free,
potatoes,
spinach
top chef: original flavor AKA we're not cooking these unproven shmoes' food
Let me just start out by saying that there is no new recipe today, and if you're not a fan of Top Chef, this post won't be of much interest to you. You also might not want to read ahead if you missed the season premiere and don't want to be spoiled. With that much said...
Nathan and I have decided that we aren't going to do a blog feature for the new season of Top Chef. I liked making our Master Meals, but to be perfectly honest, we often found it difficult to find many recipes from the cheftestants, and I think the small selection left us with some less than fabulous dinners. I definitely think that our overall success rate with the Master Meals was lower than for the regular dinners we make. Moving forward, we're going to cook whatever strikes our collective fancy. If that relates to Top Chef, cool, we'll make a note of it, but we're certainly not going to make a point of it.
We did however, decide to make a little friendly competition of the new season. Based solely on the opening sequences, pre Quickfire, Nathan, Pete and I each placed our bets one cheftestant to win. The loser has to buy dinner, and the cost of the dinner is proportional to how well the winner's chef does compared to how poorly the loser's chef performs.
Initially, we were going to pick immediately after the credits rolled, but they went by in a blur of names and faces, so we decided to let the competitors introduce themselves and that we'd choose right before the first challenge began. I first wanted to go with Angelo based on the opening, because he reminded me of season five's Fabio, the most likable little Italian man. Then he opened his mouth and reminded me instead of that jerk from Flipping Out. Part of me is glad I don't have cable at my apartment because that means I can't get bored and watch the crap that makes up the rest of Bravo's lineup. Anyway, since I very quickly went from thinking Angelo was cute to thinking he was repulsive and cocky, I switched to Kelly from Colorado. This was probably a mistake, because Angelo ended up edging out Kenny for both the Quickfire and Elimination challenge wins. Winning the first challenge almost always guarantees you a spot in the finals. Season three's Tre was controversially axed after a Restaurant Wars redo, but Kevin came in third, Stephan came in second, and Stephanie, Ilan and Harold all took home the title. If I had stuck with Angelo, I probably could have ridden his coattails to a very nice dinner indeed.
That being said, I did better than Nathan at the very least. Kelly's dish garnered compliments from the judges during the show, and Gail Simmons called it "another standout, even if she was not the strongest in her group," on her blog. Pete's pick, 51 year old culinary instructor Lynne, skated through without much notice, but Boyfriend's horse, John of the scary dreadlocks, struggled the whole episode through. I knew he was in trouble the moment he pulled something out of the freezer in Whole Foods and announced he had never used it before. Frozen, pre-made AND you've never used it before? Three strikes you're out, John. On top of that, he foolishly attempted a dessert, the usual kiss of Top Chef death. Needless to say, he went home, even over fake Kate Hudson's grainy chicken liver mousse. Sorry Nathan... now where do you want to take us to dinner?
Wednesday, June 16, 2010
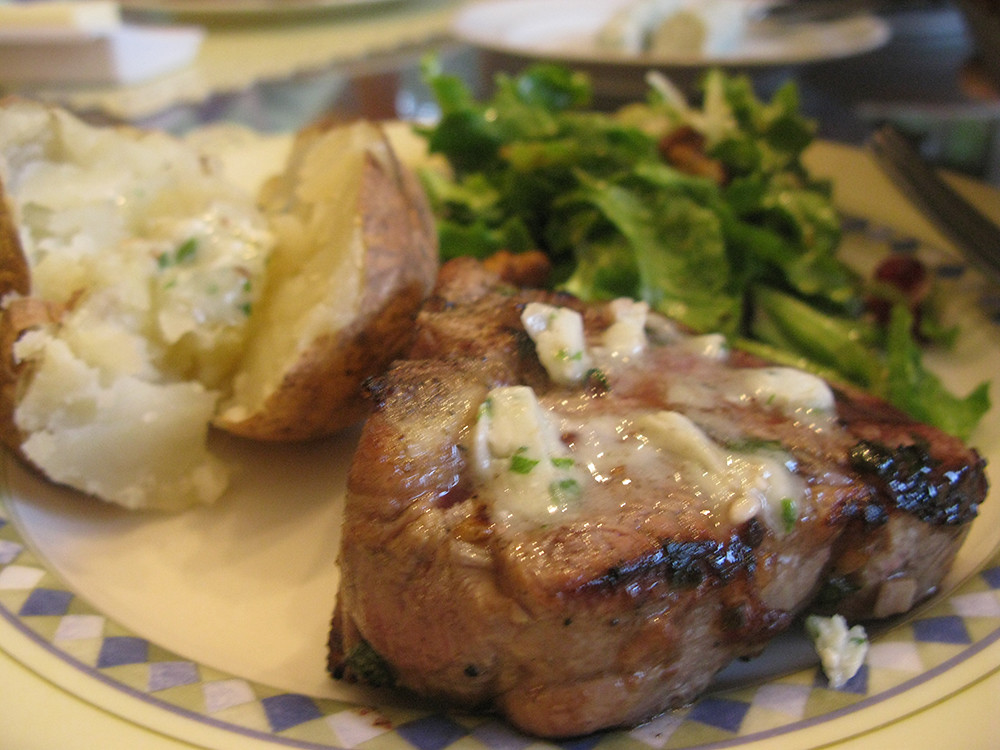
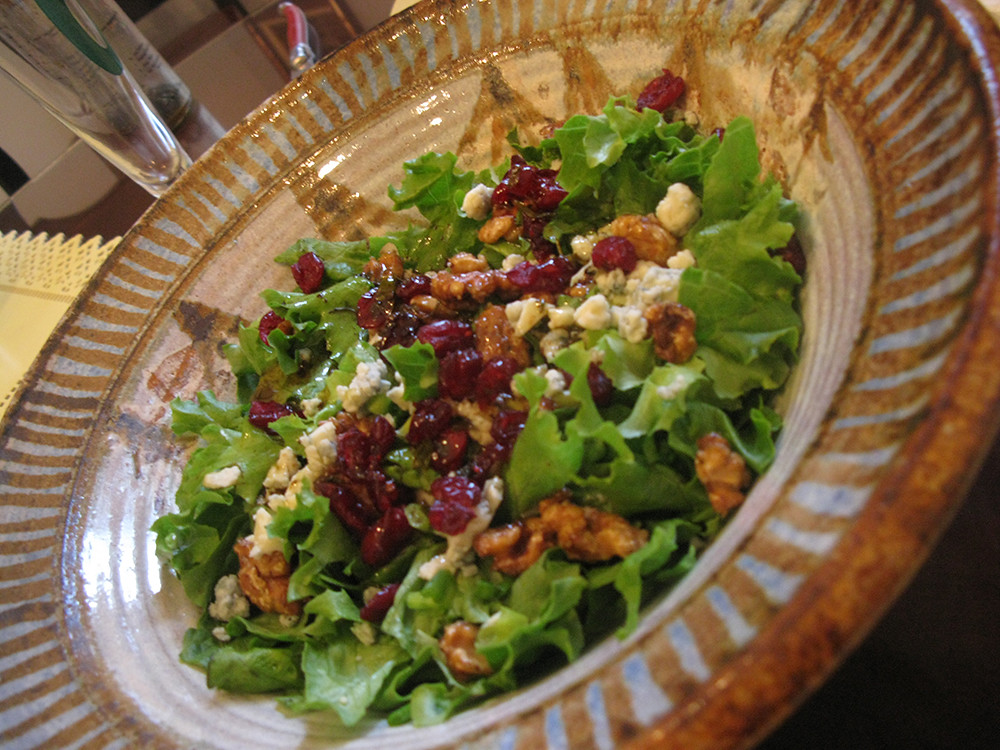
grilled lamb chops with gorgonzola butter/salad with dried cranberries and candied walnuts
My mom and I prepared this dinner a couple of weeks ago in honor of my dad's birthday. The recipe came together rather serendipitously after we shopped for the ingredients. My dad had asked for lamb, so that was all we had to go on initially. We picked some beautiful little chops at King Kullen, and talked out the rest of the meal on our way through the store. We decided on baked potatoes and a nice red leaf lettuce salad with dried cranberries and walnuts. On our way past the cheese section, I also decided to pick up some gorgonzola, which dad loves. So do I, for that matter.
Anyway, upon our return home, we decided to look online for tips on grilling the lamb. I figured I'd just find a simple marinade or something, but I found so much more when I quickly turned up this recipe for grilled lamb chops with gorgonzola butter. Since we had just bought the cheese, everything else just fell into place. Don't you just love that?
gorgonzola buttered lamb chops and potatoes
We did marinate the lamb for an hour or two with some olive oil, minced shallots and garlic, and salt and pepper. The recipe also called for rosemary, which definitely would have been nice, but my mom has some strange aversion to it so we left that out.
That was the boring part. The fun part was sauteing shallots and garlic in butter, and beating them together with a stick of butter, gorgonzola cheese, minced parsley, a healthy amount of cracked black pepper and a little olive oil and lemon juice. After this was one gooey mass, I rolled it into a log, covered it in plastic wrap, and stuck it in the freezer to firm up before dinner.
My dad took over grilling duties, and cooked the lamb to perfection. Each chop was topped with a healthy schmear of the gorgonzola mixture, which melted like, well, butter. It was both delicate and decadent. We also slathered it on our baked potatoes. Delicious, but definitely too rich for regular consumption. It was without a doubt a birthday type of meal.
Like the lamb, the salad was easy and delicious. I tore up some red leaf lettuce, crumbled up some of the gorgonzola, and tossed in a hefty handful of craisins. The only even slightly tricky part was preparing the walnuts, which I decided, in a fit of inspiration, to candy. According to the recipe I used, all you have to do is heat some sugar in a saucepan, add walnuts as it melts, and stir to coat the nuts in sugar. It worked nicely, but I was fairly stingy in the amount of sugar I used since I didn't want a whole lot of extra melty sugar and nothing to use it on. I probably could have done with a spoonful more and been better for it. I think we just used a balsamic vinegrette as a dressing, but regardless this salad was fantastic. So light and fresh and fruity!
a fabulous salad with pungent cheese, crunchy nuts and delicious fruit!
It was all in all a very nice dinner, although it was lucky Nathan was not around for it. First of all, he is crazy and thinks neither fruit nor nuts have any place in salads. Also, we had just enough chops for the four of us, and there weren't any more at the store. Boyfriend would have had to settle for a cheaper, inferior cut of lamb, haha.
Labels:
butter,
candied,
craisins,
gluten free,
gorgonzola,
lamb,
salad,
walnuts
Tuesday, June 15, 2010
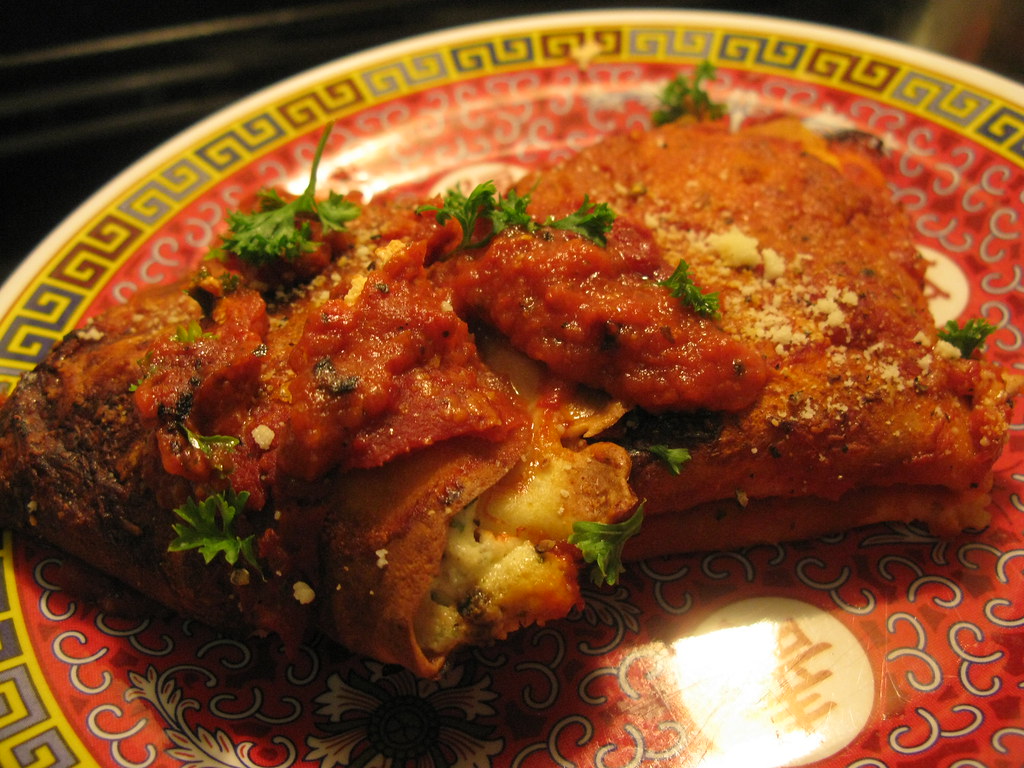
master meals, week 8: tony mantuono's crespelle with ricotta and marinara
crespelle with ricotta and marinara sauce
So, Top Chef Masters ended its season last week, with Ethiopean born Swedish chef Marcus Samuelsson narrowly edging out Rick Moonen and Susur Lee. If you've been reading along, you may be thinking "hmm... this Master Meals series thingie didn't feature two of those three finalists." You'd be right, and I'm afraid that's not going to change. We kind of fell off the bandwagon the final two weeks of the season, partly because Marcus and Susur's food is a bit removed from our culinary comfort zones, and partially because I had a Yelp event with free food one Wednesday and that killed our momentum. So, we skipped cooking entirely the second to last week, and then last Wednesday we made chicken marsala instead of a master meal (we'll eventually get around to blogging about that too, I'm sure).
For now, I'm going to talk about this awesome dish by Tony Mantuono, Obama's favorite chef. Crespelle are really fun to make, like little crepes, only not quite as thin and therefore less delicate and difficult to perfect. The batter was particularly easy to prepare. Simply combine the wet ingredients (two eggs and three quarters cup milk) with the dry (three quarters cup flour and a half teaspoon salt), and then stir in a tablespoon of melted butter. Aside from the instructions to cover the crespelle batter and let it sit in the fridge for an hour, this recipe was really quick to prepare as well.
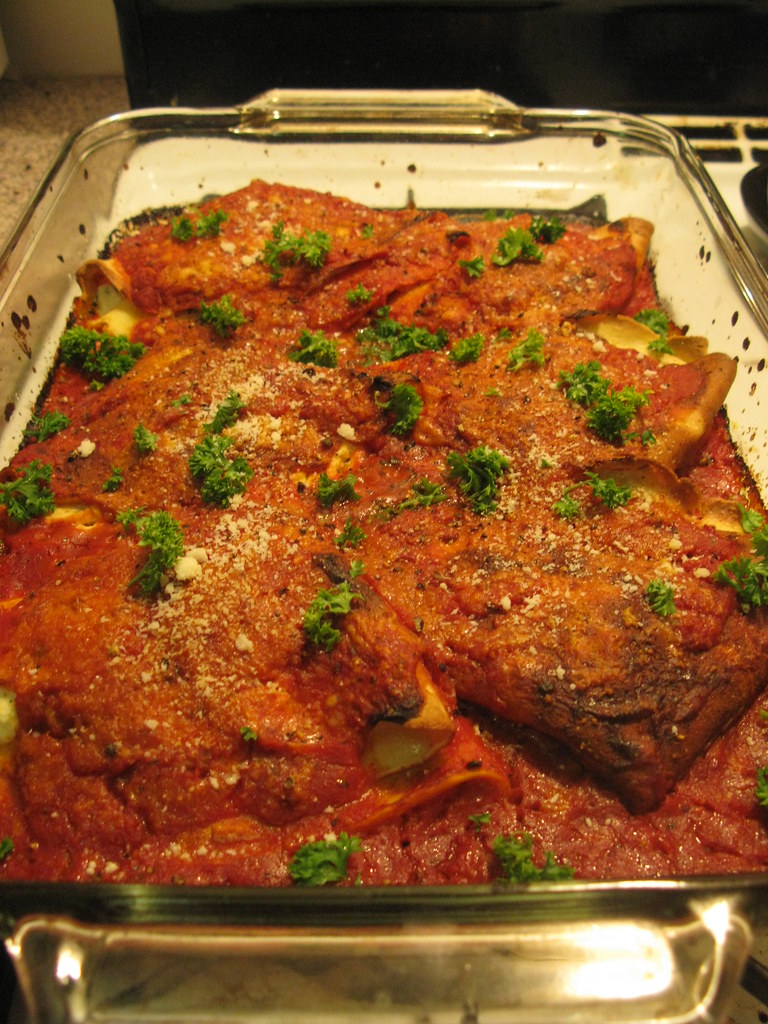
I fried the crespelle for three minutes each in a frying pan rubbed with an olive oil soaked paper towel. I wound up with only six of them, because I didn't have a quarter cup with which to measure the batter. They are like thin pancakes. Then Nathan and I spread each crespelle with a mix of ricotta, parmesan, parsley and cracked black peppper and folded them into quarters. Nate had made up some tasty tomato sauce, so we spread half of that in the bottom of our baking pan, and put the crespelles on top. Another layer of sauce, some parsley and extra grated cheese, and we simply popped the pan into the oven for 25 minutes.
oven baked crespelle
Nathan will disagree with me but I think this dish blows a simple lasagna, (which will also be making a blog appearance one of these days), out of the water. It's like an easy manicotti. So good!
getting ready to plate
Labels:
italian,
master meals,
pancakes,
ricotta,
tomato sauce,
tony mantuono,
top chef
Thursday, June 10, 2010
my csa!
Today I am so excited. Would you like to know why? It's because I picked up my new CSA for the first time, and this is what I got:
the season's first food co-op share
This is a ridiculous haul for the first pick up of the season, and I actually left behind a beautiful head of romaine lettuce because there were just too many greens! I am just blown away by this spread. Zucchini, summer squash, Boston lettuce, mixed lettuce, a cousin of bok choi, parsley, cilantro, turnips, spinach, mixed lettuce, that big woody kind of kale or whatever, a carton of sugar snap peas.... It's ridiculous. Take another look:
squash, turnips, tatsoi (fake bok choi), and that awful kale
This is my second year in a CSA, or community sponsored agriculture. I go to the food co-op pick up site once a week and pick up that week's share of locally grown organic vegetables and fruit. This year I'm in the Central Harlem CSA at 135th and Adam Clayton Powell. I know it's still early, but I have a good feeling that it's going to be better than the old Norwood CSA Laura and I were in last year. I checked back and our first share there consisted of 4 garlic scapes, 6 scallions, .75 lb mixed braising greens, 6 turnips, 6 of the tiniest radishes I've ever seen and 3 bok choi. Now, the women who were running the distribution tonight were the first to say that this was an unheard of bounty for the the second week of June, but that doesn't make me any less impressed with this new CSA.
Compared to Norwood's, the produce was impeccably clean and large. I thought that food co-ops meant runty veggies covered with dirt. I mean, that's not a problem, but apparently, if you shell out a bit more cash, you'll get prettier produce. The veggie share at Norwood was only $315, but down in Manhattan the lowest available price was $410, and members are encouraged to pay $540 or $625 if they can afford it. I wasn't pleased about the price hike at first, but the location is way more convenient, and now that I've seen the produce, I'm diggin' it.
I don't know what I'll be cooking with my new bounty, but I happen to have tomorrow off so I'm definitely going to spend some time in the kitchen. I am so excited for this season!
Wednesday, June 9, 2010
ghetto black bean soup
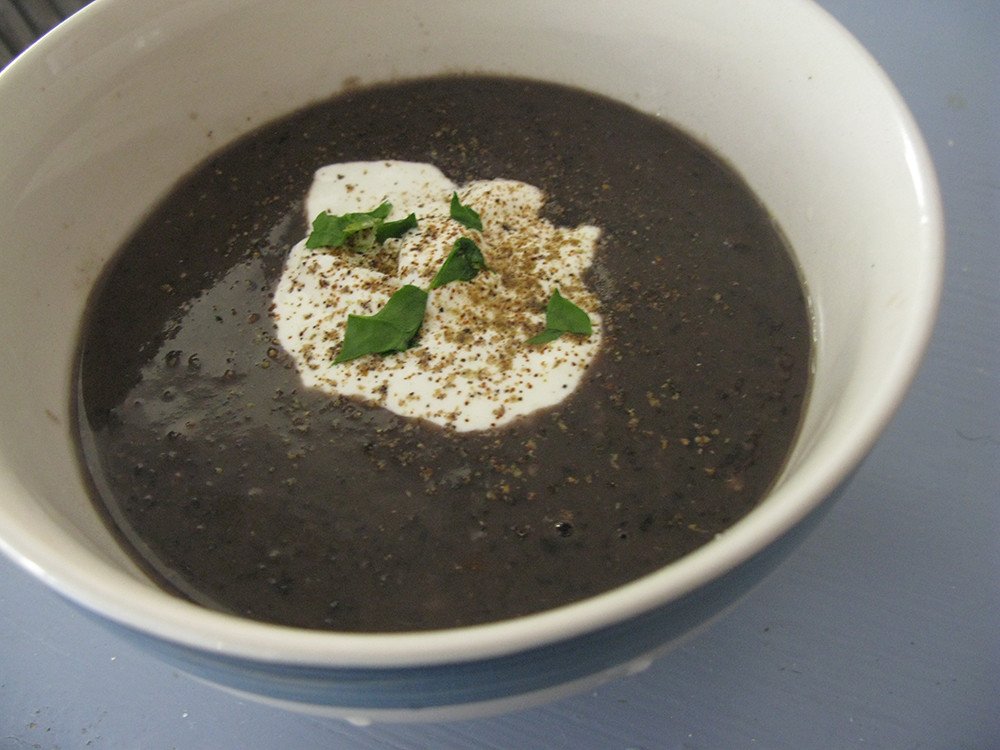
black bean soup with cumin crema
I made this a couple of Thursdays ago while I was watching an evening's worth of NBC comedies. I was kind of cranky because I think some plan for the night had fallen through, leaving me with nothing to do and nothing in the house to make for dinner. As I sat there vegging out and gradually growing hungrier and hungrier, I decided it was time to do something with some of those black beans from the food co-op that I had sitting in the pantry. I threw a large handful of them in a pot with some water without much thought, and eventually wound up with the soup pictured above.
This tasted quite tasty considering I was pretty much winging it. I have no idea how long I cooked this for, as I kind of started without realizing what I was doing. I improvised a lot. I didn't have any ham or peppers, like my mother would have used, or any chilies, red onion or lime, like this recipe suggested. However, beans are of themselves pretty rich and hearty, so I guess that the bulk of the flavor is already there, and all the add ins are less essential.
Basically, what happened was that I had the beans boiling away, and I kept adding more water, and then after awhile I added a cup or two of my homemade stock. Then I sauteed up some yellow onion with salt and pepper and a healthy sprinkling of cumin, and tossed that in the pot as well. I cooked this all on a really high boil because I was hungry and didn't want to wait a million years for dinner. In lieu of the ham, I diced a slice and a half of bacon, (a terrible brand to boot), and threw it in the frying pan. Once it had crisped up I added it into the soup with the pan drippings. I checked the beans every once in a while, and when I decided they were soft enough/I was too hungry to wait any longer, I went to town with the immersion blender. If you cook this the proper amount of time, blenders are unnecessary, but I was already taking a lot of liberties with the dish, so I decided to expedite my dinner.
The one ingredient I strangely did have was cumin seeds, which I toasted in a frying pan, ground up as best I could with my muddler, and mixed into some sour cream. This "crema" is a Bobby Flay recipe, and it probably would have been delicious had my sour cream not somehow frozen in the back of the fridge. In case you were wondering, it does not defrost well. At all. However, you could tell this was good.
All in all, the soup came out way better than I could have reasonably expected. I would have topped it with a little fresh cilantro, but I didn't have any. I needed something green for the photograph though... Spinach. I tore up some spinach. Like I said, ghetto black bean soup. Good, but ghetto. Will definitely have to try making this again properly, because it's one of my favorite soups, and mom has a GREAT recipe for it.
Labels:
bacon,
black beans,
bobby flay,
cumin,
food co-op,
gluten free,
mexican,
soup
Sunday, June 6, 2010
master meals, week 7: jonathan waxman's steak tartare and potatoes with melted raclette
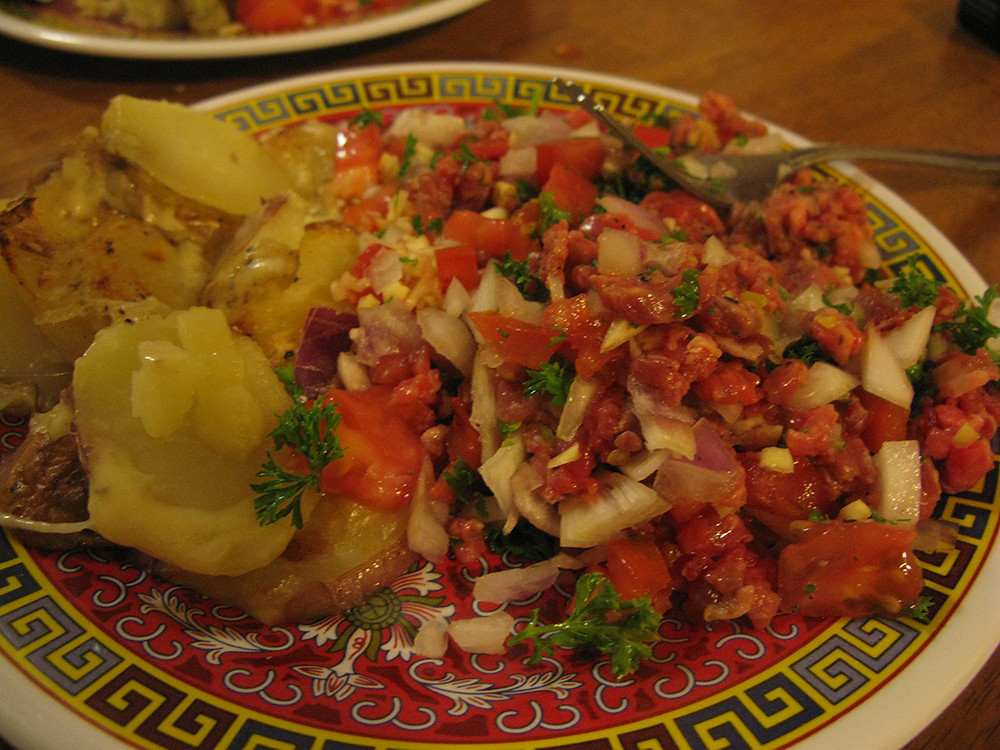
waxman's tartare and potatoes
We've fallen a bit behind on our Master Meals series. We made this quite awhile ago, after loading and reloading the google book copy of A Great American Cook until we found a Jonathan Waxman recipe that we both liked. Nathan is crazy about steak tartare, and I was willing to give it a shot.
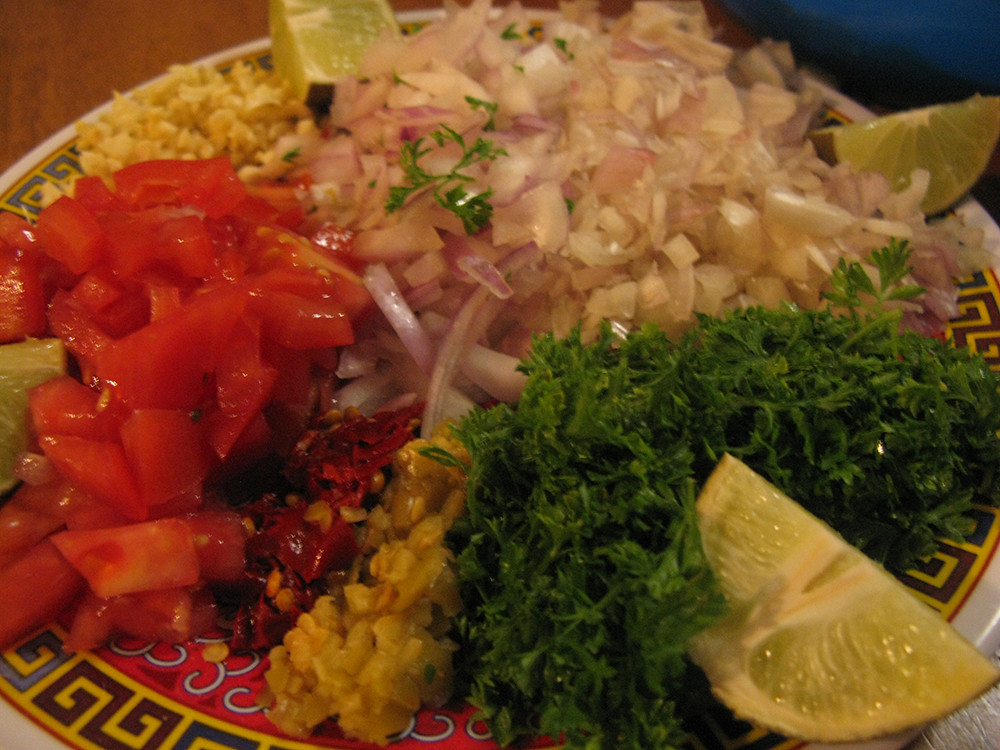
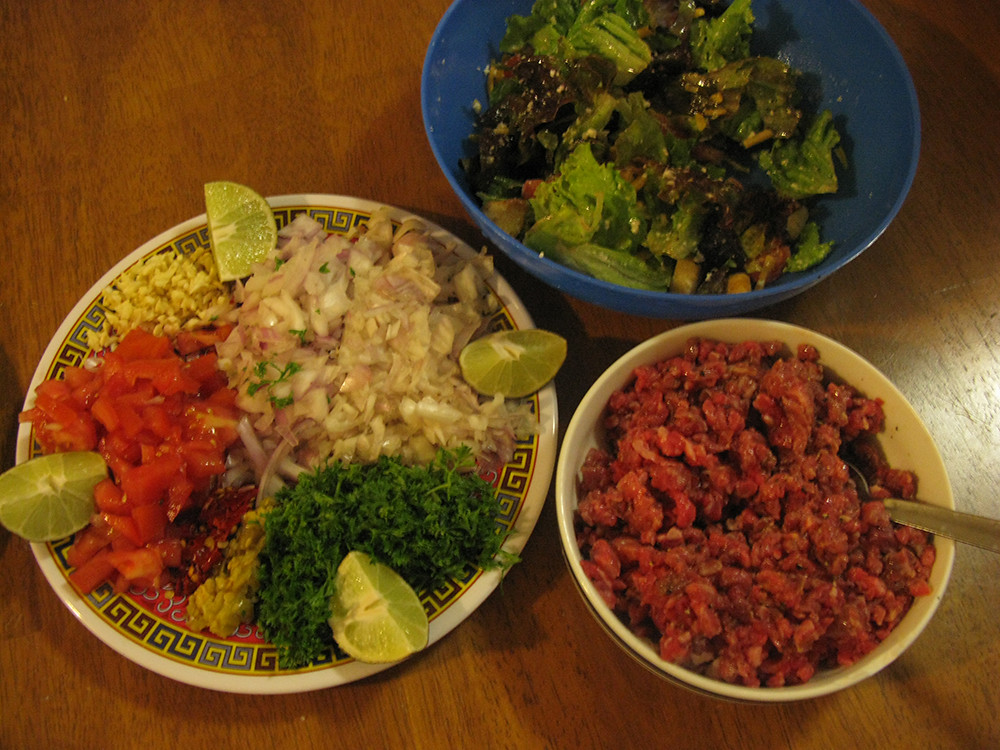
As it required no cooking, the tartare was pretty easy to make. It did, however require a whole lot of chopping. First, the meat, which I sliced into ⅛ inch strips and attempted to dice. Then we quartered a lime and chopped up half a red onion, a couple of shallots, 4 cloves of garlic, a jalapeno chile, a serrano chile, a tomato and a half cup of parsley. Like I said, a lot of chopping. Then we mixed the meat with salt, pepper, a few shakes of tabasco sauce and the juice of a lemon. The other ingredients we piled on a plate, and added them in as we saw fit at the table.
tartare mix-ins
Somehow, this didn't quite come together. It wasn't bad, but I didn't enjoy it all that much either. I think that the steak wasn't chopped small enough. I did the best I could with a knife, but I think having it coarsely ground would have worked better. Nathan also thinks we should have mixed in some egg yolk. That probably would have been good. The biggest problem, in my opinion, is evident in the picture below. You can see that the pile of onions and shallots and such was almost as big as the pile of meat, and I didn't even do the full three recommended shallots. It was pretty much all we could taste after we mixed it all together, and I kept on tasting it all night through to the next day's lunch. Decidedly unpleasant.
a salad, tartare and all the fixins
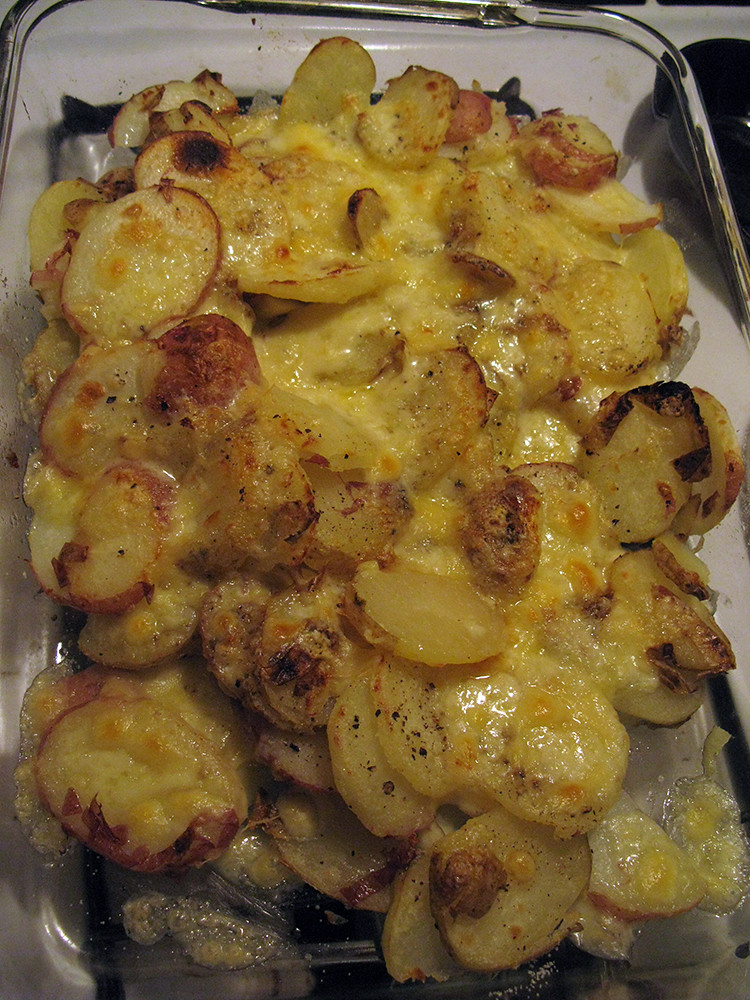
The potatoes, on the other hand, were great. We boiled them for 20 minutes, and then sliced them real thin. After tossing them olive oil and salt and pepper, we crisped them under the broiler with half a pound of shredded raclette cheese and cooked until it got nice and bubbly, which only took two or three minutes. Raclette tastes pretty nasty cold, but it melts into total deliciousness. I would definitely make potatoes like this again, and I'd love to find another raclette recipe.
raclette roasted potatoes
Labels:
cheese,
gluten free,
jonathan waxman,
master meals,
potatoes,
steak,
top chef
Saturday, June 5, 2010
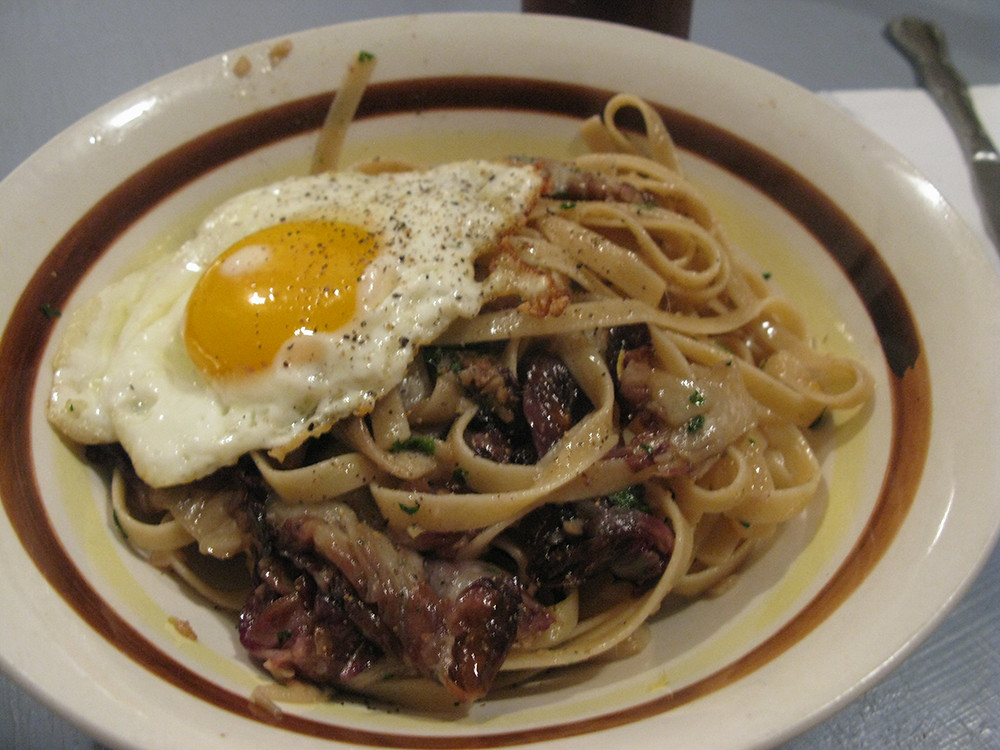
photos of pasta with anchovy sauce, wilted radicchio and an olive oil fried egg
Remember when we blogged about Nancy Silverton's pasta with anchovy sauce, wilted radicchio and an olive oil fried egg? No? Well take a look back, because we made it again and now there are pictures!
creamy polenta with sausage and parmesan
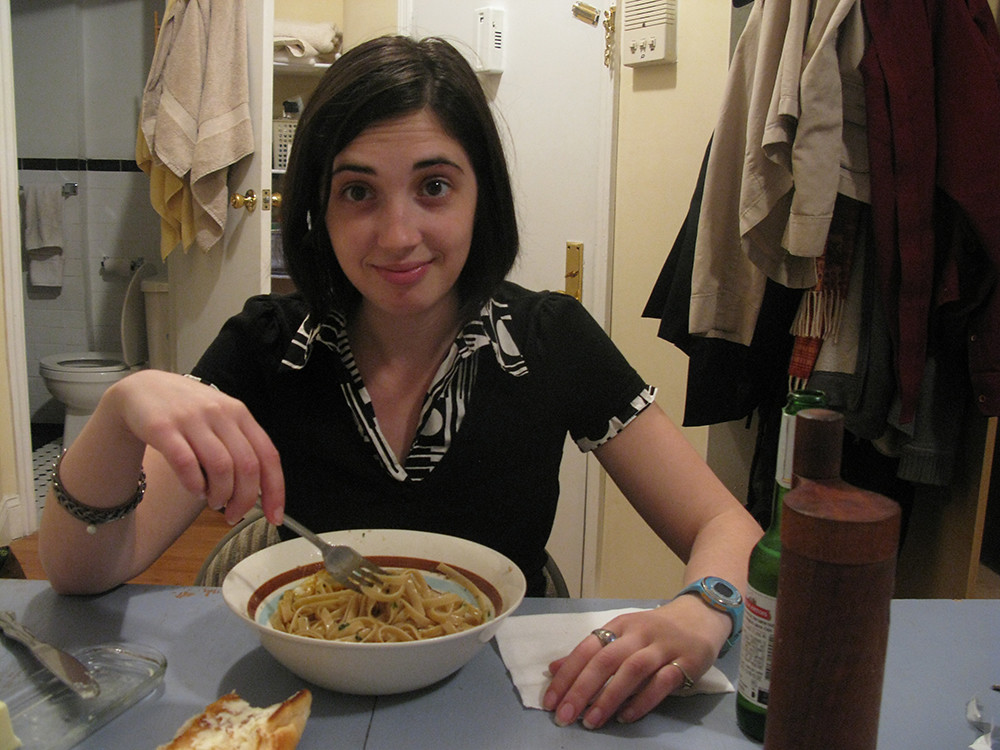
There's the pasta. It was awesome. And here is me eating it, even though I always get annoyed when Nathan photographs me during dinner. It's never flattering, and this is no exception.
I didn't realize what a lovely (read: unfortunate) view into the bathroom there is from my dinner table.
Anyway, you guys should make this. You will love it!
Labels:
anchovies,
bagna cauda,
gluten free,
italian,
nancy silverton,
pasta,
radicchio
Thursday, June 3, 2010
fancy carbonara
A traditional carbonara is made with spaghetti, eggs, pecorino romano cheese, guanciale and cracked black pepper. Of course, you are probably used to a carbonara with bacon or pancetta, since guanciale, or cured pork cheek, is hard to find outside of Italy, except at specialty stores. You also might expect to find some garlic or parsley or maybe even onions thrown in there, and you're probably used to a carbonara sauce thickened with cream or half and half. You might not even think twice about using parmesan in lieu of romano (although having recently attempted such a substitution for the first time, I urge you not to). Although your conception of carbonara might deviate from the original dish first served in Rome, you'd expect most people to agree that both feature the same flavors and textures, and that such variations or adaptations are true to the spirit, if not the letter of the culinary law.
I'd be right there with you, had I not recently discovered that there is a small but vocal community of carbonara purists out there, trolling the web in order to find and attack the authors of so-called "bastardized" carbonara recipes. Edward Schneider of The New York Times became one such victim when he blogged about his attempt to recreate at home the carbonara dish he had been served by Joël Robuchon at his restaurant in Monte Carlo.
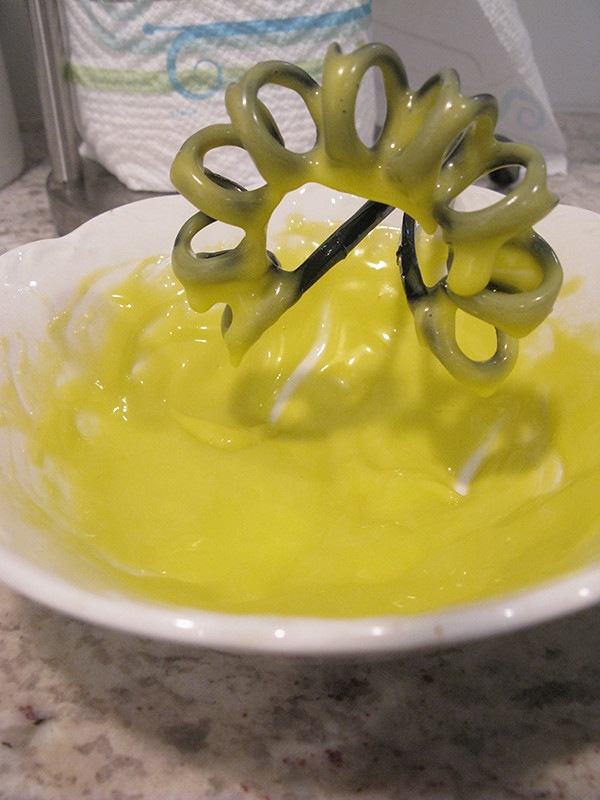
This carbonara uses small bite-sized pasta such as acini di pepe, although we settled for orzo. The pasta is served with crispy strips of bacon, cracked black pepper and a rich creamy sauce of caramelized shallots, parmesan cheese and heavy cream. Schneider suggests slow cooking an egg for 45 minutes at 145 degrees and cracking one into each serving, but when we tried to fudge this, we wound up with hardboiled eggs. So we had egg salad for the next day's lunch and just put a raw egg into each bowl of hot pasta and then stirred it all together and ate our soupy carbonara with a spoon.
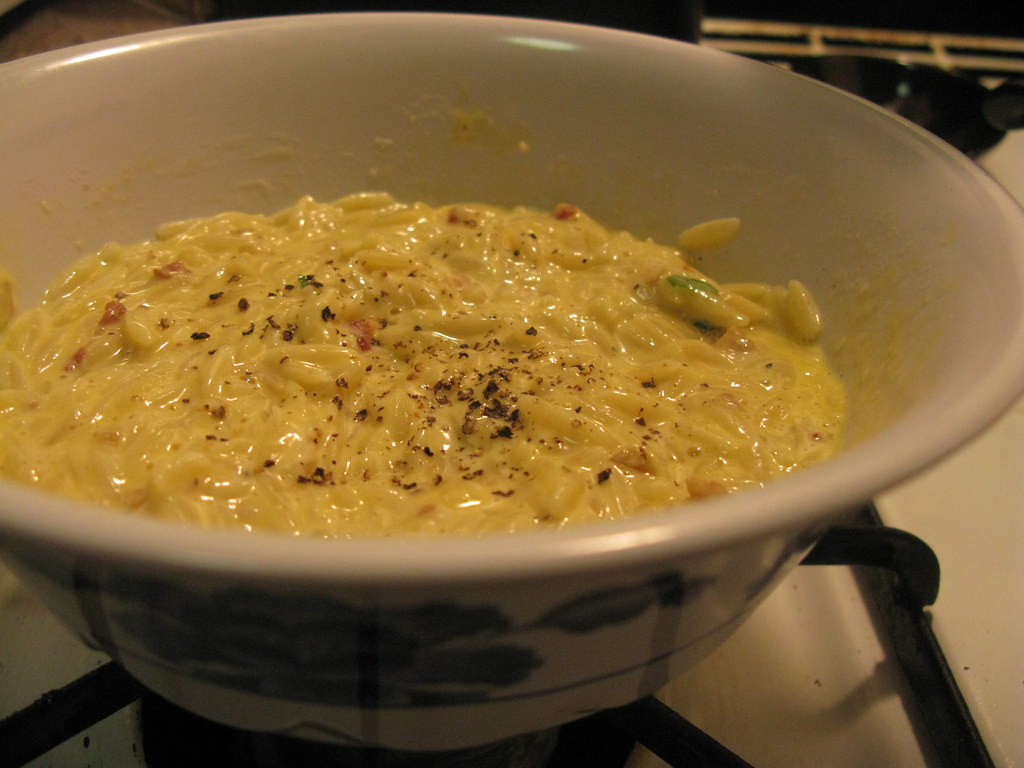
orzo carbonara
As amazing as that dish sounds, folks immediately went to town in the comments, belittling Schneider for calling such a dish a carbonara, and going so far as to demand a correction from the Times and less sloppy and careless global reporting. It was all pretty ridiculous. (Bonus points if you can pick out Boyfriend's inflammatory comment aimed at putting uppity carbonara purists in their rightful place.)
Robuchon is a masterful French chef. He was actually voted the chef of the CENTURY, so he's got nothing to prove, and I'm sure he's well aware of the "true" recipe for carbonara. That being said, the chef of the century is not going to serve the traditional carbonara as perfected by Roman peasants. He's going to take that tried and true recipe and play around with it, tweaking the ingredients and methods in order to create something new and high end that both pays homage to and is evocative of the original dish. Great chefs don't replicate, they create.
Now, I am sure that "real" carbonara is fucking fantastic. I'd love to make it some day. Perhaps I'll see the error of my ways and never again add cream or garlic or parsley or bacon. However, I'm pretty sure I'm always going to think the carbonara I grew up with is delicious— because it is, bastardization or not! And so was Schneider/Robuchon's!
Basically, the way I feel is that if someone thinks that carbonara has cream in it, that doesn't make them an idiot and that doesn't even make them wrong. Their understanding of the dish is simply filtered through an American lens. For better or for worse, cream and bacon have become part of the dish's identity, and people can and should call pasta with bacon and a cream/egg/cheese sauce carbonara. That's cultural evolution for you.
Our enjoyment of food is deeply tied to memory and nostalgia, so I can understand being attached to a particular recipe. For instance, I doubt you'd be able to convince me there's a better way to make pesto. However, I'm hardly about to attack someone if they have a different idea about how to prepare it. What is the kitchen, if not a place to experiment with taste and smell and flavor? And as Schneider points out, the flavors of carbonara "seem to lend themselves to being taken apart and put back together again." Why not change things up up a bit?
Recipes aren't written in stone, and each person is going to have their own tastes and opinions. It's subjective. In any dish there is always room for change, and dare I say it, maybe even for improvement? To be too attached to any one recipe is just close-minded and irrational. Don't let your culinary creativity be stifled, and don't worry if stodgy purists think you're calling your dish the wrong thing! Cook and eat what you love, whatever you call it.
If, by any chance, you'd like to read more about the real carbonara, one particularly obnoxious fellow has written a minor epic detailing the reasons why you must never, under any circumstances, deviate from the tried and true Roman original. There's also this less pompous and self important piece on traditional carbonara technique and an accompanying recipe from Saveur, although it uses parmesan rather than romano. I'm fascinated by the thought of a silkily creamy sauce made only from eggs and cheese, so don't be surprised if I blog a more traditional version of this dish sometime soon.
Finally, let me just say that however you may change, adapt or "bastardize" any of the meals we describe here on garlicus maximus, I wish you the best of luck in your kitchen. May all that you eat be delicious!
Labels:
bacon,
carbonara,
edward schneider,
eggs,
gluten free,
italian,
joel robuchon
Tuesday, June 1, 2010
spinach pancakes and "fried" chicken wings
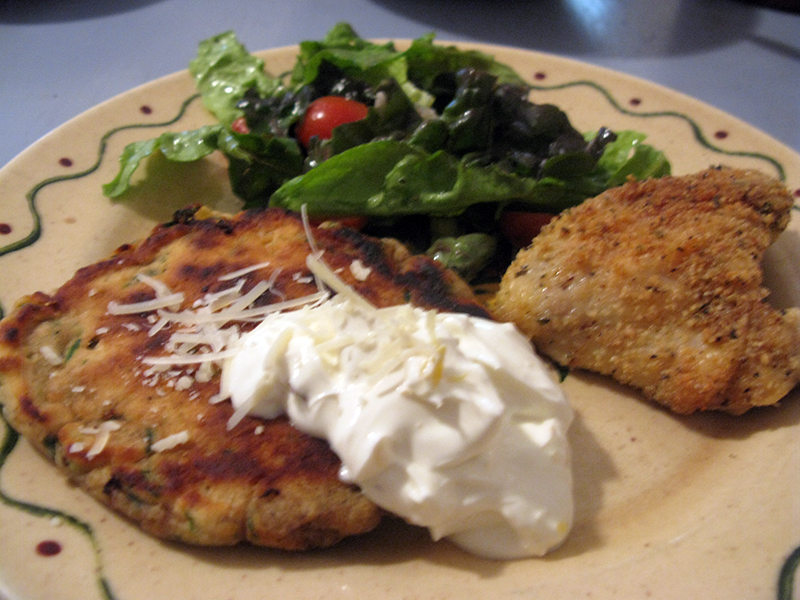
chicken wings and spinach pancakes
My friend Becky came over for dinner a couple of weeks ago, and we made my mom's toaster oven chicken wings and some Mark Bittman pancakes by way of some food blog. We rounded things off with a little salad with grape tomatoes and my fast-becoming-standard red wine vinegar dressing. You should really give this a shot— According to Mario Batali, "a great salad dressing has great olive oil and an inexpensive red-wine vinegar."
Anyway. The pancakes were the most labor intensive part of the meal, which was pretty damn easy overall. We trimmed and washed ten ounces of spinach, and briefly sauteed it with a little garlic and oil. Then we squeezed out the water, chopped the spinach up, and mixed it into the pancake batter. This consisted of one and a half cups buttermilk, two beaten eggs and 2 tablespoons melted butter, which we mixed together and then stirred into the dry ingredients: 2 cups flour, a tablespoon of sugar, half a teaspoon each of baking soda and salt, and a dash of nutmeg. Finally, we added the spinach.
We fried the pancakes up with butter over medium high heat until crisp and golden on both sides. A good rule of thumb for flipping pancakes is to wait until the surface is full of little bubbles. Becky handled our pancakes, and did a bang up job. They were great. We served them with sour cream mixed with lemon zest and some shredded parmesan. Dee-licious.
Before we started cooking the pancakes we prepared our chicken wings and stuck them in the toaster oven. I grew up eating these chicken wings, and they are so good. Crispy and moist with a delicious breading... as a kid, this seemed like perfection, and even now I think its pretty wonderful, especially since they're so easy. Obviously, these are baked, but as a kid I always assumed they were fried, and I don't think I stopped thinking of them as such until a few years ago. They are that damn good.
First, season some breadcrumbs. I generally buy a canister of plain ones at the grocery store and jazz them up with some garlic powder, black pepper, grated romano cheese, dried basil, oregano and parsley. I like to keep a container of these in the fridge for making scrambled eggs or breading pork chops, chicken cutlets or eggplant. They really do come in handy.
Once your breadcrumbs are ready, spread some out on a sheet of wax paper. Then you want to coat your wings with a little bit of mayo and then roll them in the breadcrumbs. This bit is a little gross, because your hands wind up covered in raw chicken, mayo and breadcrumbs, but once you're through it, you're basically done. Pop those wings into the toaster oven on a little tray, and cook them at 350° for about 50 minutes. So easy!
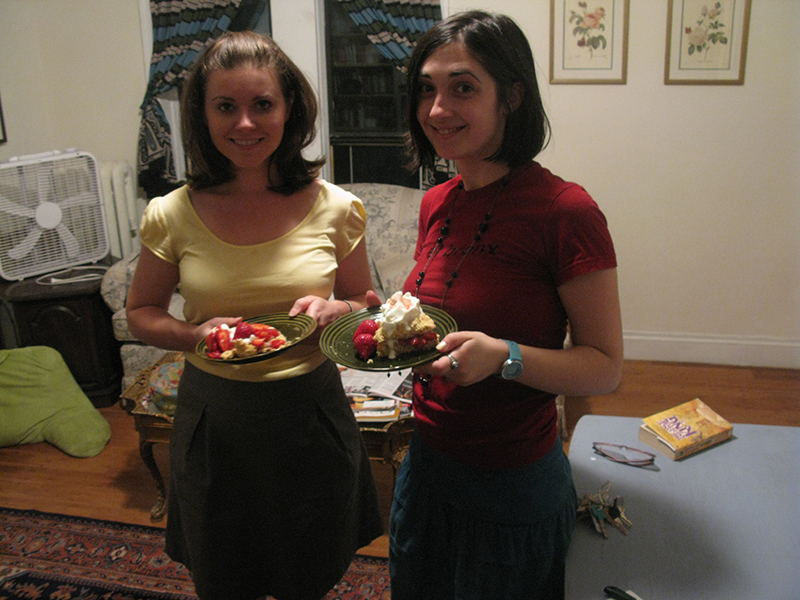
After enjoying our delicious supper, Becky and I also made ourselves a strawberry shortcake for dessert. I'm not sure if it was because we slightly undercooked it or if the recipe was just a dud, but the cake had a slightly unpleasant doughiness to it, or something. I suspect it may have been our fault as over eager cake eaters, but ultimately, it was not that good. Becky is supposed to guest blog the recipe, so stay tuned for that. Until then, I leave you with this parting shot of the two of us with our just desserts.
strawberry shortcake cream on top, tell me the name of your sweet heart
Labels:
breadcrumbs,
chicken,
chicken wings,
family recipe,
gluten free,
mark bittman,
pancakes,
spinach
Subscribe to:
Posts (Atom)