Come Christmas time, my parents presented me with a gift card good for $95 at The Institute of Culinary Education in the city, with instructions to take Knife Skills 1 with Norman Weinstein. In a case of great minds think alike, Nathan presented me with a hand drawn "I owe you one knife skills class," card. This later transformed into a handsome Calphalon knife block.
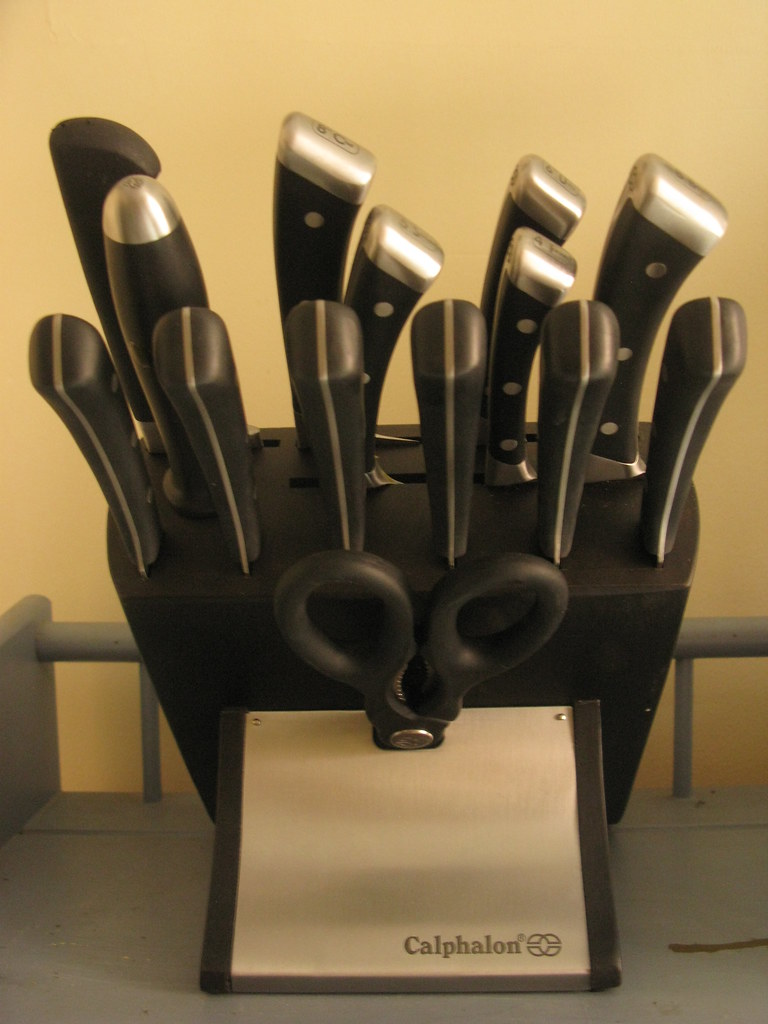
nate bought me these for christmas
I've been using the knives for a couple of months now, but I didn't get to take the knife skills class until last Monday. It was an interesting experience, since it immediately became apparent that I was doing pretty much everything imaginable wrong. The techniques we learned in the class make so much sense and are so much easier and less tiring than what I've done all my life. Assuming you are just as clueless with a blade as I was, I'm going to describe Weinstein's methods and include some key excerpts from the course packet.
First of all, you have to hone your knives every time you use them, and take them to a sharpener once or twice a year. To hone your knives, you want to use a steel that is at least two inches longer than your knife. Unfortunately, my steel is only 8 inches, same as my longest knife. Lame.
"Place a work towel on a flat, non-skid surface such as your kitchen counter or cutting board. Hold the steel at a 90 degree angle to the work surface, tip firmly held on the board. Heel and tip of the knife should from a 45 degree angle, with the heel and spine at the required angle (20 degrees) at the handle end of the steel. Using moderate pressure, draw the knife back and downwards to the bottom until you have pulled the tip off the steel near the bottom with a "follow through" motion. do not turn your wrist or the angle will change. Repeat the process on the other side of the steel. Proceed in this manner 3-4 times, using alternating strokes, keeping the required angle at all times."
The second thing we learned was that the bigger and heavier the knife we use, the less force we have to exert. The bigger knife will do the work for you, and will require less strokes to accomplish a given task. For someone who always uses a 3 inch paring knife, this was big news. Unfortunately, my knife block's biggest knife is 8 inches, and Weinstein swears by a 10 inch model. I will have to get one at some point, but for now I'll just make a point to use the chef's knife I have.
To hold the chef's knife, pinch the back of the blade between your thumb and forefinger, and curl the other three fingers under the handle. DO NOT grip the knife tightly, as this will cause tension in your arm and lead to pain in the shoulder and back, and will prevent you from cutting in a fluid motion. Use your other hand to hold whatever you're cutting with a light grip, lightly curving your fingers so that you present the flat segment of your fingers to the blade rather than your finger tips or knuckles.
When you're cutting, you should never be pressing down on food to cut it. Your knives should be sharp enough to slice your ingredients effortlessly. (In fact, the should be able to cut through a single sheet of paper effortlessly. Ha! I just spent 20 minutes sharpening all my knives and that is tall order!) Instead of pressing down, you want to move your knife forward and then bring it back in one constant swinging motion.
For items that are less than an inch high, Weinstein has devised a "low technique." You start with the tip of the knife on the board in front of whatever you're cutting, and glide the knife back towards you, lowering the blade as you go. You wind up with the whole back of the blade against the board, and you cut effortlessly. Then you kind of swing back and repeat. It's difficult to get the hang of at first, but it's an awesome feeling when you do.
For taller items, like a head of cabbage, you start with your knife on the item, with the tip an inch in front the far edge of it. You pull the knife back and it begins cutting the food, and then you lower the blade and let it glide down onto the board. You should use the full length of the knife to cut, and then swing it back forward to begin again. It's similar to the low technique, but a little trickier, I think. I kept raising my elbow up, which is wrong because it creates extra work.
"To get the best swing motion from the knife hand, stand back six to seven inches from the cutting board and have you waist parallel to the table, feet slightly spread (under shoulders). Stand too close to the edge and you feel cramped and a need to clamp your upper arm to your ribs, not a good thing to do when you are trying to achieve a relaxed, fluid, swinging motion." Most things are easier to cut when they are closer to the edge of the board, but I haven't quite figured out how to do that and not drop food on the floor.
We also learned how to dice, to peel, to mince, and how to cut onions, bagels, garlic, herbs and peppers. All in all, I've learned a lot and I am excited to continue practicing these new techniques. And to make lovely tomato roses. I won't describe the method for those because it's just too easy and makes these pretty things much less impressive.
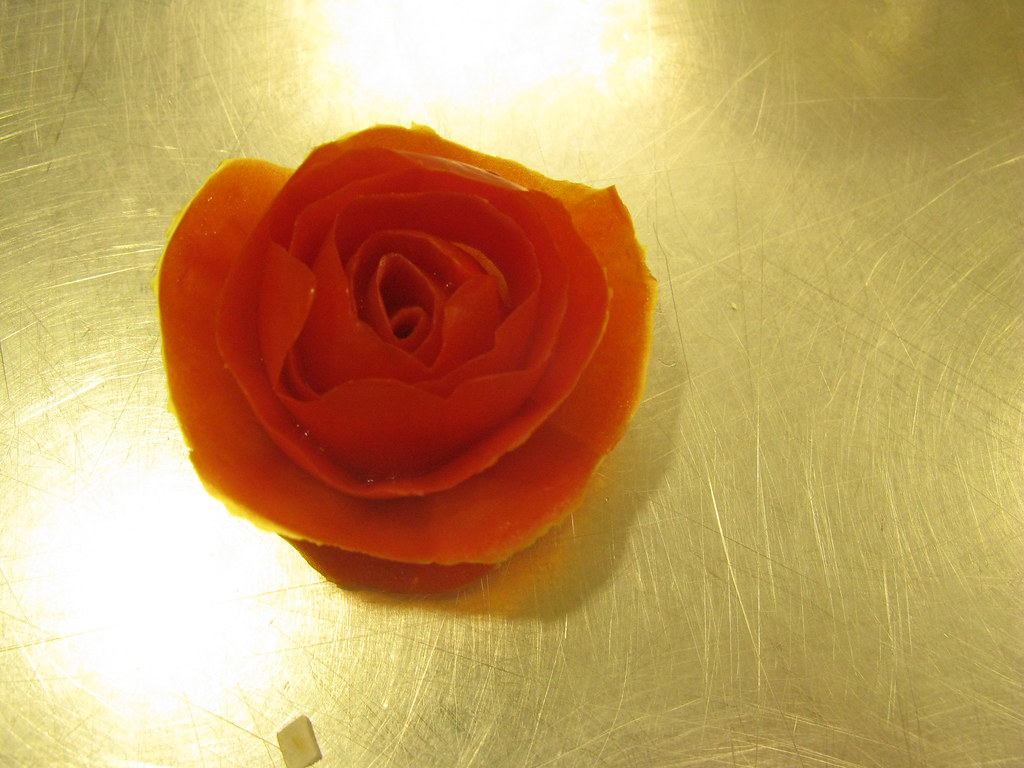
my tomato rosette secret

Excellent!
ReplyDelete